“Boo”-worthy Halloween Cookies You’ll Want to Haunt Your Kitchen With Tonight
Skip the store-bought sugar bombs. These halloween cookies look like they came from a pro bakery, taste like a cozy October hug, and require zero pastry school. We’re talking crisp edges, soft centers, and spooky-cute decorations that make your guests think you planned this for weeks.
Reality? One bowl, chill, bake, and a fast decorating hack that steals the show. If you can stir and press a cookie cutter, you can pull this off—no witchcraft needed.
What Makes This Recipe Awesome
- Soft centers, crisp edges: The brown sugar + melted butter combo delivers bakery-level texture without fancy gear.
- Decorations that pop: A simple powdered sugar glaze becomes a canvas for mummies, webs, and monster eyes.
It’s Halloween—go dramatic.
- Foolproof dough: Chilled shortbread-style sugar cookie dough holds shape with cutters, so your bats won’t morph into blobs.
- Batch-friendly: Doubles easily and freezes like a dream, so you can stockpile for parties or trick-or-treat fuel.
- Customizable flavors: Pumpkin spice? Cocoa? Black cocoa?
Yes, yes, and absolutely yes.
What You’ll Need (Ingredients)
- For the cookies:
- 2 3/4 cups all-purpose flour
- 1/2 teaspoon baking powder
- 1/2 teaspoon baking soda
- 1/2 teaspoon fine sea salt
- 3/4 cup unsalted butter, melted and slightly cooled
- 3/4 cup granulated sugar
- 1/2 cup packed light brown sugar
- 1 large egg + 1 egg yolk (room temp)
- 2 teaspoons pure vanilla extract
- Optional: 1 teaspoon pumpkin pie spice OR 2 tablespoons Dutch-process cocoa powder
- For the glaze and decor:
- 2 cups powdered sugar
- 2–4 tablespoons milk (or water), plus more as needed
- 1 teaspoon vanilla or almond extract
- Food coloring gels (orange, black, purple, green)
- Candy eyeballs, mini chocolate chips, or sprinkles
- Black cocoa or activated charcoal powder (a pinch for ultra-black icing, optional)
The Method – Instructions
- Whisk your dry team: In a bowl, whisk flour, baking powder, baking soda, and salt. If using cocoa or pumpkin spice, whisk it in now.
- Mix the wet team: In a large bowl, whisk melted butter with granulated and brown sugars until smooth and glossy. Add egg, yolk, and vanilla.
Whisk until cohesive.
- Bring it together: Add dry ingredients to wet. Switch to a spatula and fold just until no flour streaks remain. The dough should be soft but not sticky; if overly tacky, add 1–2 tablespoons flour.
- Chill for shape: Divide dough in half, flatten into discs, wrap, and chill 45–60 minutes.
This prevents spread and makes cutouts clean.
- Preheat and prep: Heat oven to 350°F (175°C). Line two baking sheets with parchment.
- Roll and cut: On lightly floured parchment, roll one disc to about 1/4 inch thick. Cut shapes—pumpkins, ghosts, bats, cats.
Re-roll scraps once if needed.
- Bake: Arrange on sheets with an inch of space. Bake 8–11 minutes, depending on size. Edges should be set and barely golden; centers will look soft.
Don’t overbake unless you like edible coasters.
- Cool: Let rest on the sheet 5 minutes, then transfer to a rack. Cool completely before glazing, or the icing will slide off like a horror movie escape scene.
- Make the glaze: Whisk powdered sugar, extract, and 2 tablespoons milk. Add more milk drop by drop until it’s thick but pourable—like honey.
Split into bowls and tint with gel colors. For deep black, use a pinch of black cocoa or charcoal.
- Decorate: Dip tops or spoon the glaze and smooth with the back of a spoon. For spider webs, pipe rings of white over black icing and drag a toothpick outward.
For mummies, drizzle white lines and press on candy eyes. Let set 30–60 minutes.
- Showtime: Plate, post, and pretend you didn’t lick the spoon. Twice.
How to Store
- Room temp: Keep glazed cookies in an airtight container with parchment between layers for 4–5 days.
- Freeze unglazed: Baked, unglazed cookies freeze up to 2 months.
Thaw on the counter, then glaze.
- Freeze dough: Wrap discs tightly and freeze up to 3 months. Thaw overnight in the fridge before rolling.
- Humidity hack: If your icing stays tacky, store cookies single-layer uncovered for 30 minutes, then containerize.
Health Benefits
- Portion control that actually works: Cut smaller shapes for built-in calorie management without losing the festive vibe.
- Less processed than store-bought: Real butter, real vanilla, no mystery shelf stabilizers. Your ingredient list fits on a sticky note.
- Custom sugar management: Reduce sugar by 10–15% with minimal texture change, or use darker cocoa for richer flavor so you feel satisfied with fewer cookies (in theory).
- Allergy-friendly options: Swap dairy-free butter and plant milk for a solid dairy-free treat; use certified gluten-free flour blends that include xanthan gum for structure.
Pitfalls to Watch Out For
- Skipping the chill: Warm dough spreads into shapeless blobs.
Chill time is non-negotiable.
- Overbaking: Pull them when edges are set. Cookies firm as they cool. Don’t judge doneness only by color.
- Watery icing: Too thin and it runs.
Aim for a slow ribbon. Add sugar to thicken, milk to loosen—tiny amounts at a time.
- Heavy flouring: Too much bench flour toughens the dough. Lightly dust the surface and roll between parchment if needed.
- Using liquid food dye: It thins icing and dulls color.
Gel colors are your friend, IMO.
Mix It Up
- Blackout bats: Replace 2 tablespoons flour with black cocoa. Finish with white web lines for contrast.
- Pumpkin spice pumpkins: Add 1 teaspoon pumpkin spice and a dash of orange zest. Glaze with orange icing and clove-scented aroma is instant fall.
- Salted caramel drizzle: Stir 2 tablespoons caramel into glaze and finish with flaky sea salt.
Luxurious? Yep.
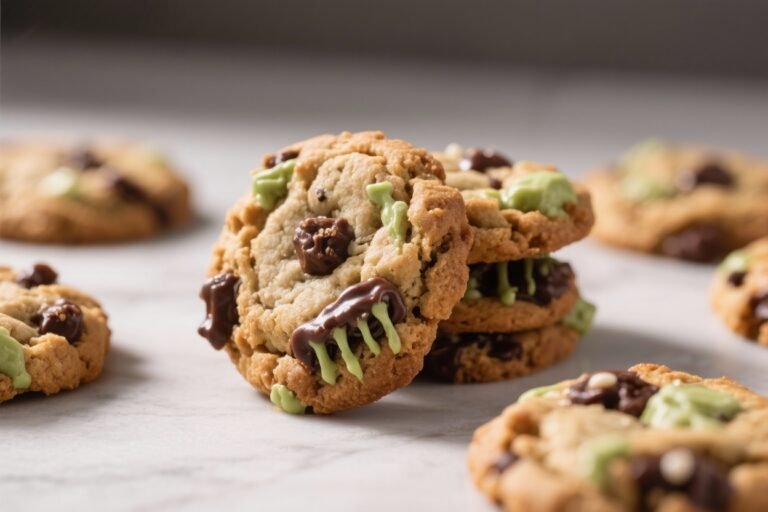
- Monster mash-ins: Fold in mini chocolate chips and green food gel; decorate with 2–3 candy eyes for goofy gremlins.
- Gluten-free path: Use a 1:1 GF flour with xanthan gum. Chill the dough extra 15 minutes to keep shapes crisp.
- Vegan variant: Use vegan butter, 3 tablespoons aquafaba instead of egg + yolk, and plant milk for glaze.
Texture remains tender if chilled well.
FAQ
Can I make the dough ahead of time?
Yes. Keep it chilled up to 72 hours or freeze up to 3 months. If very firm, let it sit at room temp 10–15 minutes before rolling.
How do I get super-black icing without bitterness?
Use gel black coloring plus 1–2 teaspoons black cocoa powder.
Let the icing sit 20 minutes—colors deepen as they rest, so you can use less dye.
Why are my cookies tough?
Likely overmixing or too much flour. Mix just until combined and measure flour with a scale or the spoon-and-level method. Also avoid overbaking.
Can I skip the glaze and just use sprinkles?
Absolutely.
Brush tops with a thin layer of milk or egg white before baking and add sanding sugar or sprinkles so they adhere. Easy and festive.
What’s the best thickness for cutouts?
About 1/4 inch. Thinner spreads less but can turn brittle; thicker may underbake and puff.
Use rolling pin guides for consistency, FYI.
Do I need a stand mixer?
Nope. A whisk and spatula do the job since the butter is melted. One bowl, fewer dishes, more cookies—win-win.
Wrapping Up
You don’t need fancy tools or a chef diploma to crank out halloween cookies that look epic and taste even better.
The dough is reliable, the decorations are playful, and the whole process slips neatly between work and party prep. Make a batch, stash a few, and let your inner cookie artist take over. If a plate of mummies and bats doesn’t spark joy, check your pulse—then grab another cookie.