These 21 Easter Bunny Nails Are So Cute!
Ready to ditch those dull winter shades and embrace some seriously adorable spring vibes? This Easter, your fingertips are about to become the cutest canvas in town. Get ready to fall head over heels for these bunny-tastic nail ideas that are guaranteed to bring a smile to everyone’s face. Trust us, your mani game is about to go next level!
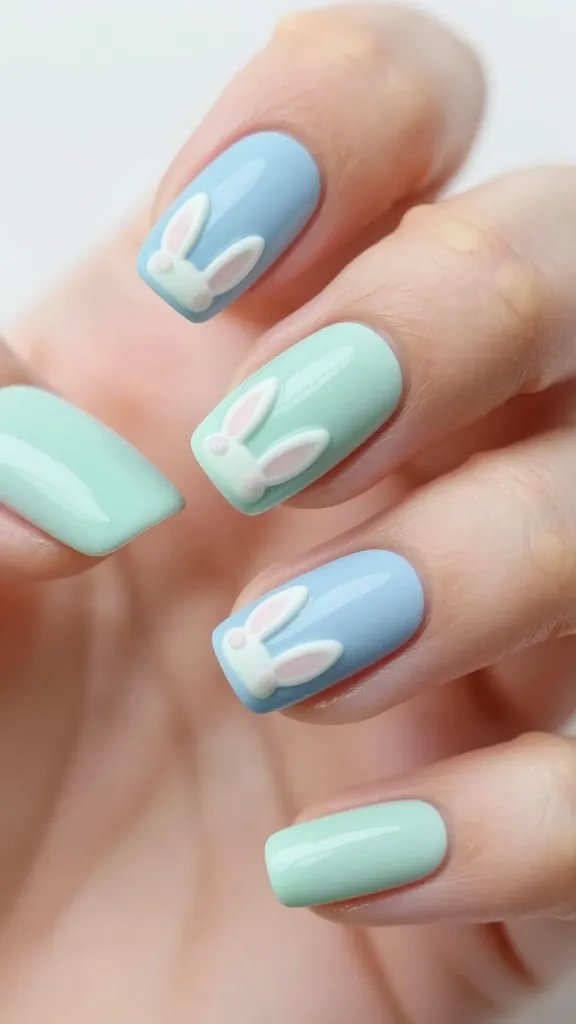
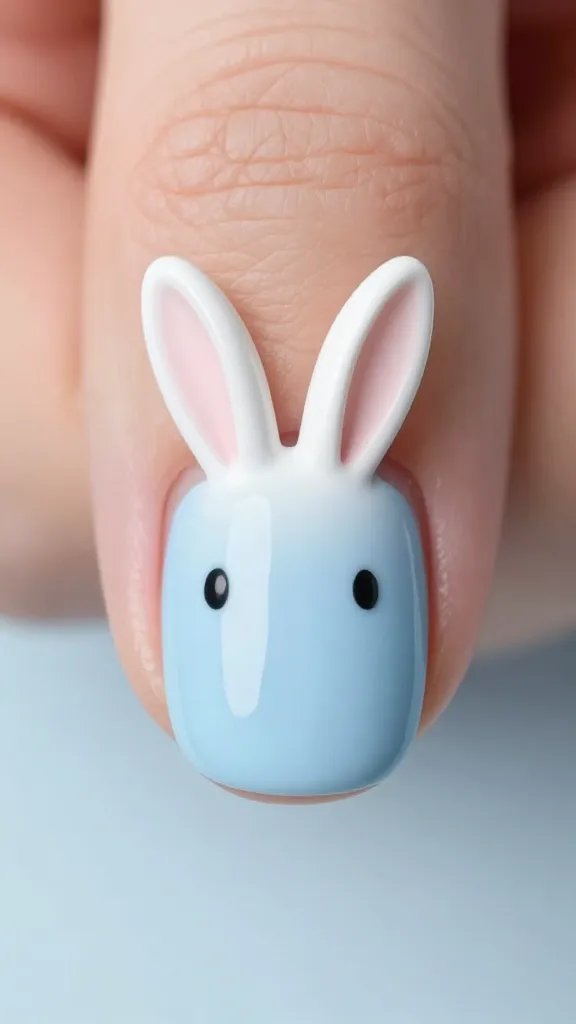
1. The Classic White Bunny Accent
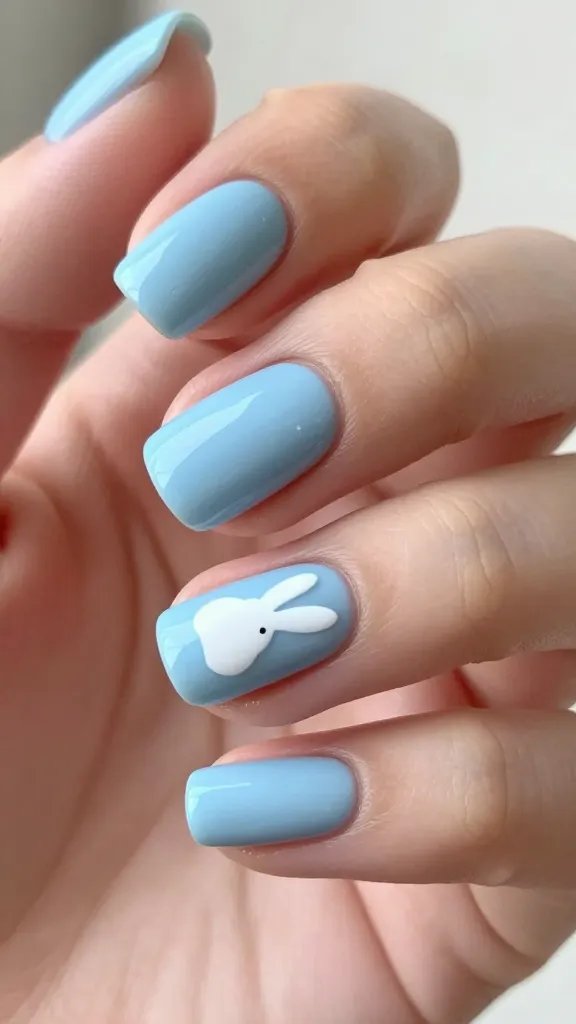
Sometimes, less is more, especially when it comes to capturing that innocent bunny charm. A single, perfectly placed white bunny on an accent nail is pure elegance with a playful twist. Think of it as your little secret burst of joy.
Key Elements:
- Soft pastel base (think baby blue or mint green)
- One accent nail with a simple white bunny silhouette
- Small dot for the eye (optional, but adds character!)
This look is perfect for anyone who wants to celebrate Easter subtly but with undeniable cuteness. It’s chic, sweet, and totally office-appropriate.
2. Glitter Bunny Tails Galore
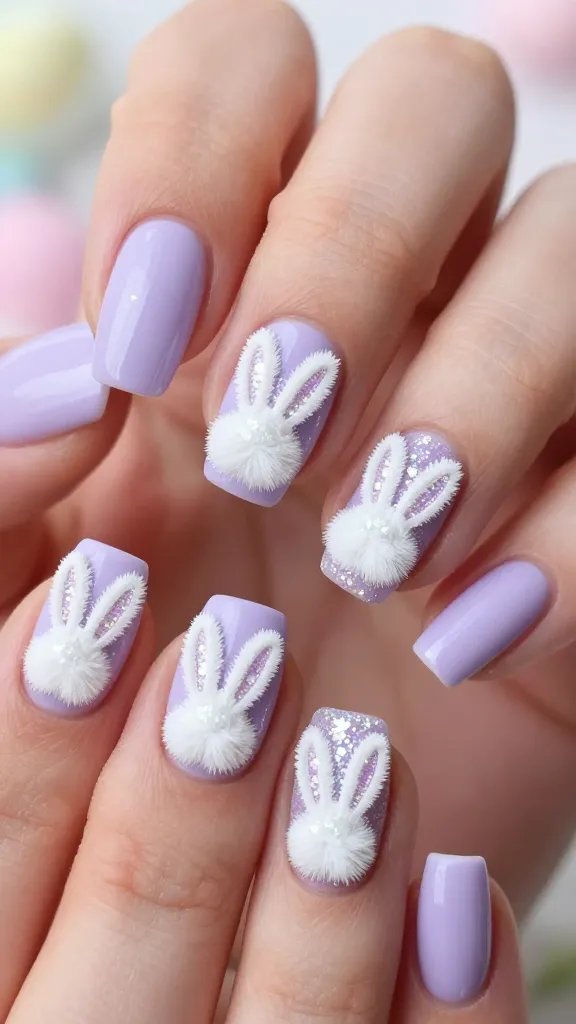
Who doesn’t love a fluffy bunny tail? Now imagine that fluffiness translated into dazzling glitter on your nails! This design brings all the sparkle and whimsy you could ever want in an Easter mani.
Start with a light, opaque base color like pink or lavender. Then, use a dotting tool to create small, round shapes on each nail and fill them with a chunky white or iridescent glitter. Seriously, these tails are so realistic, you’ll want to pet them.
This style is a total showstopper for Easter brunch or any festive spring gathering. Get ready for compliments!
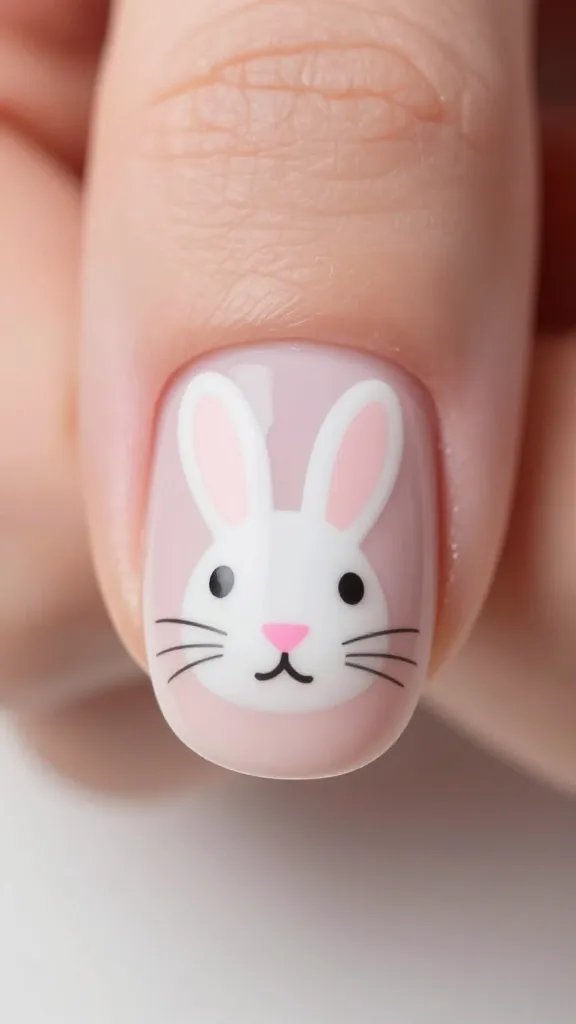
3. Cartoon Cuties: The Expressive Bunny
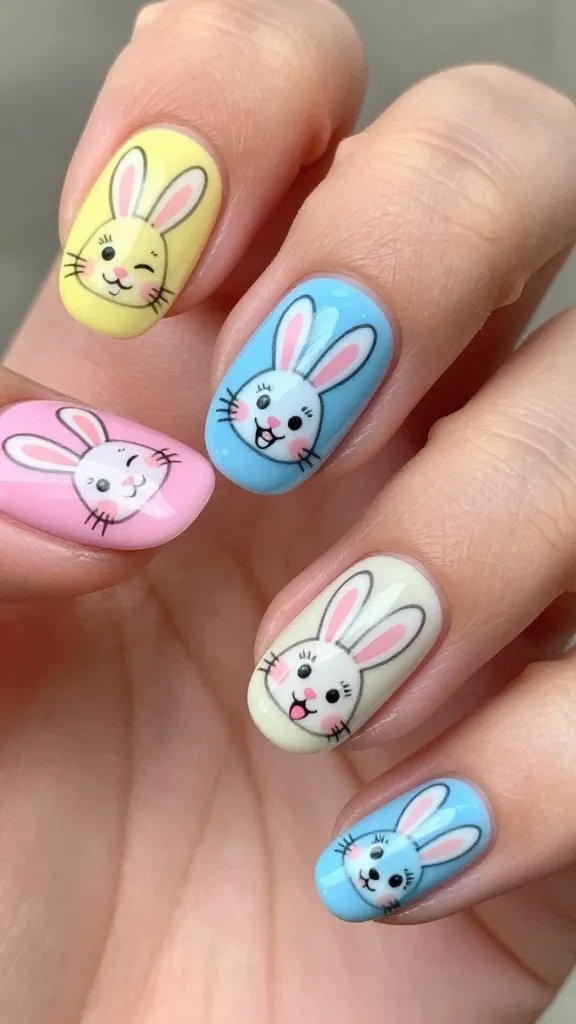
Unleash your inner child with bunnies that have personality! We’re talking big, expressive eyes, tiny rosy cheeks, and maybe even a little buck tooth peeking out. These aren’t just bunnies; they’re characters ready to tell a story.
Choose a bright, cheerful base color, then use fine brushes to draw your cartoon bunnies. Don’t be afraid to experiment with different facial expressions across your nails – one winking, one smiling, one looking surprised. It’s all about fun!
This playful design is fantastic for those who love to stand out and aren’t afraid to embrace their whimsical side. It’s pure joy on your fingertips.
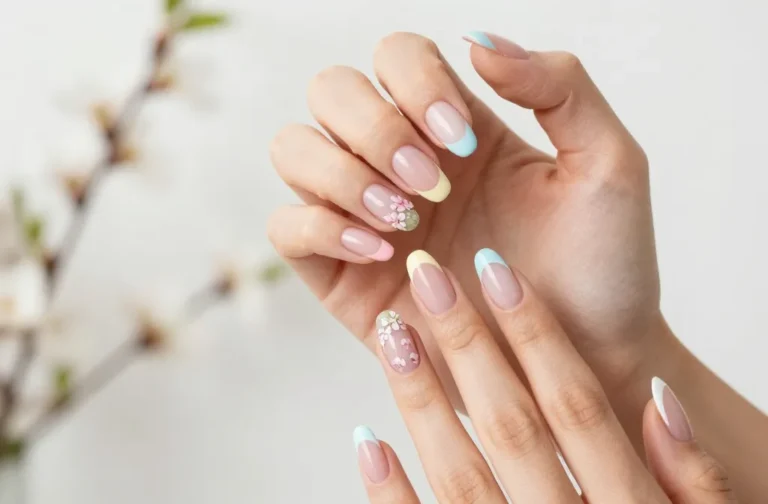
4. French Tip Bunnies: A Chic Twist

Give the classic French manicure an adorable Easter makeover. Instead of a plain white tip, transform it into the top of a bunny’s head, complete with perky ears. It’s sophisticated, but with a surprising pop of seasonal charm.
Apply a sheer nude or pink base. Then, carefully paint the white “tips” in a curved shape that extends slightly upwards on the sides to form the ears. You can even add tiny pink inner ear details. This look is seriously elegant with a side of cute.
This is your go-to if you want something fashionable and festive without being overly cutesy. It’s perfect for a grown-up Easter celebration.
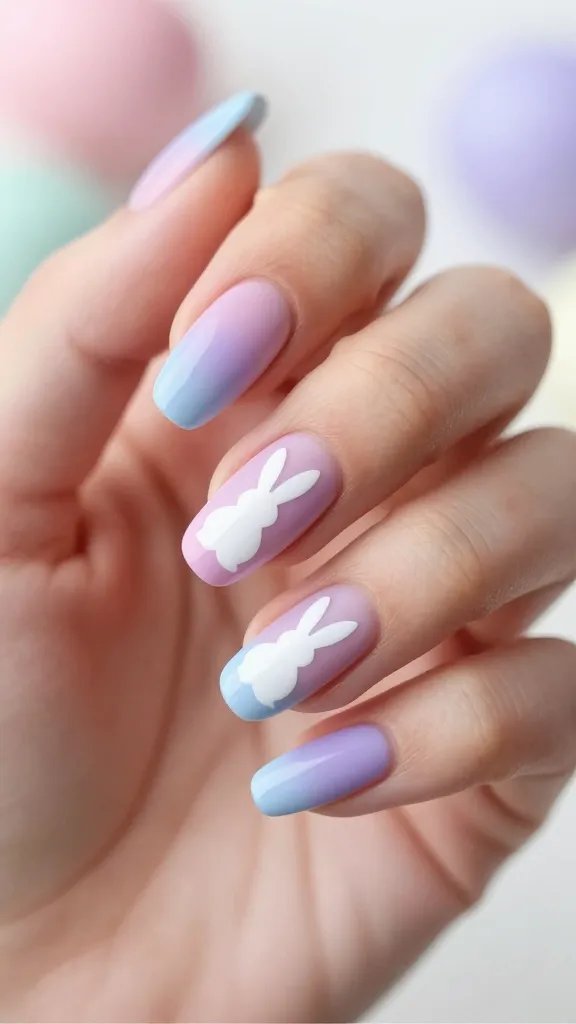
5. Ombre Sunset Bunnies
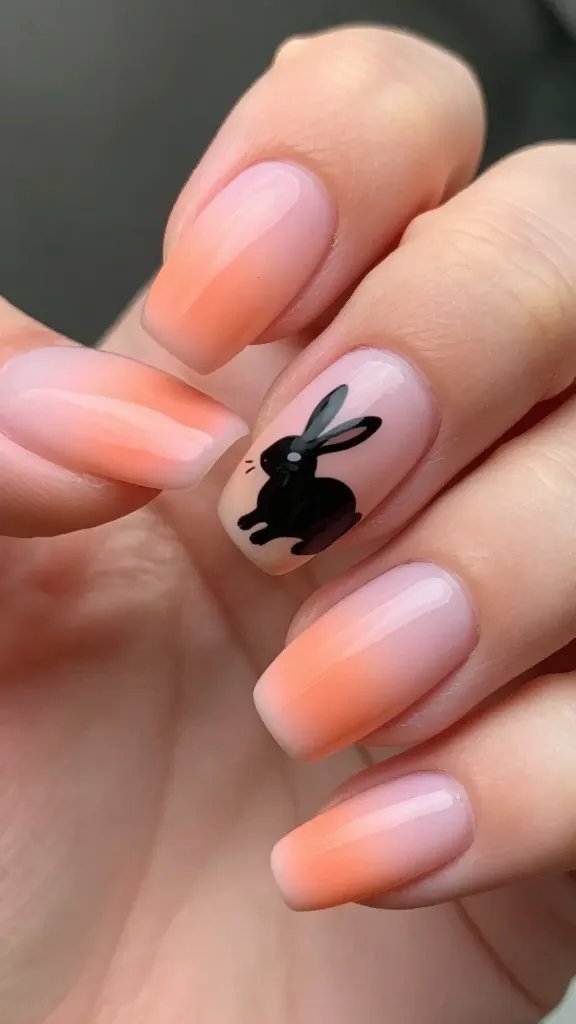
Imagine a bunny silhouette hopping across a beautiful gradient sunset. This design combines the dreamy aesthetic of an ombre fade with the undeniable charm of an Easter bunny. It’s artistic and utterly captivating.
Create a soft ombre effect using two or three pastel shades (think pink to orange, or blue to purple). Once dry, carefully paint a black or white bunny silhouette on top. The contrast will make your bunny pop against the dreamy background.
This style is for the creative souls who appreciate a bit of artistry on their nails. It’s visually stunning and perfectly captures the magic of spring.
6. Polka Dot Bunny Ears
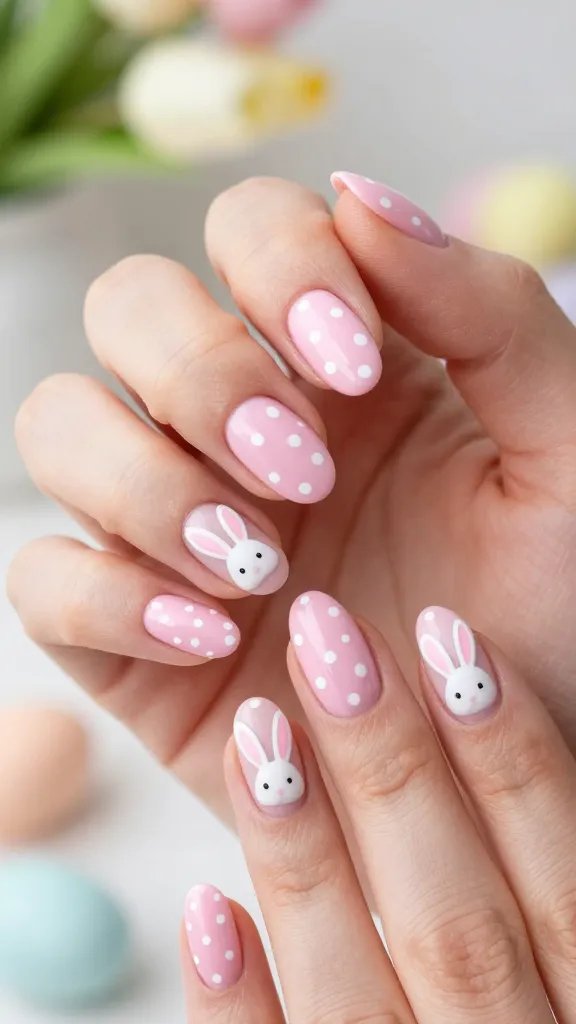
Dots and bunnies? Yes, please! This design is super easy to achieve and looks incredibly charming. It’s a playful nod to Easter without needing intricate drawing skills.
Start with a light, solid base color. Then, use a dotting tool to create two larger dots side-by-side at the base of your nail, followed by two smaller dots directly above them for the ears. You’ve got yourself a stylized bunny face! Or, just fill the nail with polka dots and add two small bunny ears peeking from the cuticle.
This is a fantastic option for beginners or anyone short on time but big on style. It’s quick, cute, and impossible to mess up.
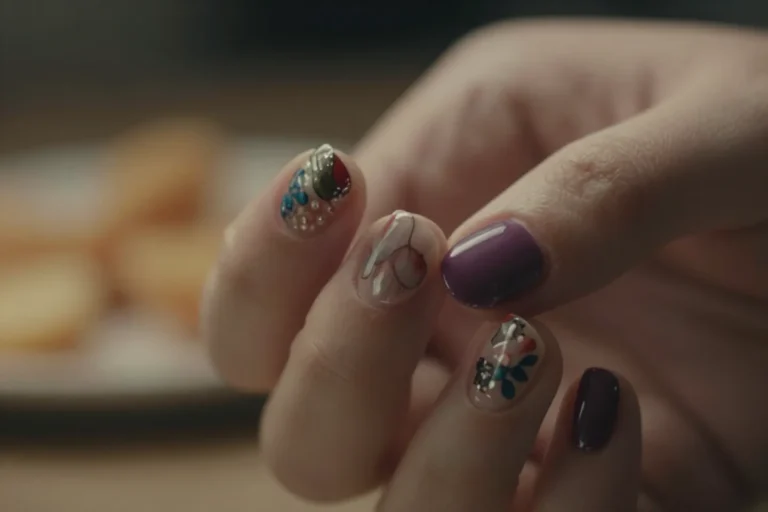
7. The Bunny Patchwork Mani
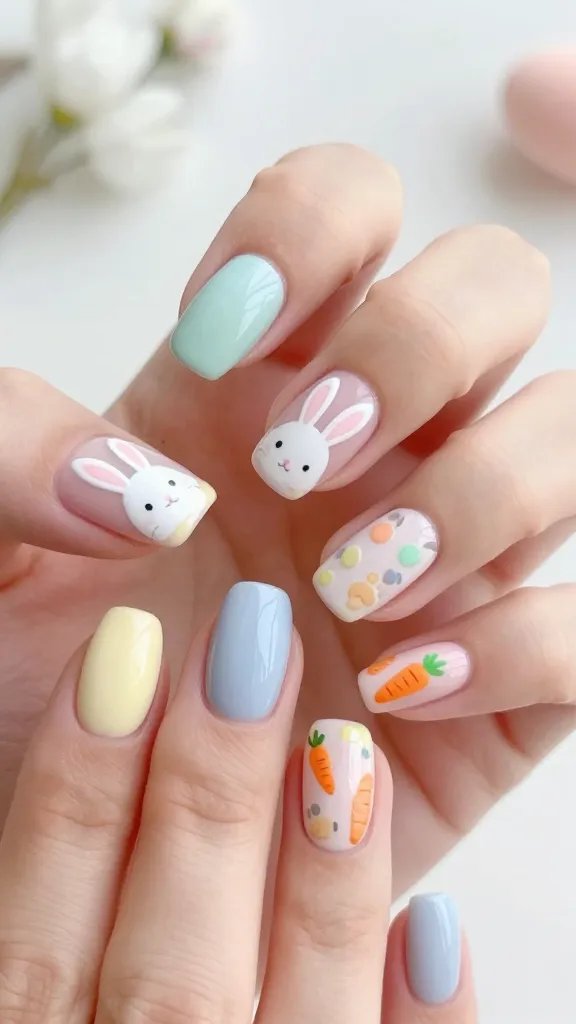
Why choose just one bunny design when you can have a whole collection? This idea involves dedicating each nail to a different bunny-themed pattern or character, creating a delightful patchwork effect across your hand.
Think one nail with a full bunny, another with just ears, one with bunny footprints, and another with a carrot pattern. Use a consistent color palette to tie it all together. This is where your creativity truly shines, FYI.
This maximalist approach is perfect for those who can’t pick a favorite and want to showcase a range of adorable Easter elements. It’s a conversation starter, for sure!
8. Glitter Gradient Bunny Silhouettes
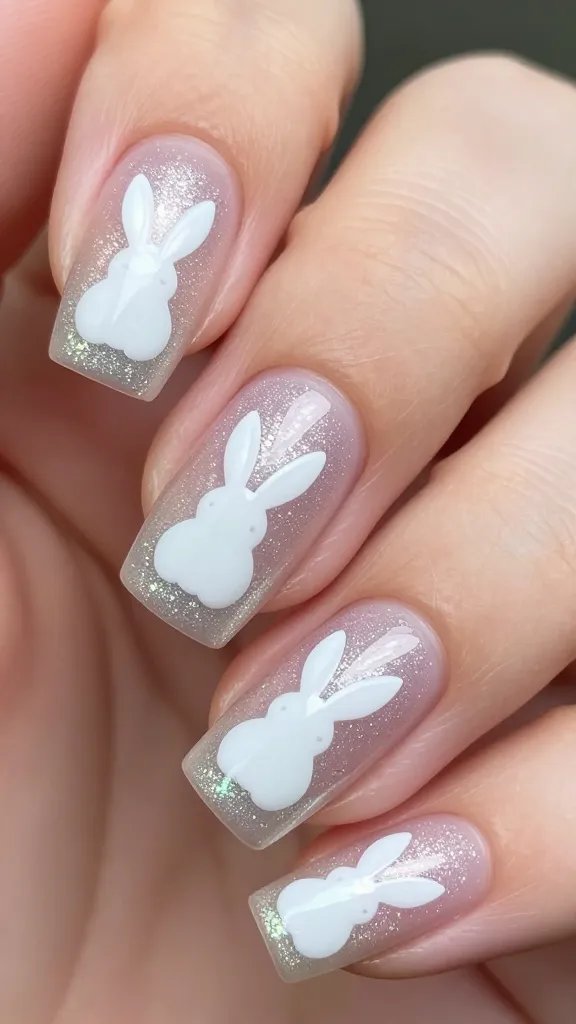
Combine the sparkle of glitter with the elegance of a gradient, then add a bunny on top! This design features a subtle glitter fade on the nail, with a solid bunny silhouette painted over it. It’s glamorous with a touch of seasonal fun.
Apply a sheer base, then use a sponge to dab on a fine glitter polish, concentrating it more towards the tip or base. Once dry, use a contrasting opaque polish (like white or black) to paint a bunny silhouette. The glitter peeking through is just *chef’s kiss*.
This look is ideal for anyone wanting a high-impact, sparkly nail design that still feels sophisticated. It’s Easter glam, baby!
9. Bunny in the Garden: Floral Accents
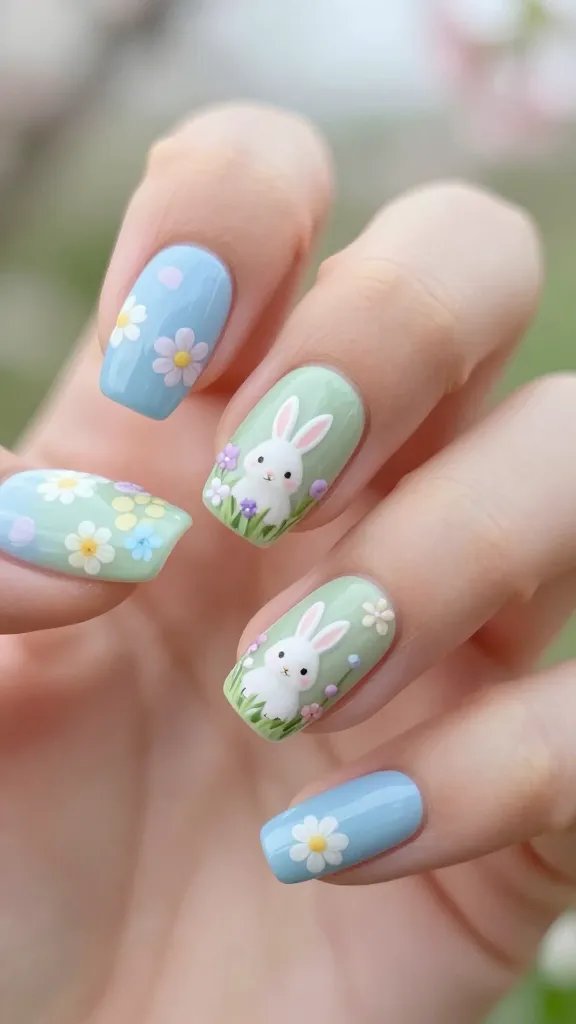
What’s cuter than a bunny? A bunny surrounded by tiny, delicate flowers! This design brings the beauty of a spring garden right to your fingertips, with an adorable bunny as the star.
Paint a light green or sky blue base. Then, carefully freehand small, simple flowers in various pastel colors. Once your garden is blooming, add a small bunny peeking out from behind a flower or sitting among them. Think tiny daisies or cherry blossoms.
This is a truly enchanting design for those who love intricate details and the fresh feel of spring. It’s like a mini ecosystem on your nails.
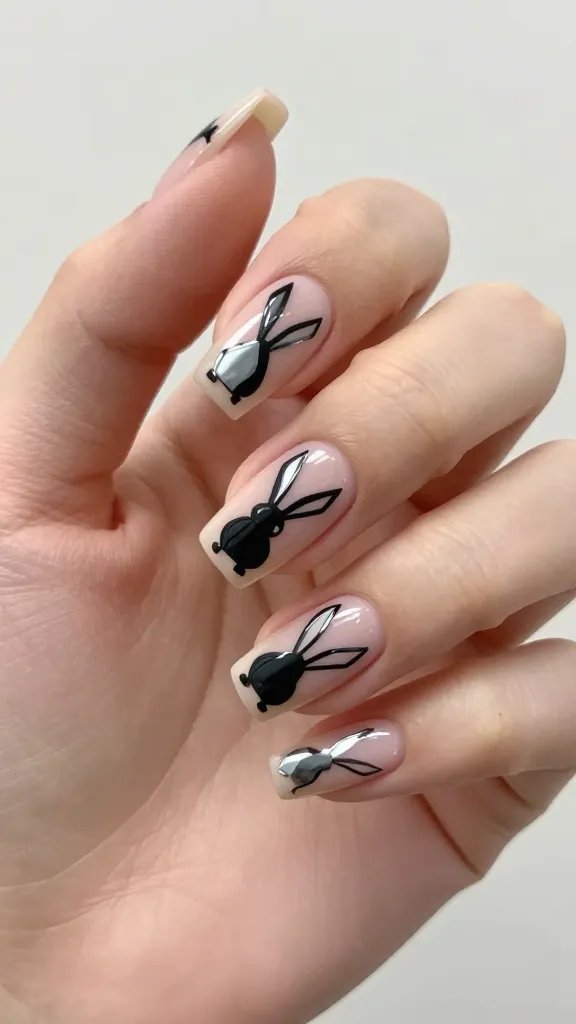
10. Minimalist Bunny Outline
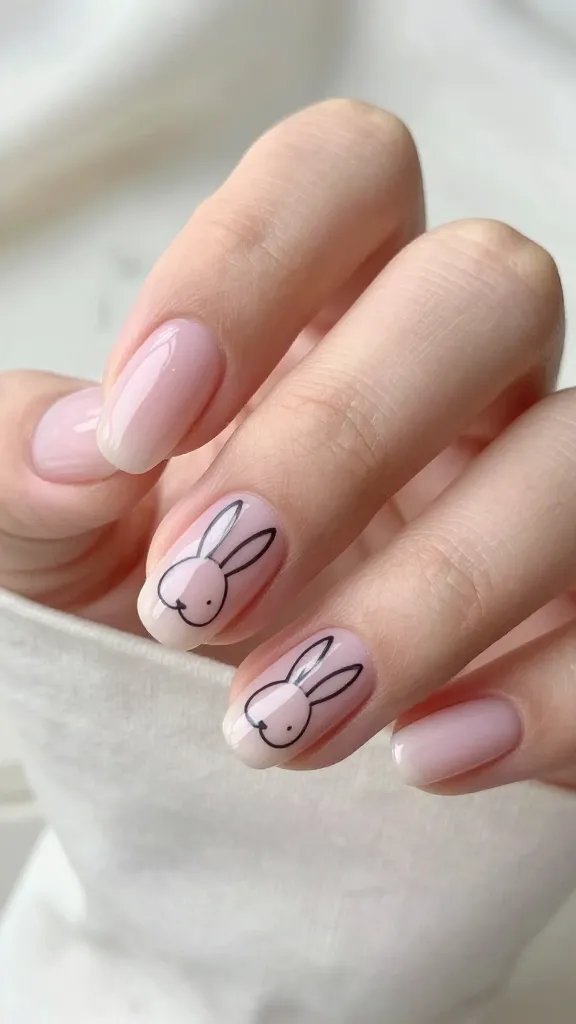
For the modern minimalist, a simple bunny outline can be incredibly chic. This design uses fine lines to create the shape of a bunny, often without filling it in, letting your natural nail or a subtle base color show through.
Choose a neutral base like clear, sheer nude, or a very light pastel. Then, using a super fine brush and a contrasting polish (black, white, or even gold), draw a clean, simple outline of a bunny. It’s understated elegance with a playful secret.
This is perfect for the fashion-forward individual who appreciates subtle design and clean lines. It’s effortlessly cool and totally on-trend.
11. Bunny Ear Tips: Playful & Unique
Instead of a full bunny face, sometimes just the ears are enough to convey the message! This design focuses on creating cute, perky bunny ears at the tip of your nails, often peeking over a pastel background.
Paint your nails with a solid pastel color. Then, using a fine brush, paint two small, triangular shapes at the very tip of your nail, slightly rounded at the top, to mimic bunny ears. You can add a tiny pink inner ear detail for extra cuteness.
This is a super playful and unique take on Easter nails, great for those who want something a little different from the usual full bunny designs. It’s cheeky and charming!
12. Bunny Footprints Trail

Imagine a tiny bunny hopping across your nails, leaving a trail of adorable footprints! This design is all about movement and whimsy, suggesting a bunny’s journey across your fingertips.
Start with a light, contrasting base color. Then, using a dotting tool, create a series of small, oval-shaped dots with three even smaller dots above them (like a paw print). Arrange them diagonally across your nails to create the illusion of a hopping trail.
This is a super cute and dynamic design that tells a little story on your nails. It’s simple to do but makes a big impact.
13. Gradient Bunny Silhouettes
This design merges the beauty of a color gradient with the iconic bunny silhouette. It’s less about sparkle and more about the smooth transition of colors, making your bunny pop against a dreamy backdrop.
Create a beautiful two- or three-color gradient on each nail using a sponge. Once completely dry, paint a crisp white or black bunny silhouette over the gradient. The seamless color blend makes the bunny stand out in a sophisticated way.
If you love a good color melt and want to add an Easter touch, this is your jam. It’s elegant, modern, and undeniably pretty.
14. Bunny Nose & Whiskers Close-Up
Get up close and personal with the cutest part of a bunny: its little pink nose and delicate whiskers! This design focuses on a magnified view of a bunny’s face, making it incredibly endearing and unique.
Paint your nail a light, solid color. Then, use a fine brush to paint a small, inverted triangle for the nose in pink or black. From the nose, extend three or four fine lines on each side for the whiskers. You can even add two tiny dots for eyes above the nose.
This is a super quirky and adorable design that’s sure to grab attention. It’s a fresh take on the traditional full bunny face.
15. Candy-Coated Bunnies

Inspired by jelly beans and pastel chocolates, this design features bunnies in vibrant, candy-like colors. Think bright pink, sky blue, lemon yellow, and mint green bunnies, almost good enough to eat!
Use a neutral base or even a different pastel for each nail. Then, paint your bunnies in bold, opaque candy colors. You can even add a glossy top coat to make them look extra “sugar-coated.” This is seriously sweet!
This is perfect for those who love bright, cheerful colors and want their nails to look like a delicious Easter treat. It’s pure, unadulterated fun.
16. Geometric Bunnies: Modern & Edgy
Who says bunnies can’t be chic and angular? This design takes the classic bunny shape and reinterprets it using geometric lines and shapes. It’s a modern, artistic take on Easter nails that’s anything but traditional.
Start with a clean, light base. Then, using a fine striper brush, create a bunny shape using only straight lines and sharp angles. You can keep it as an outline or fill in sections with contrasting colors. Think abstract art meets Easter.
This is for the trendsetters who appreciate a more contemporary aesthetic. It’s cool, unique, and definitely not your grandma’s Easter mani.
17. Textured Fluffy Bunnies
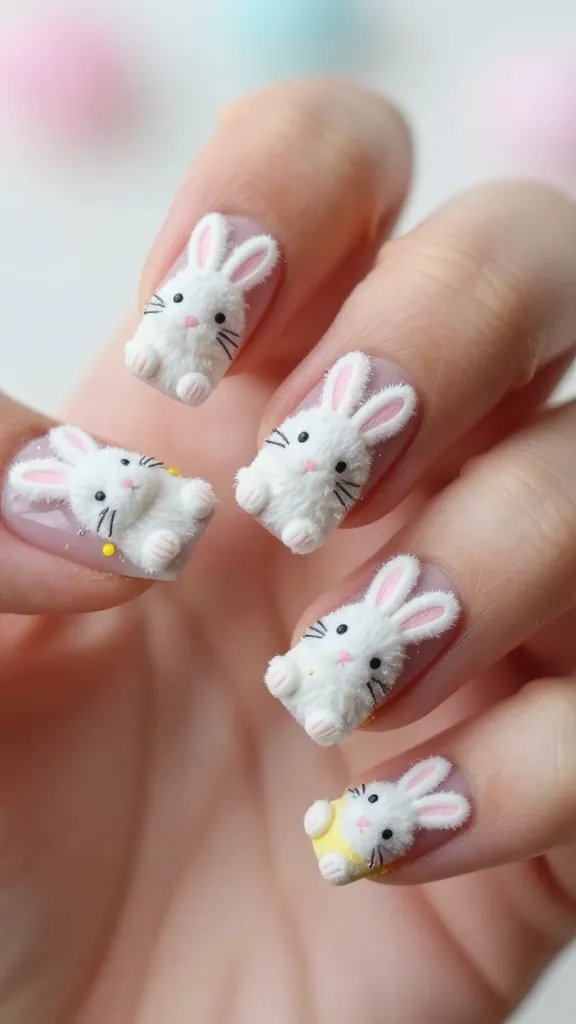
Want your bunnies to feel as soft as they look? This design incorporates textured elements to give your bunnies a truly fluffy, three-dimensional feel. Seriously, it’s next-level tactile fun!
After painting your base and the basic bunny shape, use flocking powder or a special textured polish to create the illusion of fur. You can also use a dotting tool to apply tiny acrylic powder dots for a raised, fluffy effect. It’s a sensory delight!
This design is for those who love to experiment and want their nails to be a tactile experience. Prepare for everyone to want to touch your nails!
18. Bunny Peeking Over the Edge
Imagine a shy little bunny just peeking over the edge of your nail, as if it’s playing hide-and-seek. This design is incredibly charming and creates a playful illusion of depth.
Paint your entire nail a solid pastel color. Then, at the cuticle or the tip, paint half of a bunny’s head and ears, making it look like it’s just emerging or disappearing. A tiny eye can add to the illusion.
This design is super cute and a bit unexpected, perfect for adding a touch of whimsy to your Easter look. It’s subtle yet utterly captivating.
19. Watercolor Bunnies: Soft & Dreamy
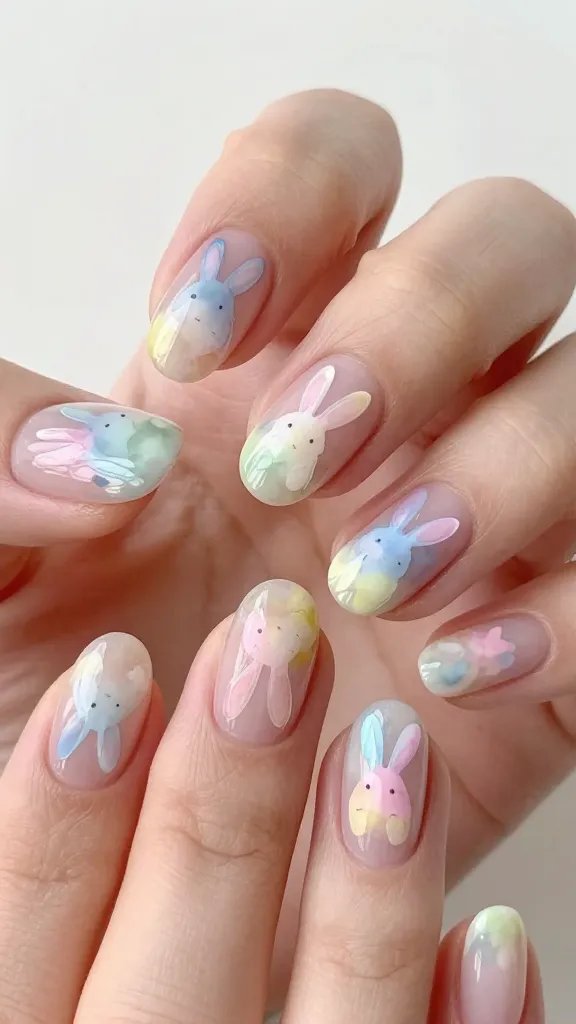
Embrace the ethereal beauty of watercolor with this soft, blended bunny design. It creates a delicate, artistic look that feels light and airy, just like spring itself.
Apply a sheer, light base coat. Then, using watered-down polishes or gel paints, gently dab and blend colors to create a soft, almost translucent bunny shape. The edges should be blurred, giving it that characteristic watercolor effect. Think soft pastels melting into each other.
This is a beautiful, artistic choice for those who appreciate a more delicate and painterly aesthetic. It’s truly dreamy.
20. Bunny with a Carrot: A Classic Combo
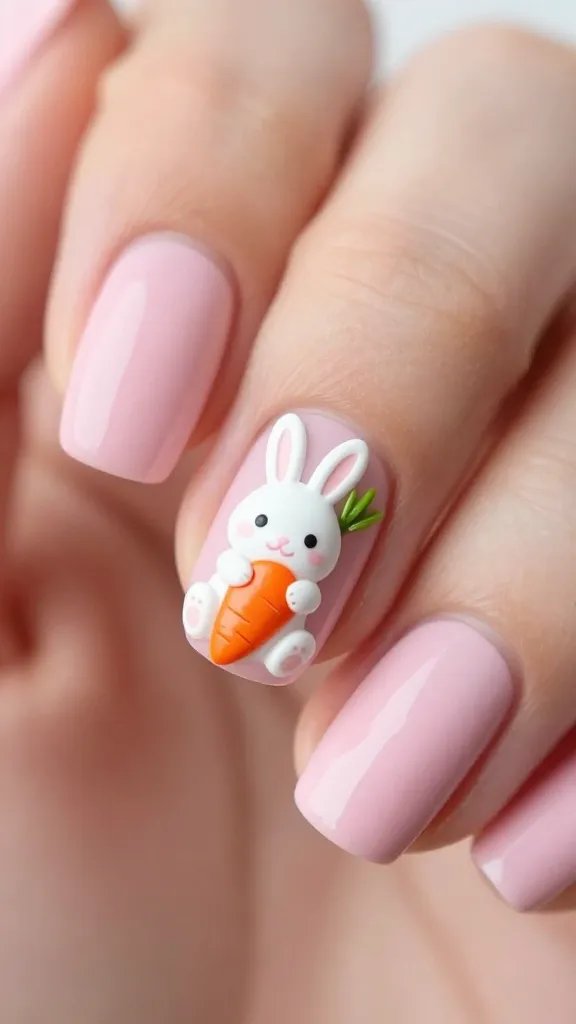
You can’t have a bunny without its favorite snack! This design features an adorable bunny happily munching on or holding a small, vibrant carrot. It’s a classic pairing that just screams Easter.
Paint a light base. Then, draw your bunny (full body or just the head and paws) and add a tiny orange carrot with a green top next to it or in its paws. The contrast of the orange against the pastel background is visually striking.
This design is timeless and universally loved, perfect for anyone who wants to celebrate Easter with a traditional, heartwarming motif. It’s simple, sweet, and iconic.
21. Glow-in-the-Dark Bunny Eyes
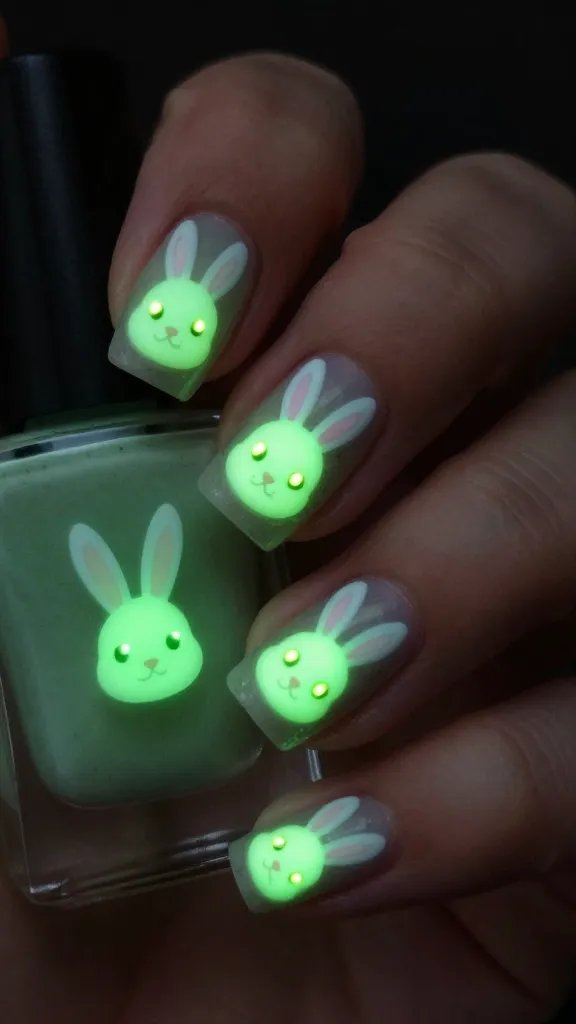
Want a fun surprise for your Easter night? Incorporate glow-in-the-dark polish for the bunny’s eyes! This design looks cute by day and transforms into a spooky-cute spectacle when the lights go out.
Create any bunny design you like, focusing on clear, distinct eyes. Then, carefully apply a small dot of glow-in-the-dark polish to each eye. Charge them under light, and watch them come alive in the dark! IMO, this is genius.
This is for the playful souls who love a good surprise and want their Easter nails to have an extra layer of fun. It’s a unique twist that will definitely get people talking!
There you have it, 21 ways to bring some serious bunny magic to your fingertips this Easter! Whether you’re a minimalist or a maximalist, there’s a bunny nail design here just waiting for you to try. So grab your polishes, unleash your inner artist, and get ready to hop into spring with the cutest nails around!