39 Nightmare Before Christmas Nails for a Tim Burton-Inspired Mani
Alright, fellow spooky season fanatics and year-round Halloween lovers, get ready to unleash your inner Sally and Jack! We’re diving headfirst into 39 Nightmare Before Christmas Nails that are so good, they’ll make Oogie Boogie green with envy. Forget basic holiday manis; these designs are pure magic for anyone who lives for Pumpkin King vibes and wants to show off their fandom with serious style.
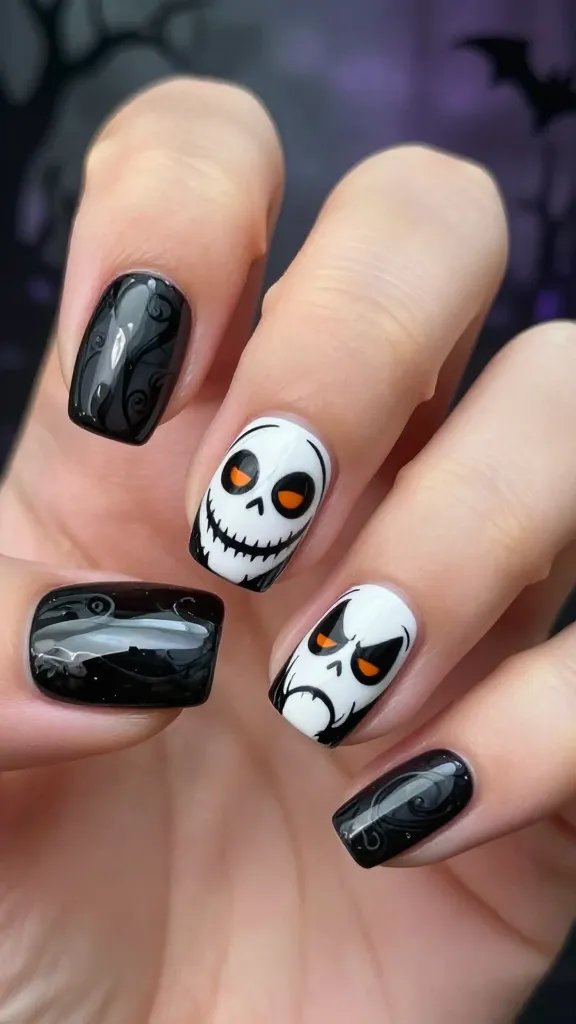
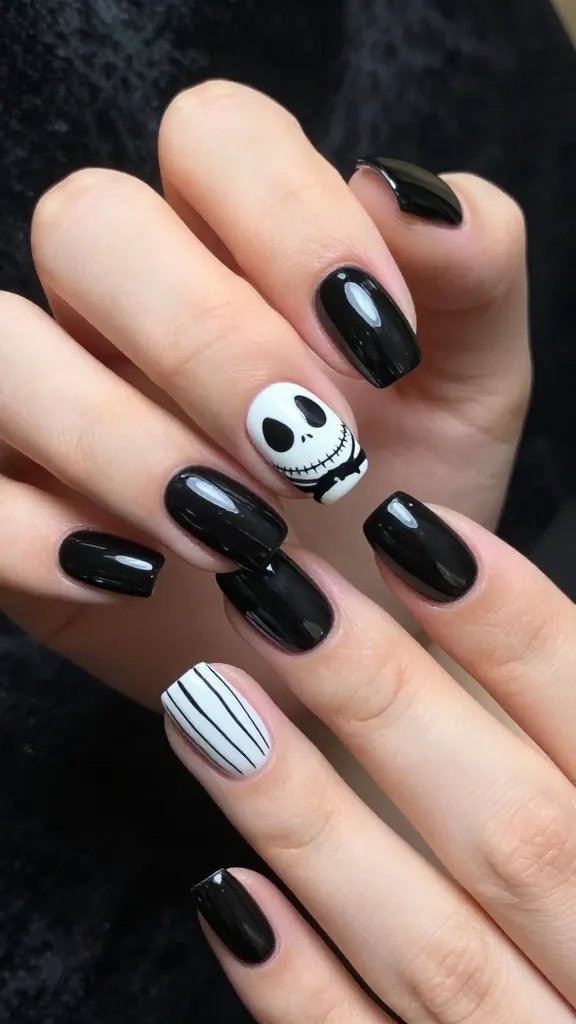
1. Jack Skellington’s Iconic Grin
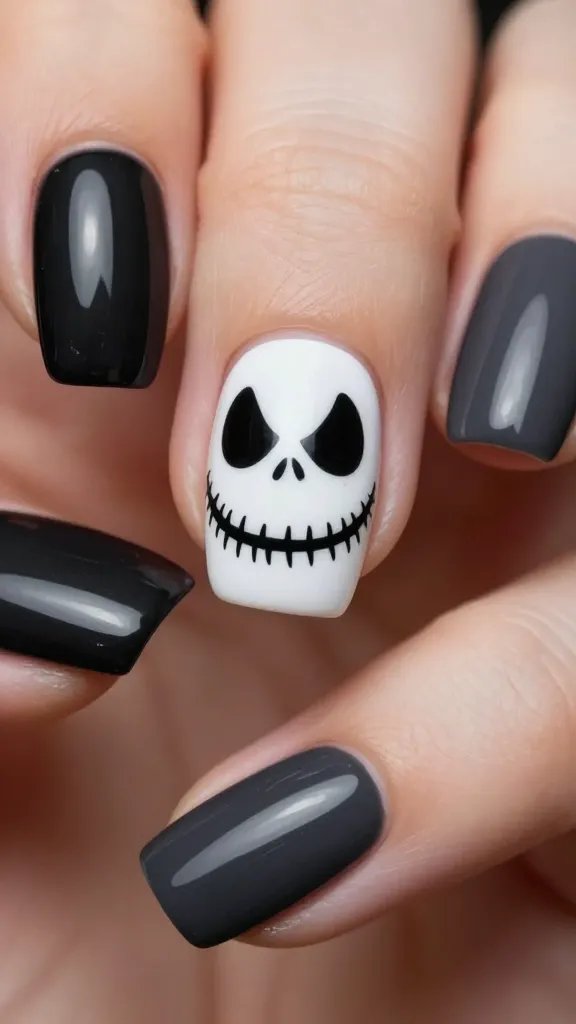
Let’s kick things off with the main man himself, Jack Skellington. His iconic grinning face is surprisingly versatile for nail art, don’t you think? It’s a classic for a reason and instantly recognizable.
Design Essentials:
- A crisp white base coat.
- Fine black lines for the eyes and mouth.
- Don’t forget those signature stitches!
This design is perfect for a statement nail, giving a subtle nod to your favorite skeleton without going full costume.
2. Sally’s Patchwork Perfection
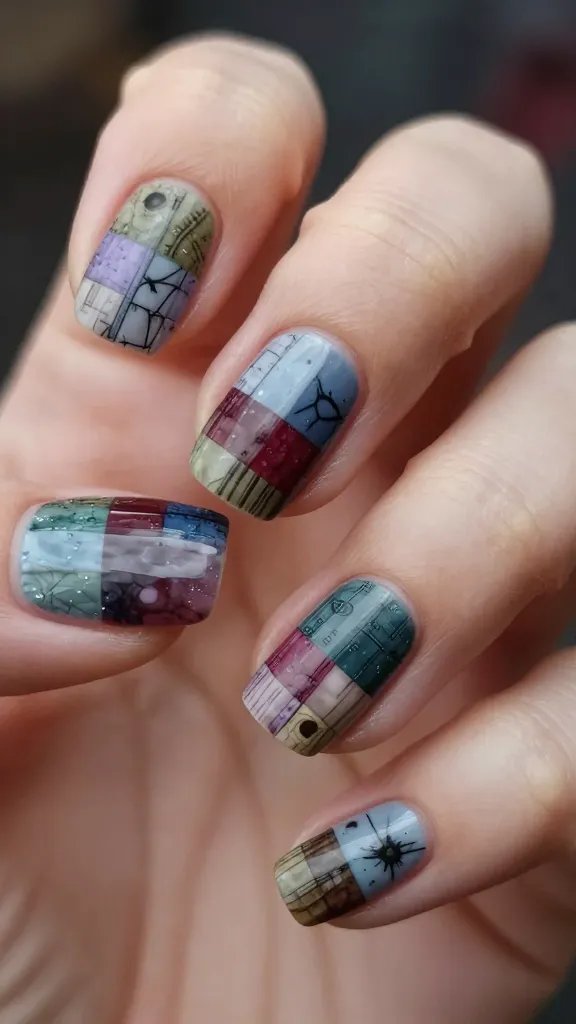
Our favorite rag doll, Sally, brings a whole world of color and texture to the table. Her patchwork dress is a goldmine for unique nail designs that are anything but boring.
Think mismatched squares and rectangles in various muted tones. It’s a beautiful way to incorporate a bit of her melancholy charm.
This look is fantastic for those who love a more intricate, artistic manicure that tells a story.
3. Oogie Boogie’s Sinister Silhouette
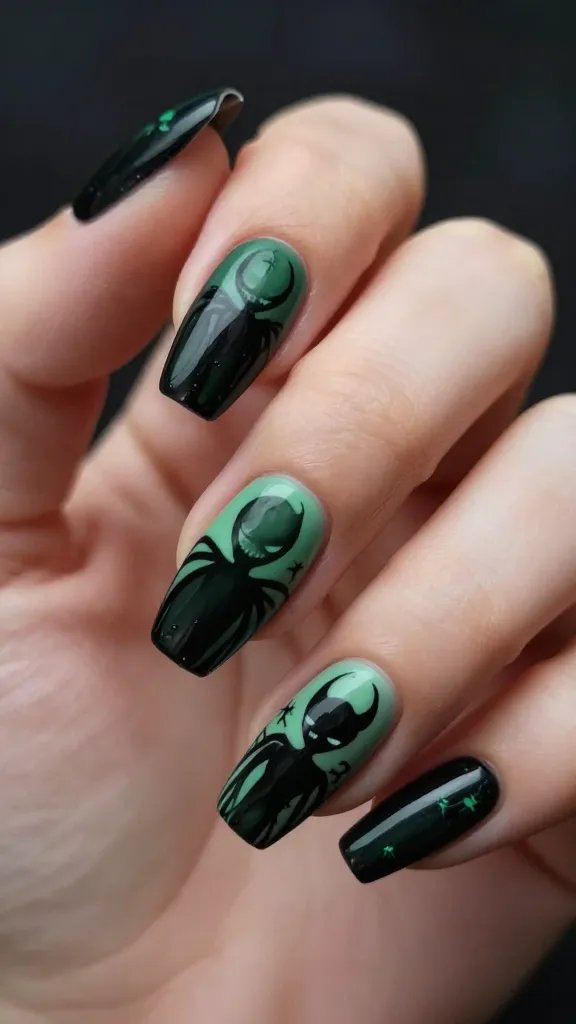
Feeling a bit mischievous? Oogie Boogie’s menacing silhouette is perfect for a darker, more dramatic nail. His shadowy presence adds a touch of villainous flair.
A dark green or black base with a subtle outline works wonders. You could even add some tiny “bugs” if you’re feeling extra bold.
Seriously, this design is for when you want to channel your inner villain with style.
4. Zero’s Glowing Nose

Who doesn’t love Zero, Jack’s loyal ghost dog? His adorable, glowing pumpkin nose is a sweet touch that adds whimsy to any manicure. It’s a subtle yet charming detail.
A translucent white base with a tiny orange pumpkin on top will capture his essence perfectly. Maybe even a little sparkle for that ethereal glow!
This design is super cute and a lovely tribute to the best good boy in Halloween Town.
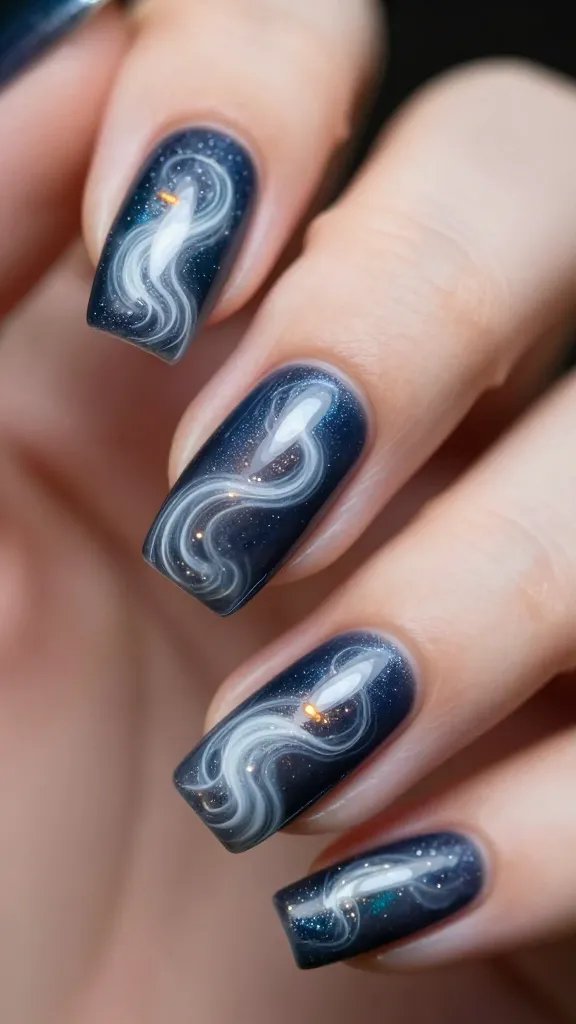
5. Spiral Hill’s Eerie Landscape
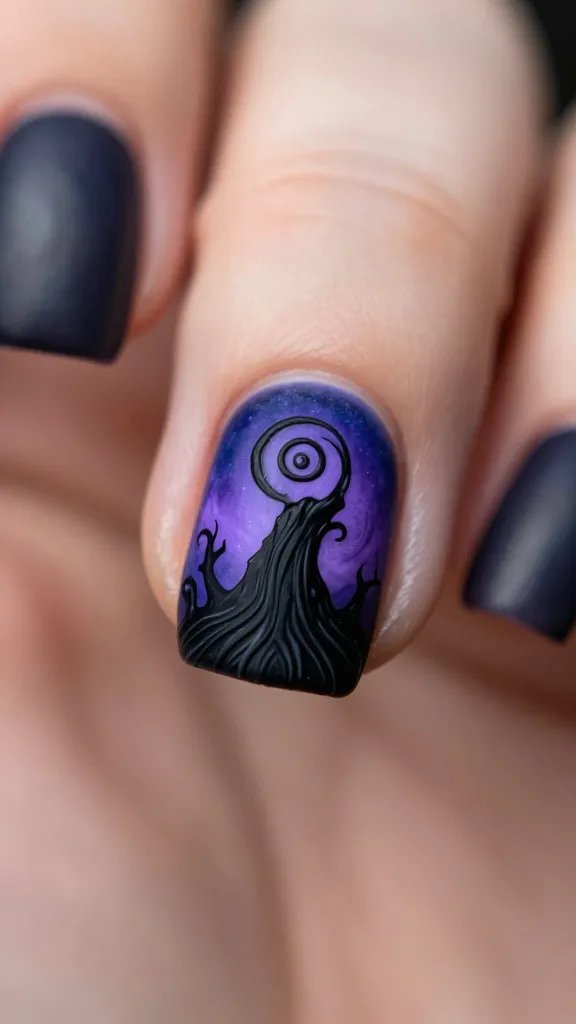
The iconic Spiral Hill where Jack often contemplates life is a fantastic backdrop for a full nail design. Its swirling, dramatic lines are instantly recognizable.
Use a deep purple or blue for the sky and stark black for the hill itself. Don’t forget that signature curl at the top!
This is a great option for a feature nail, bringing a piece of Halloween Town’s unique architecture to your fingertips.
6. Bat Bow Tie Bling

Jack’s signature bat bow tie is a simple yet effective design element. It’s elegant, a little spooky, and totally on brand.
A black bat silhouette on a contrasting background (like white or silver) makes a chic statement. Add some glitter for extra pizzazz!
This is a fantastic minimalist option for those who want a subtle nod to the Pumpkin King.
7. Lock, Shock, and Barrel’s Trio of Terror
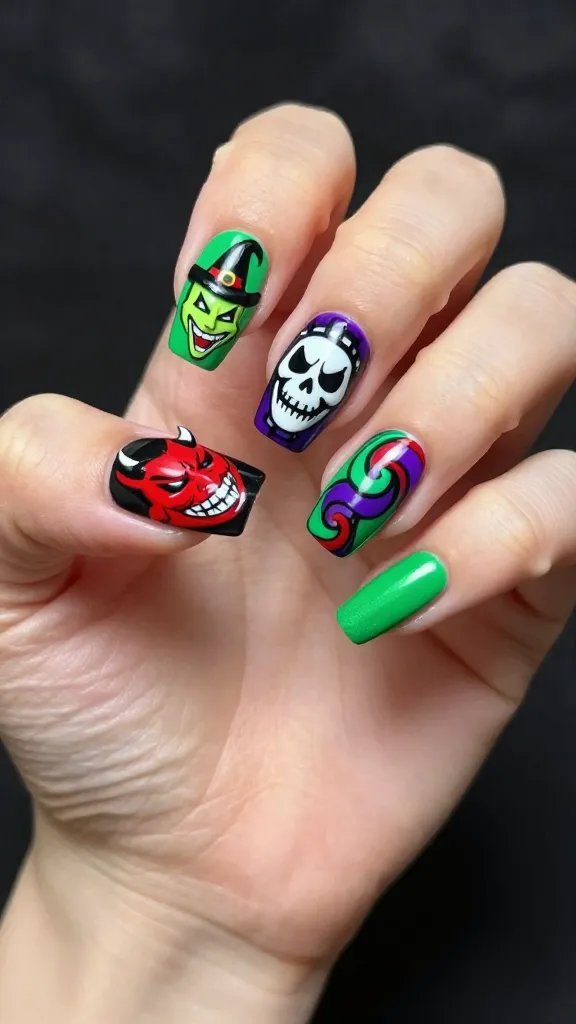
The mischievous trick-or-treaters offer a vibrant, playful, and slightly menacing vibe. Each character has distinct features that can be translated into fun nail art.
Dedicate a nail to each kid, or combine elements like their masks or individual colors. Think bright greens, purples, and reds.
This is for the playful fan who appreciates the darker humor of the film. It’s a party on your nails!
8. Christmas Lights Gone Spooky
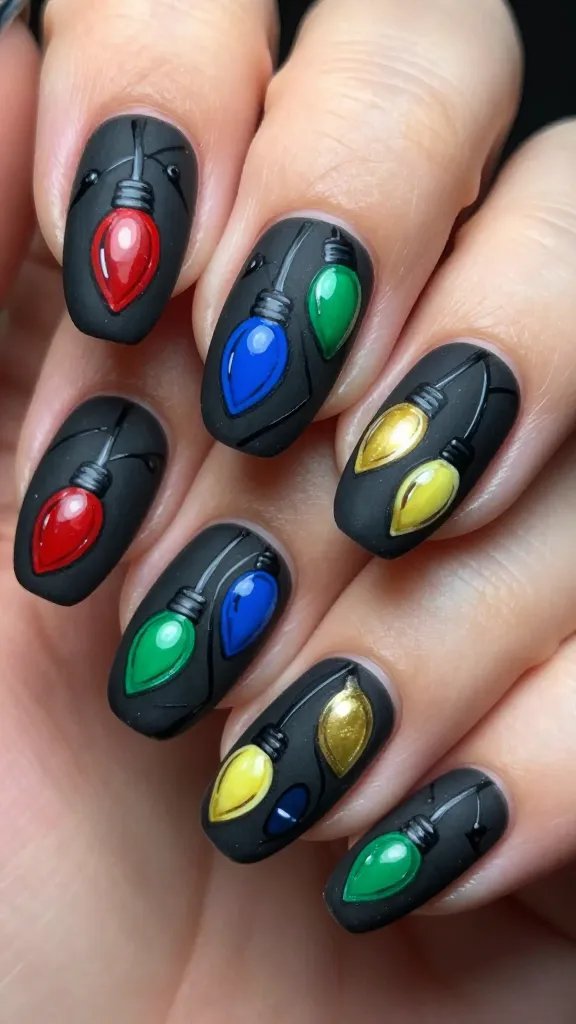
Remember when Jack tried to bring Christmas to Halloween Town? Those slightly askew, spooky Christmas lights make for a wonderfully ironic design.
Use a dark base and then paint colorful, slightly misshapen light bulbs with black wires. It’s festive, but with a twist!
Perfect for bridging the gap between Halloween and Christmas, showing off your dual fandom.
9. Snowflake Skulls
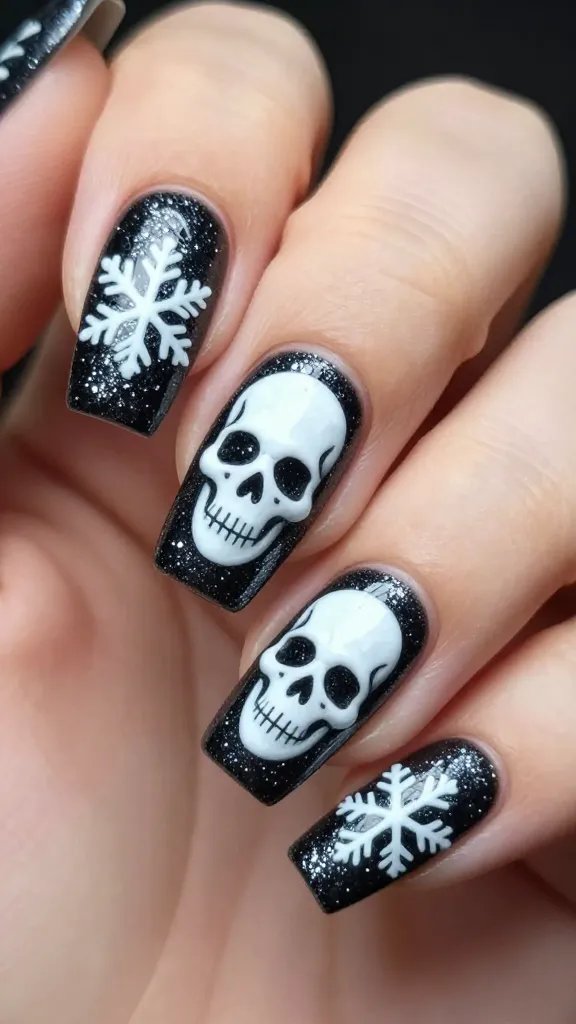
Combine the delicate beauty of a snowflake with the macabre charm of a skull. It’s the ultimate fusion of Christmas and Halloween.
A white skull outline within a snowflake pattern on a dark background creates a stunning contrast. Add some silver glitter for that icy touch.
This design is seriously elegant and perfect for the winter months without losing your spooky edge.
10. The Mayor’s Two Faces
The Mayor of Halloween Town, with his constantly spinning head, is a quirky character perfect for a fun, dynamic nail design. Two faces, two moods!
You could paint his happy face on one nail and his worried face on another, or even try to incorporate both on a single nail if you’re feeling ambitious.
This is a humorous choice that showcases your appreciation for the film’s unique personalities.
11. Sandy Claws’ Sleigh Silhouette
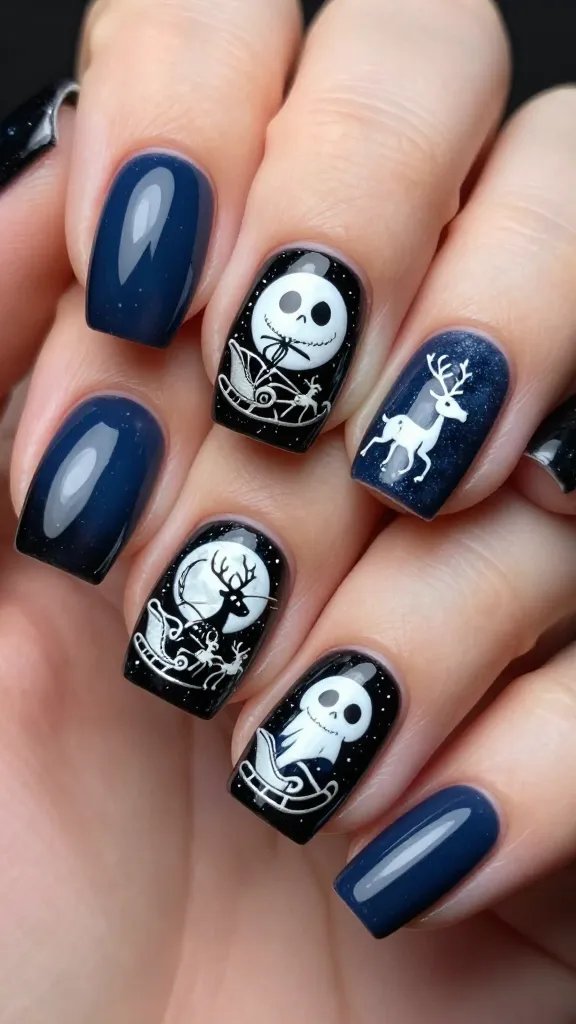
Jack’s attempt at being “Sandy Claws” provides some hilarious imagery. A silhouette of his skeletal sleigh flying across the moon is iconic.
A deep blue or black base with a white or silver silhouette of Jack’s sleigh and reindeer (Zero!) is both festive and spooky.
It’s a fantastic way to celebrate the film’s unique take on Christmas traditions.
12. Spider Web Elegance
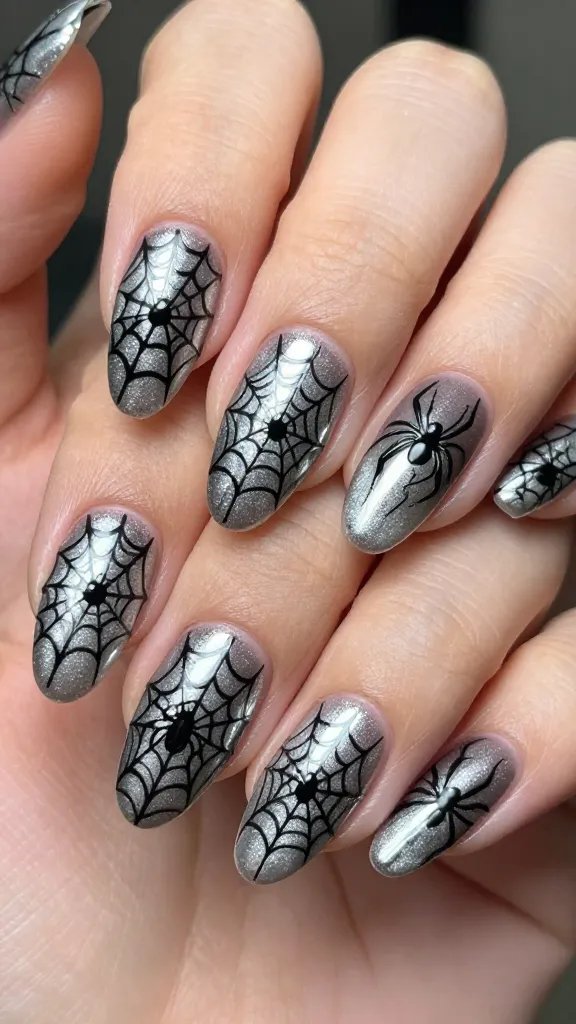
Spider webs are a classic spooky motif, and they fit perfectly into the Nightmare Before Christmas aesthetic. They can be delicate or dramatic.
A thin, intricate black web on a neutral or metallic base creates an elegant gothic look. Add a tiny spider for extra creepiness!
This design is versatile and can be dressed up or down, making it great for any occasion.
13. Striped Suit Swagger
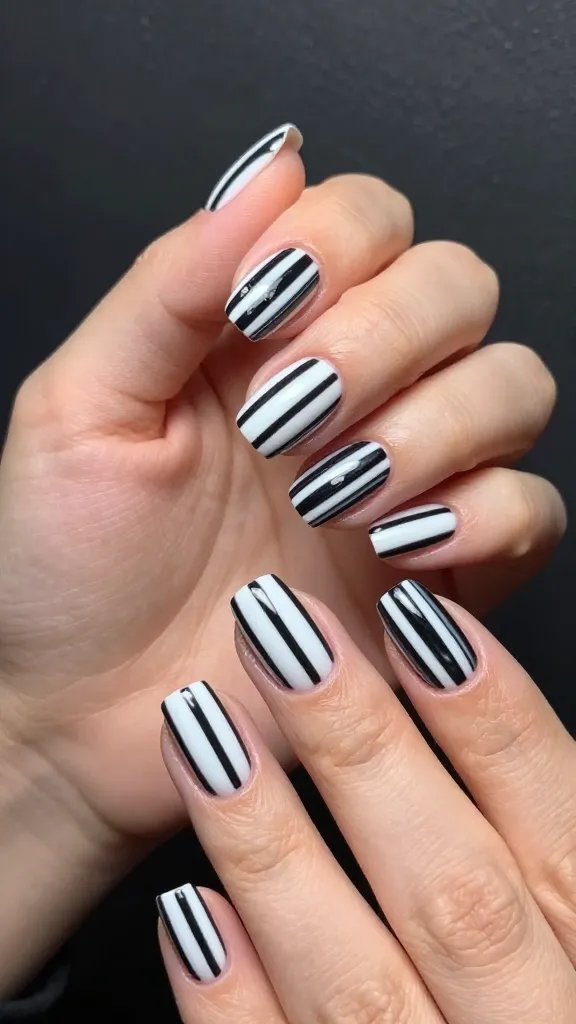
Jack’s pinstriped suit is instantly recognizable and incredibly chic. This pattern translates beautifully to nail art, offering a sophisticated look.
Alternating thin black and white stripes on your nails is a powerful statement. Keep them clean and crisp for maximum impact.
This design is effortlessly cool and a subtle nod to Jack’s impeccable style.
14. Dr. Finkelstein’s Brain Detail
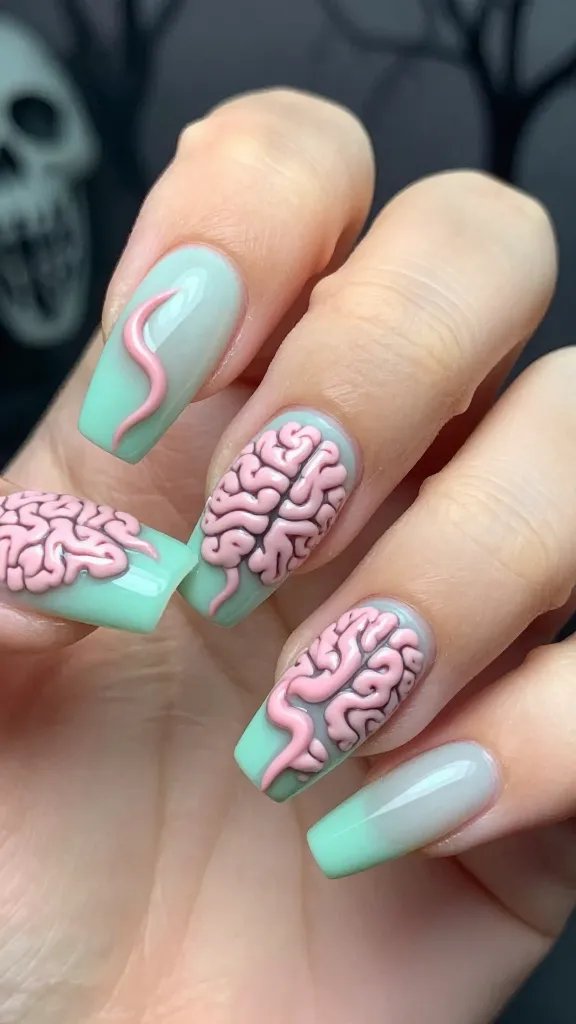
For something a little more eccentric, consider a nod to Dr. Finkelstein’s exposed brain. It’s quirky, a bit gross, and totally on brand for Halloween Town.
A pale green base with pink brain-like swirls can be surprisingly artistic. It’s definitely a conversation starter!
This is for the truly dedicated fan who loves the more macabre and unique elements of the film.
15. The Man-Eating Wreath
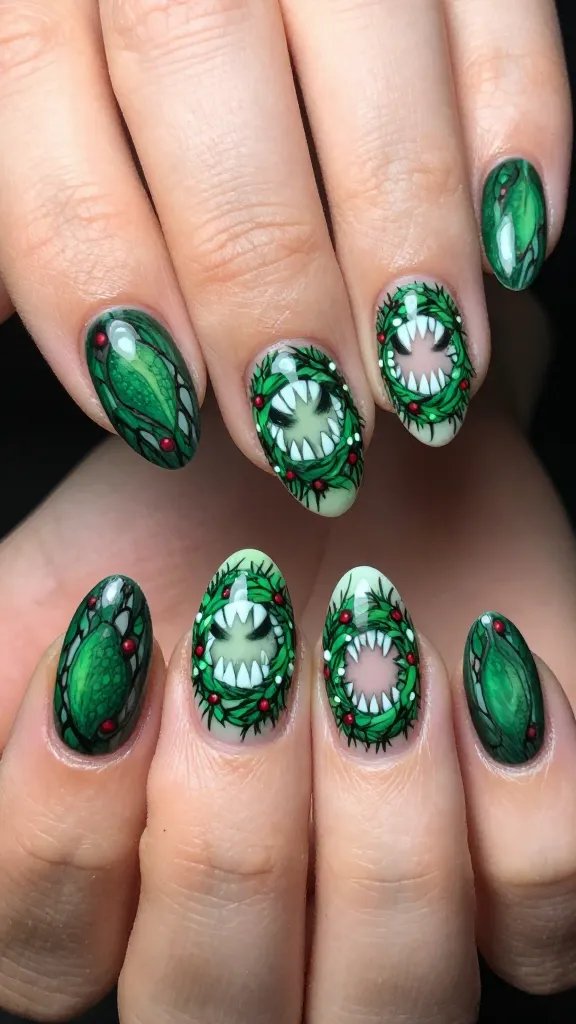
Remember those terrifying Christmas wreaths with sharp teeth? They’re a brilliant, slightly humorous, and genuinely spooky design choice.
A green wreath shape with jagged white teeth and red accents makes for a wonderfully creepy manicure. It’s Christmas, but make it scary!
This design is perfect for those who enjoy the darker, more twisted humor of the movie.
16. Zero’s Doghouse Glow
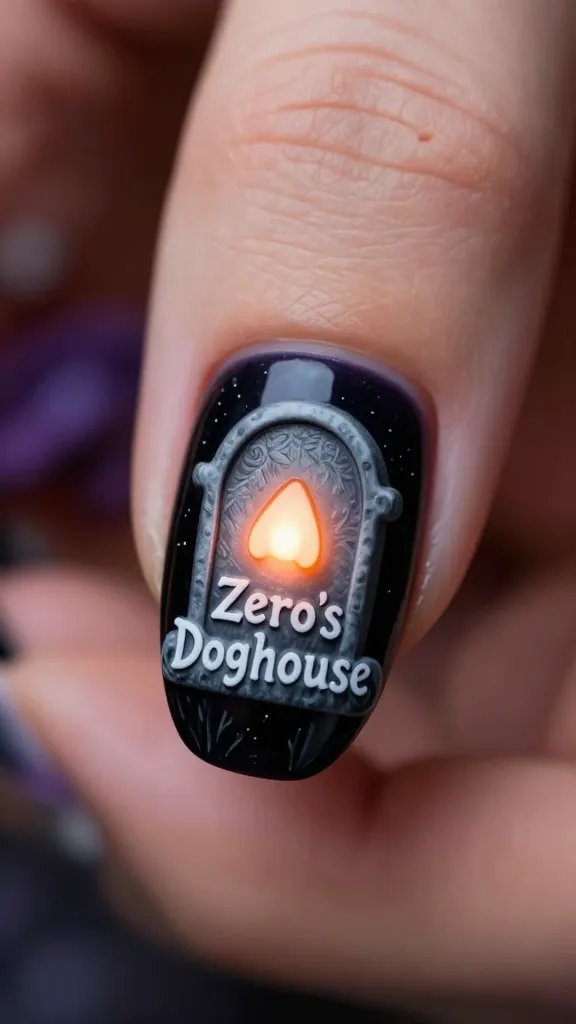
Zero’s doghouse, shaped like a tombstone, is another iconic visual. The subtle glow from his nose inside is a sweet detail.
Paint a grey tombstone shape on a dark nail, and add a small orange glow peeking out. It’s understated but instantly recognizable.
This is a charming and unique design that celebrates Jack’s loyal companion.
17. Candy Cane Coffin
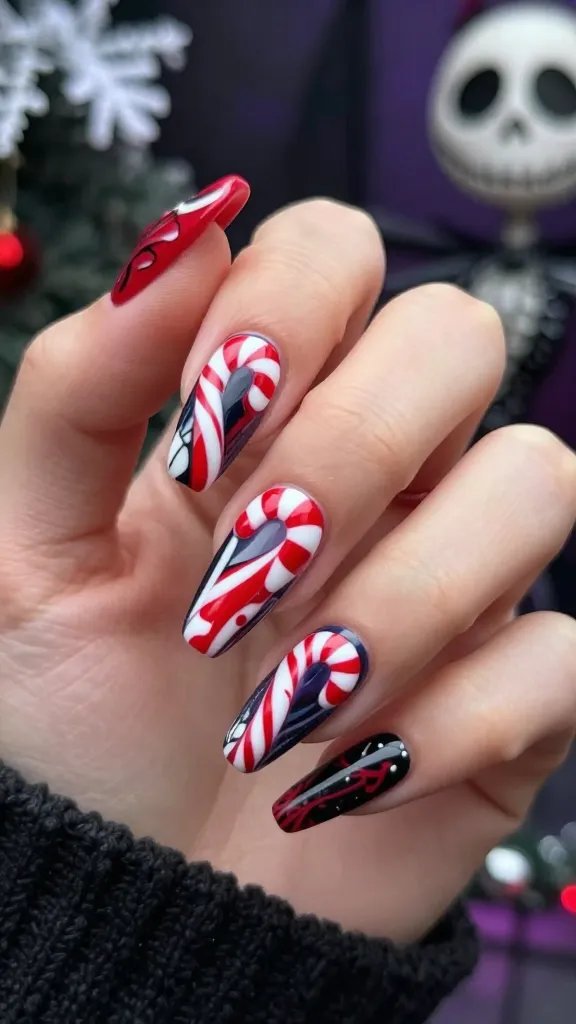
The idea of a candy cane-striped coffin is peak Nightmare Before Christmas irony. It’s sweet, but with a definite edge.
Paint a coffin shape on your nail and fill it with classic red and white candy cane stripes. It’s festive, but still spooky.
This design is a fun, playful way to combine two seemingly opposite holiday aesthetics.
18. Bat Wing Accents
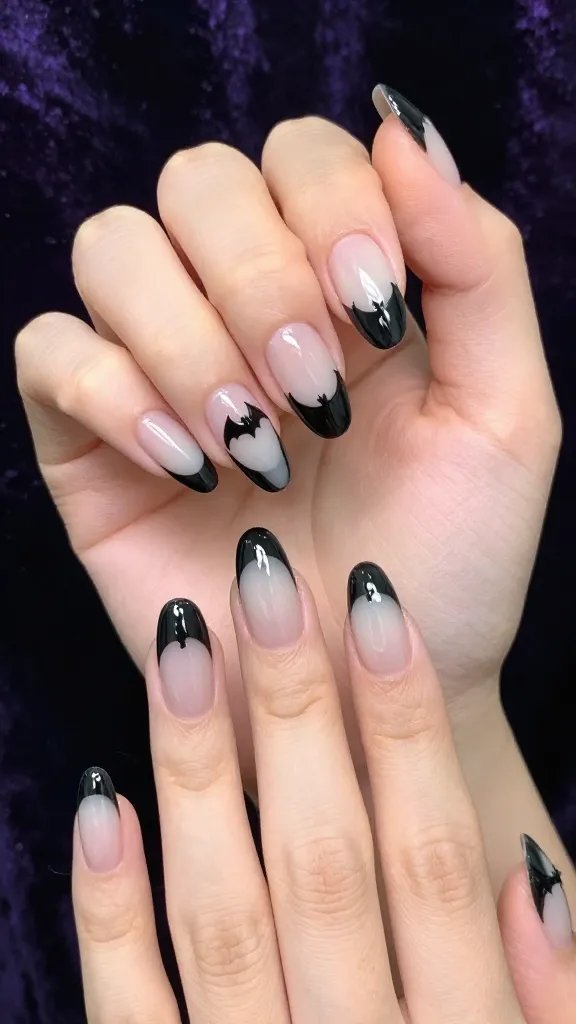
Beyond Jack’s bow tie, bat wings are a recurring motif in the film. They add a gothic, elegant touch to any design.
Small black bat wings painted near the cuticle or tip of a nail can create a subtle, sophisticated spooky vibe. Think French tip, but make it bats!
These accents are versatile and can elevate a simple manicure into something truly special.
19. Moonlit Silhouettes
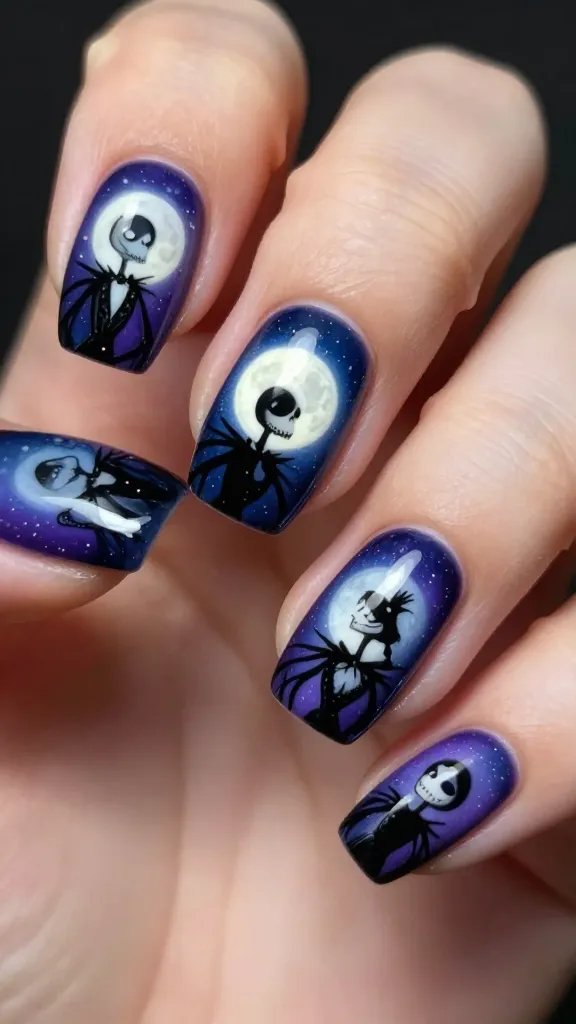
Many iconic scenes feature characters silhouetted against a full moon. This creates a dramatic and atmospheric look for your nails.
A gradient of dark blues and purples for the night sky, with a bright white moon and black silhouettes of Jack or Sally, is stunning.
This design captures the romantic and slightly melancholic beauty of the film.
20. Present with a Bite
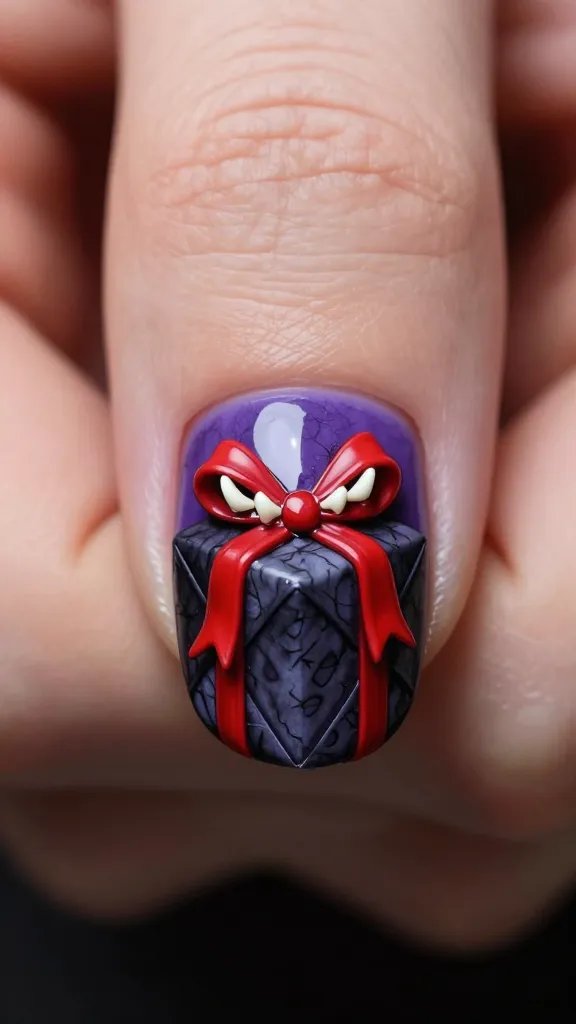
Those terrifying presents Jack delivers, often containing shrunken heads or snapping jaws, are visually striking and darkly humorous.
Paint a wrapped present with a ribbon, but instead of a bow, add some sharp teeth or a creepy eyeball peeking out. It’s a delightful surprise!
This is a fantastic design for those who love the film’s unique brand of dark humor and unexpected twists.
21. Ghostly Hill Swirls
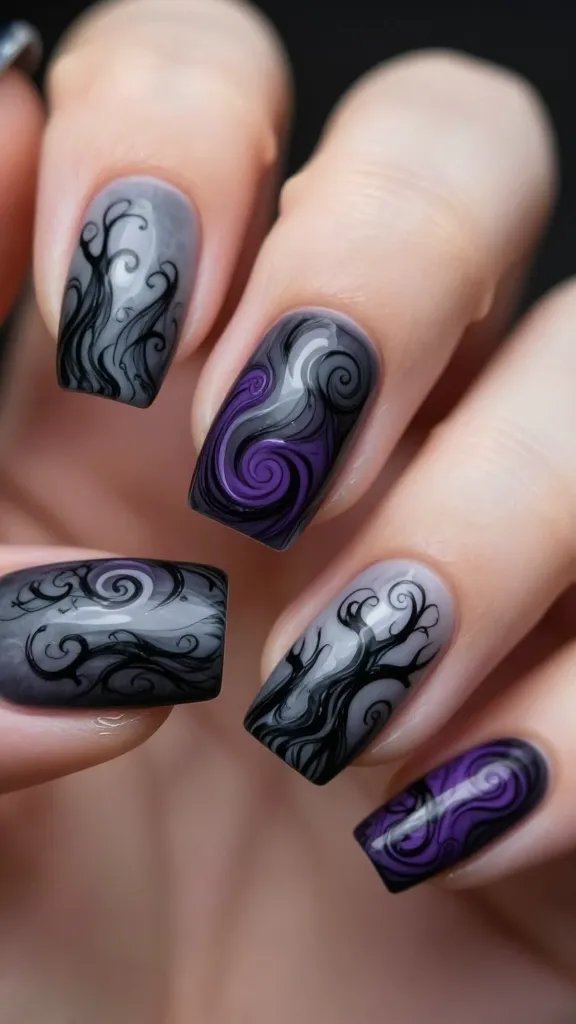
Beyond the main Spiral Hill, the general aesthetic of Halloween Town features swirling, ghostly hills and trees. These organic shapes are great for abstract designs.
Use a palette of greys, blacks, and deep purples to create flowing, ethereal swirls across your nails. It’s spooky art!
This design offers a more abstract, artistic interpretation of the film’s setting.
22. “What’s This?” Quote Nails
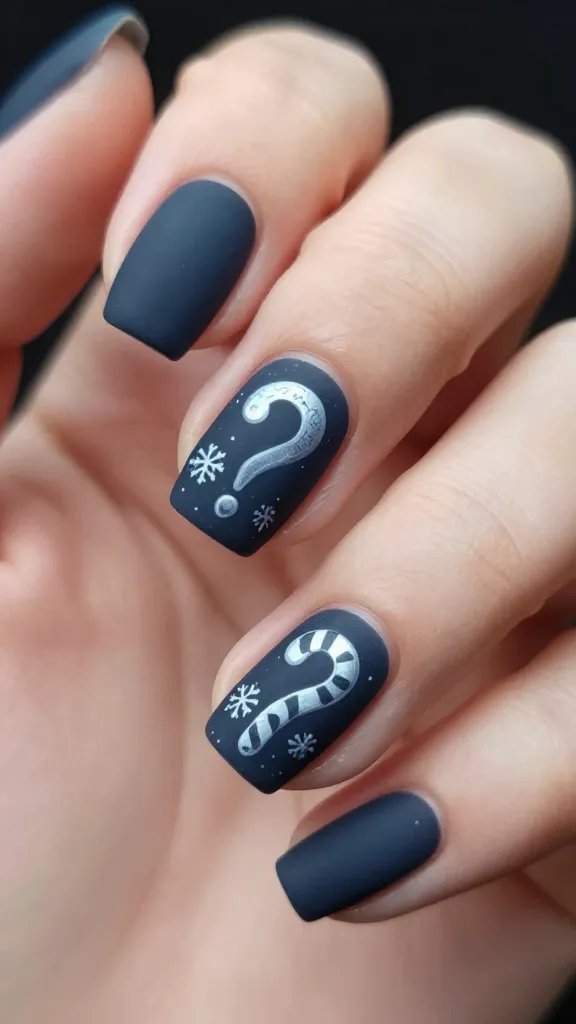
Jack’s iconic “What’s This?” moment in Christmas Town is a pivotal part of the film. A simple quote can be incredibly impactful.
Choose a dark base and carefully letter “What’s This?” in a whimsical, slightly spooky font. You could even add a tiny snowflake or candy cane.
This is a fun, text-based design that celebrates one of the movie’s most memorable lines.
23. Frightful Flowers (Deadly Nightshade)
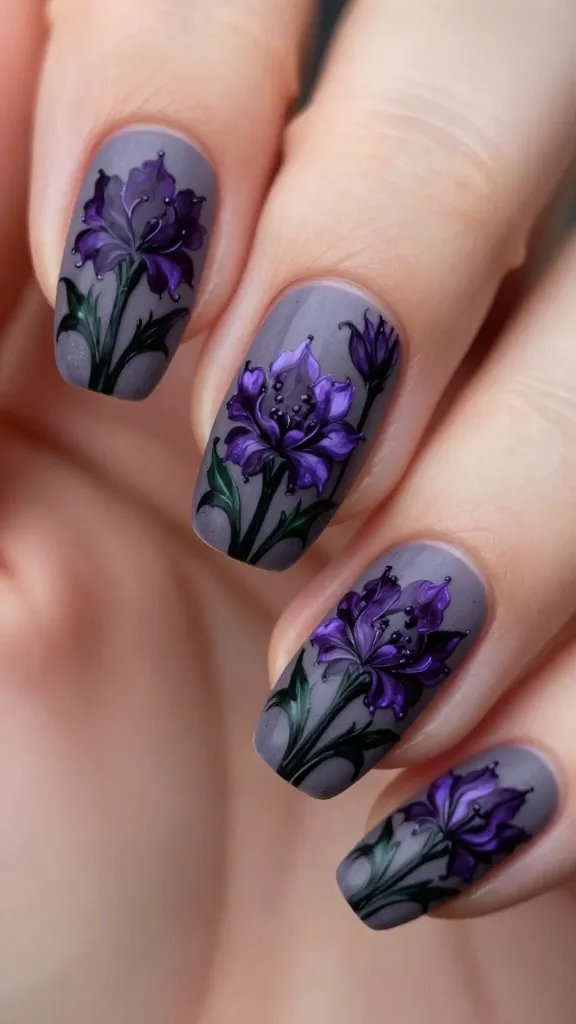
Sally’s deadly nightshade flowers, used in her attempts to escape Finkelstein, are a beautiful yet sinister detail. They offer a unique floral-gothic vibe.
Paint delicate purple or black flowers with a hint of green stem on a contrasting background. It’s poisonous beauty!
This design is perfect for those who appreciate the subtle, darker botanical elements of the film.
24. Spider and Web French Tip
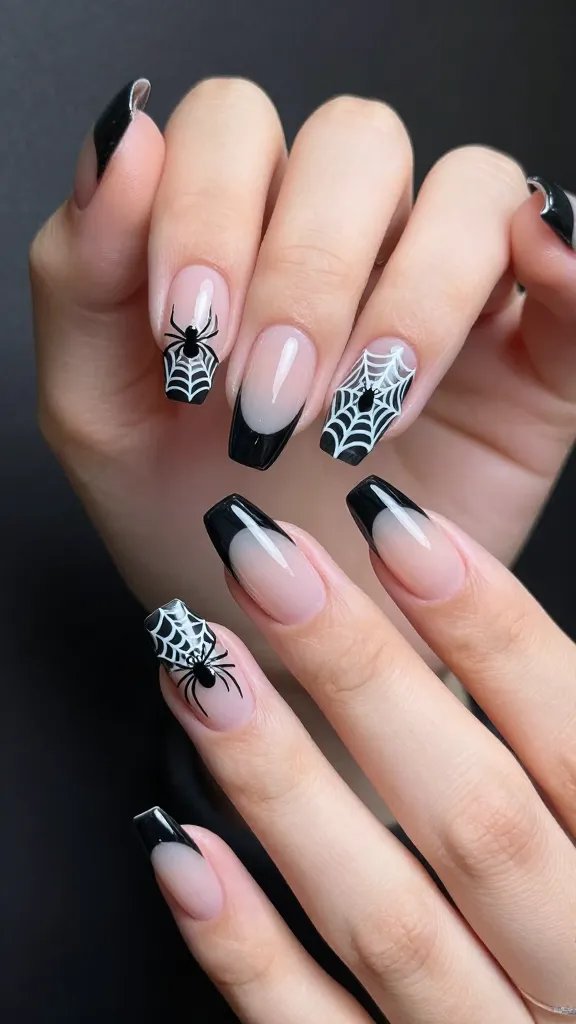
Elevate a classic French tip with a spooky twist. Instead of a plain white tip, incorporate a delicate spider web and a tiny spider.
Use a black or dark grey for the tip, then paint a fine white web and a small black spider. It’s chic and creepy!
This is a sophisticated way to incorporate Halloween Town vibes into a more formal look.
25. Pinstripe Accent Nail
If a full set of Jack’s pinstripes feels like too much, try it on just one accent nail. It’s a powerful statement without overwhelming your whole hand.
Keep the rest of your nails a solid black, white, or a deep jewel tone, and let that one pinstriped nail do all the talking.
This is a stylish and understated way to show your love for the Pumpkin King.
26. Zero’s Ethereal Trail
Zero often leaves a faint, glowing trail as he flies. This can be translated into a beautiful, mystical nail design.
A swirling, translucent white or silver shimmer on a dark base, perhaps with a tiny orange highlight, evokes his ghostly presence.
This design is subtle, elegant, and captures the gentle magic of Zero.
27. Graveyard Gates
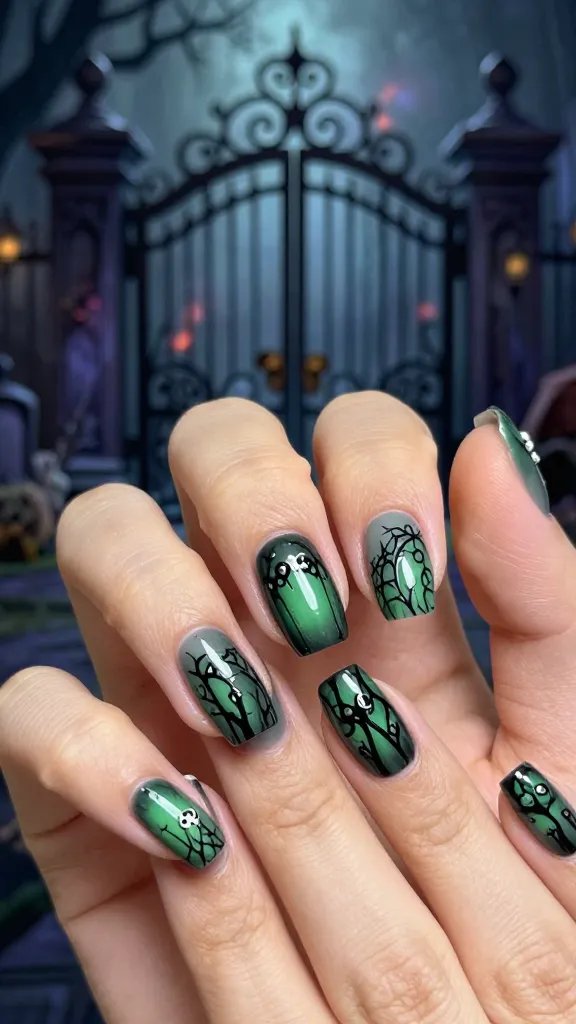
The wrought-iron gates of the graveyard in Halloween Town, often adorned with skulls or bats, provide a fantastic gothic architectural element.
Paint intricate black gate designs on a grey or dark green background. You could even add tiny skull details on top.
This design is perfect for a truly gothic and atmospheric manicure, channeling the spooky charm of Halloween Town’s entrance.
28. Experimenting with Textures: Matte & Glossy Contrast

Play with different finishes to create depth and interest, just like Sally’s patchwork. A matte black base with glossy details is incredibly striking.
Try a matte black base with glossy black Jack Skellington faces or bat silhouettes. The contrast is seriously next level!
This technique adds a sophisticated, modern edge to classic Nightmare Before Christmas motifs.
29. Tiny Tombstone Toppers
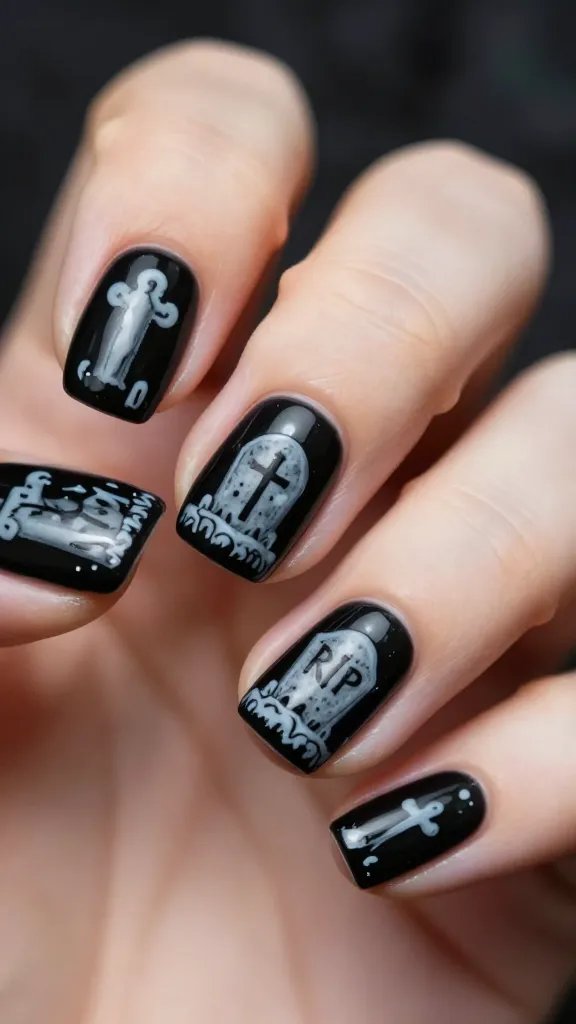
Miniature tombstones are a quintessential Halloween Town element. They’re cute, creepy, and surprisingly versatile for nail art.
Paint small grey tombstone shapes on a dark background. You can even add tiny “RIP” or cross details if you have a steady hand.
These little monuments are a fun, quirky addition to any spooky manicure.
30. Harlequin Diamond Pattern (Oogie Boogie’s Den)
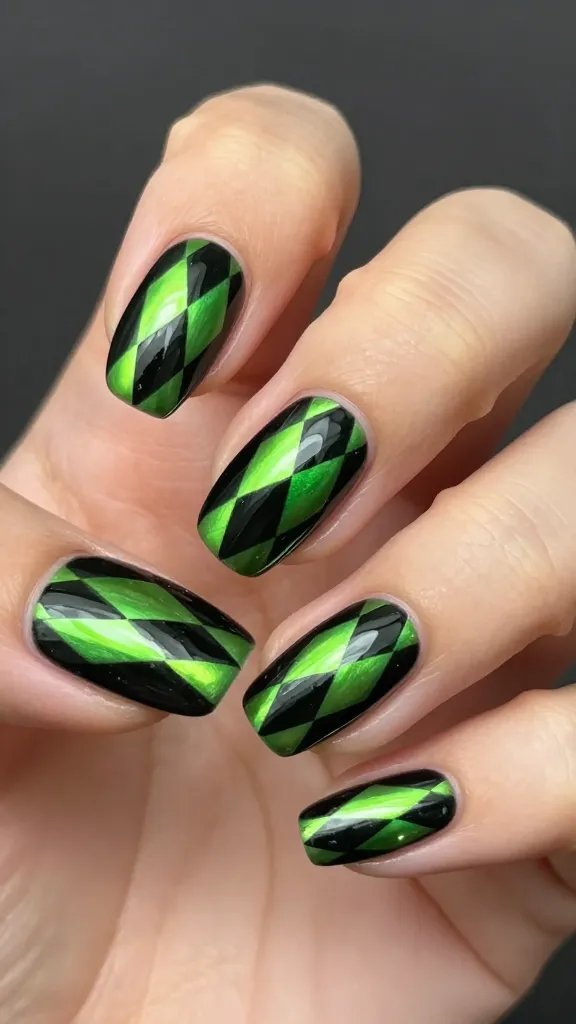
Oogie Boogie’s lair features a distinct harlequin diamond pattern. This bold, geometric design is a fantastic way to represent his sinister style.
Use black and a contrasting color like lime green or purple to create a sharp diamond pattern across your nails. It’s edgy and bold.
This design is for those who aren’t afraid to make a strong, graphic statement with their nails.
31. Spider Silk Shimmer
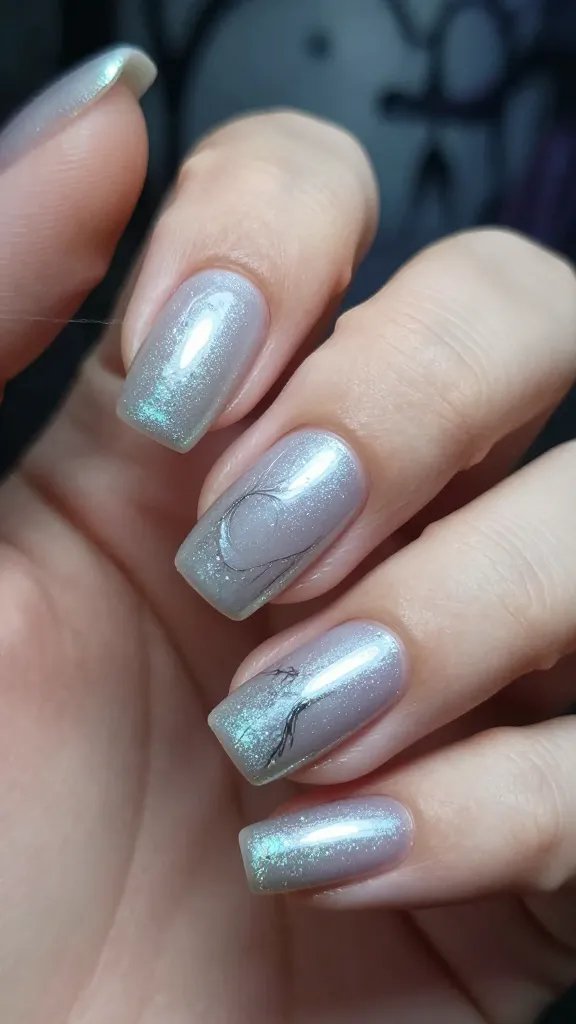
Imagine the delicate, almost invisible shimmer of spider silk catching the moonlight. This can be translated into a beautiful, subtle effect.
A clear or very light grey base with fine, iridescent glitter or a chrome powder that mimics the sheen of silk. It’s ethereal and spooky.
This is an elegant, understated design that evokes the delicate creepiness of Halloween Town.
32. “This Is Halloween” Lyrics
The opening song, “This Is Halloween,” is iconic. Incorporating snippets of its lyrics can be a creative and personal touch.
Choose a favorite line like “This is Halloween, everybody make a scene!” and carefully letter it across one or two nails. Use a spooky font!
This design celebrates the musical heart of the film and is perfect for a truly dedicated fan.
33. Glow-in-the-Dark Elements
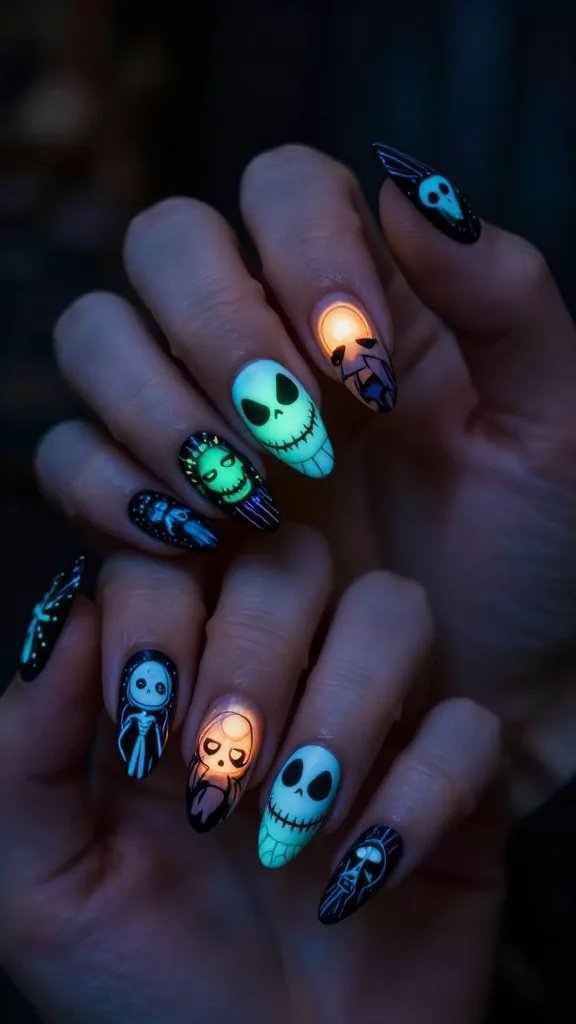
How cool would it be if parts of your Nightmare Before Christmas nails actually glowed in the dark? Think Zero’s nose or Jack’s eyes!
Use glow-in-the-dark polish for specific details like Jack’s eyes, Zero’s nose, or even subtle outlines of characters. Trust me, it’s a showstopper!
This is a fun, interactive design that adds an extra layer of magic to your manicure.
34. The Fountain of Halloween Town
The central fountain in Halloween Town, with its pumpkin-shaped basin and skeletal figures, is a unique architectural detail.
A stylized pumpkin outline with some skeletal elements can be a subtle yet recognizable nod to this iconic landmark. Use muted, earthy tones.
This design is for those who appreciate the intricate world-building of the film and its unique aesthetic.
35. Creepy Doll Eyes
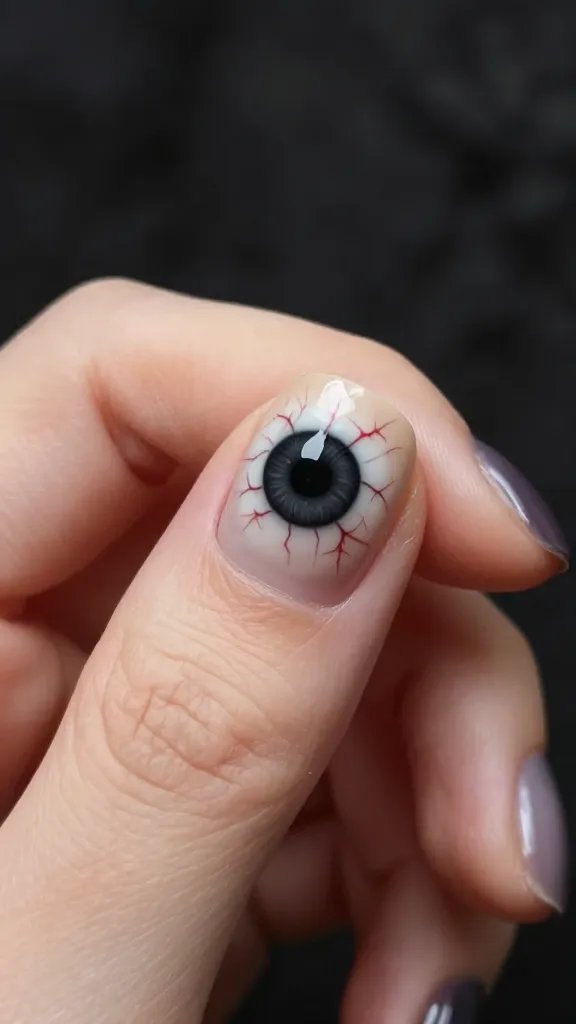
The film is full of creepy dolls and toys. A single, unsettling doll eye peeking out from a nail design can be wonderfully eerie.
Paint a large, wide-open eye with a black pupil on a neutral nail. Add some subtle veins for extra creepiness. It’s simple but effective.
This design is perfect for a truly unsettling, gothic vibe that pays homage to the film’s darker toy creations.
36. Jack and Sally’s Romantic Embrace
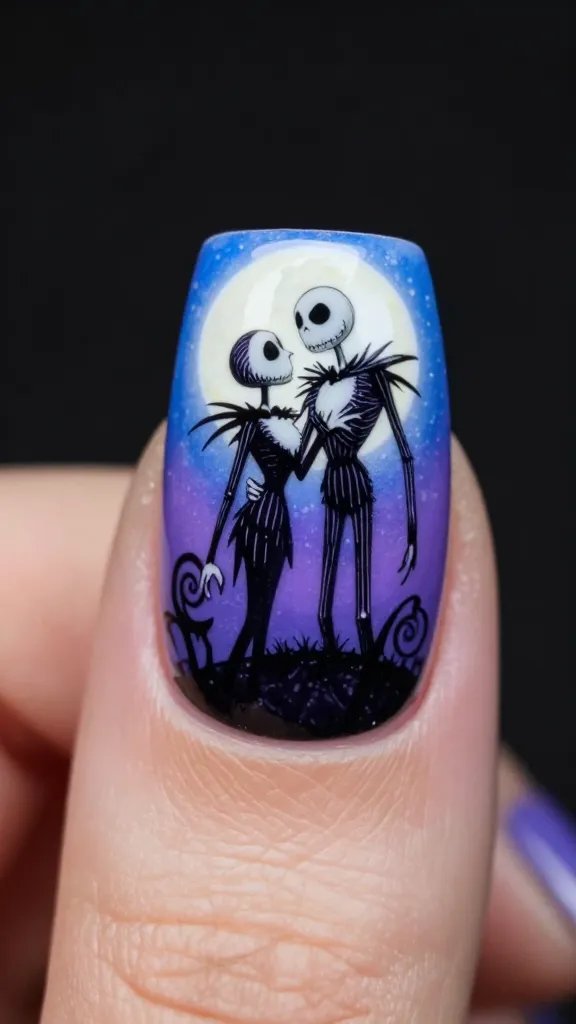
For a truly romantic and iconic design, depict Jack and Sally embracing on Spiral Hill. It’s the ultimate love story for the spooky at heart.
A silhouette of the two characters on a gradient moonlit background is breathtaking. This might be a job for a skilled nail artist, FYI!
This design is a beautiful tribute to the enduring love story at the heart of the film.
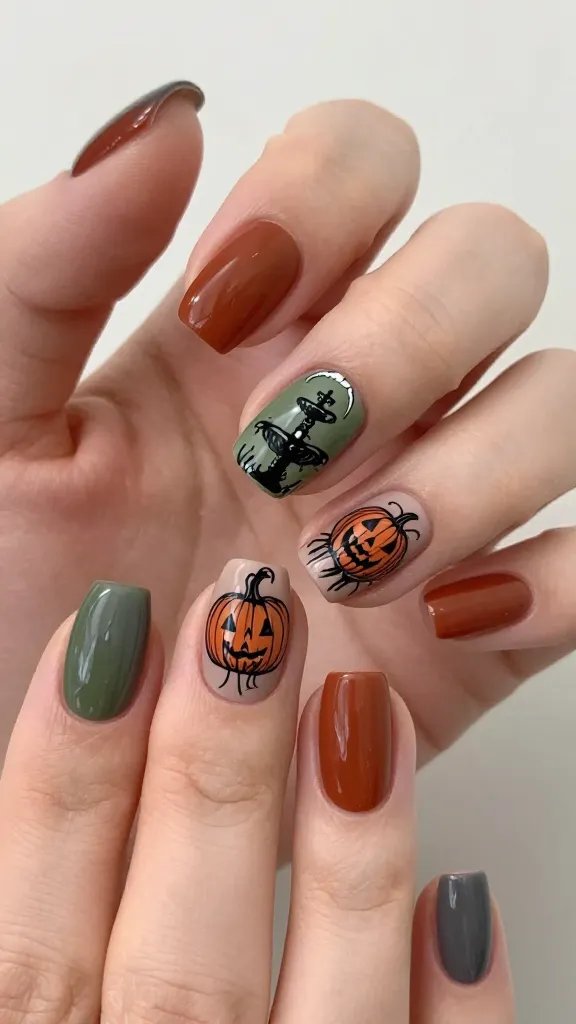
37. Mischievous Pumpkin Patch
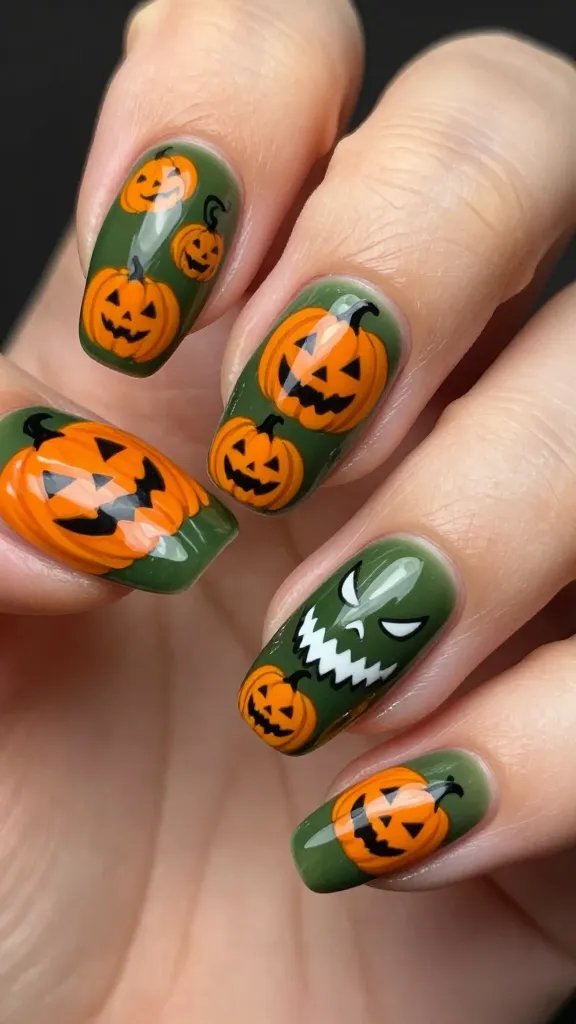
Halloween Town’s pumpkin patch isn’t just for growing pumpkins; it’s a place of mischievous fun. Think grinning, slightly sinister pumpkins.
Paint various sizes of orange pumpkins with different carved faces on a dark or earthy green background. Some can be happy, some spooky!
This is a cheerful yet still spooky design that celebrates the very essence of Halloween.
38. The Experiment Room Bubbles
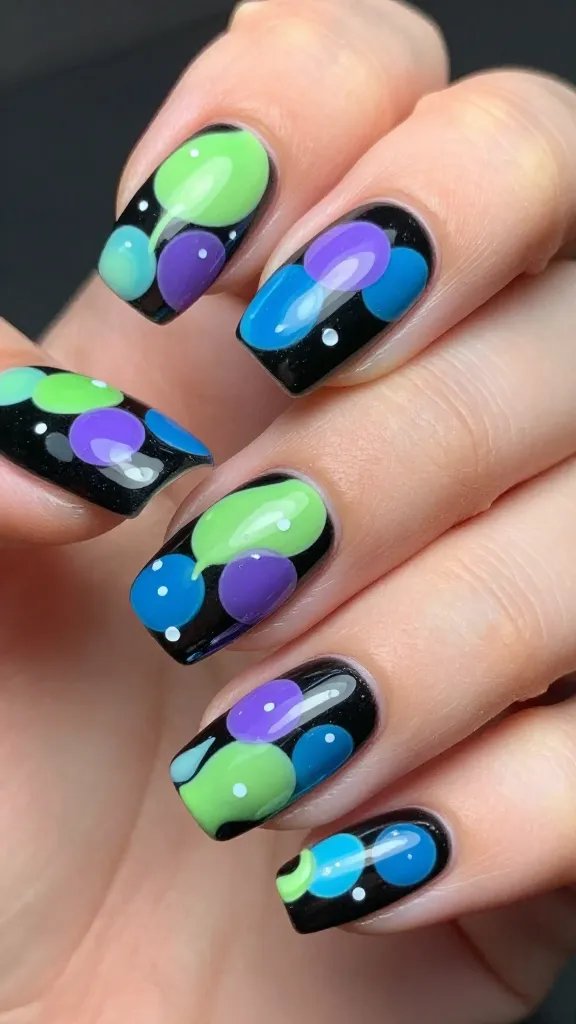
Dr. Finkelstein’s lab is always bubbling with strange concoctions. Those vibrant, glowing bubbles are a cool, abstract design element.
Use bright greens, purples, and blues to create overlapping, translucent bubble shapes on a dark base. Add some tiny white highlights for shine.
This design is a vibrant, abstract way to pay homage to the scientific (and slightly mad) side of Halloween Town.
39. “Merry Christmas, Everybody!”

End your Nightmare Before Christmas nail journey with a final, ironic flourish: Jack’s enthusiastic (if slightly misguided) Christmas greeting. It’s the perfect blend of holiday cheer and spooky charm.
Letter “Merry Christmas, Everybody!” on a festive-yet-dark background, perhaps with a tiny, slightly off-kilter snowflake or a subtle bat wing. It’s the ultimate mic drop for your manicure.
This design encapsulates the unique spirit of the film, blending two holidays into one unforgettable statement. Go forth and slay those nails!
There you have it, 39 ways to bring the magic of Halloween Town right to your fingertips! Whether you’re a die-hard Jack fan or a Sally stan, there’s a design here that’ll perfectly capture your spooky spirit. So grab your polishes, unleash your inner artist, and get ready to rock a manicure that’s truly to die for!