29 Pearl Wedding Nails That Sparkle Harder Than Your Champagne Toast
Pearls and weddings go together like cake and frosting—classic, sweet, and guaranteed to photograph beautifully. If you want nails that look timeless but still feel fresh, pearl designs hit the sweet spot. From barely-there shimmers to full-on mermaid glam, these ideas bring soft glow and subtle luxe. Ready to choose your bridal nail soulmate?
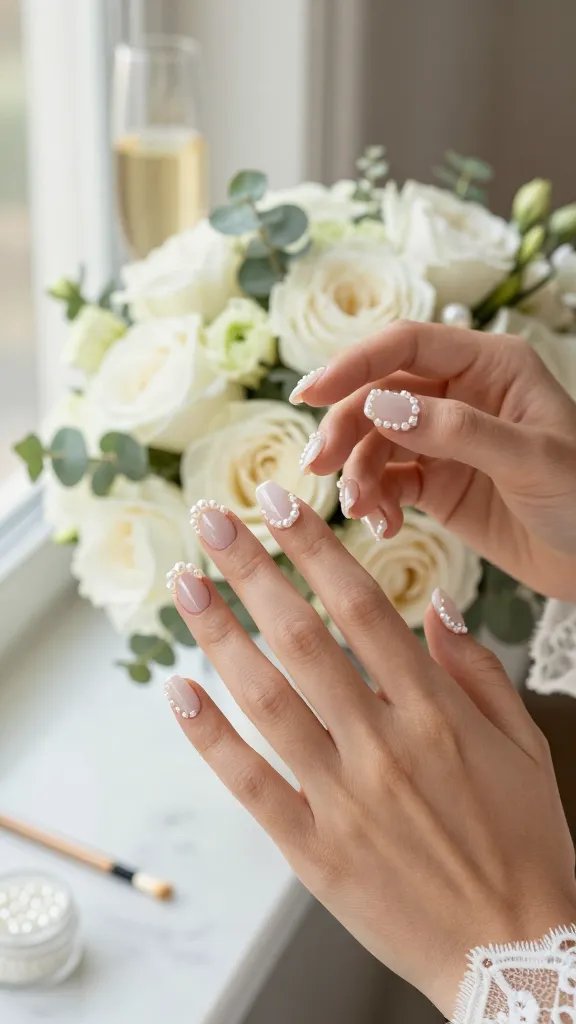
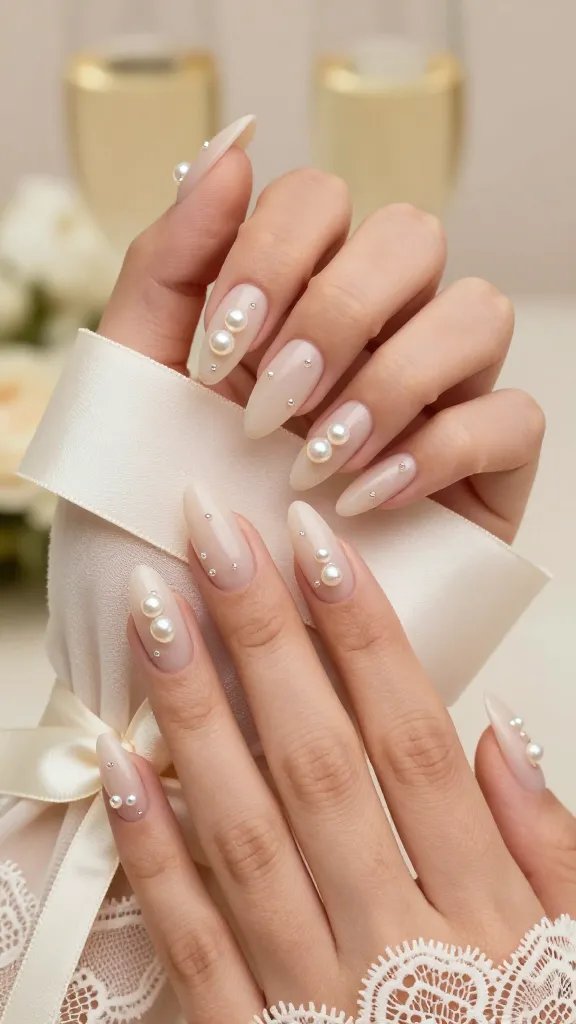
1. Classic Sheer Nude With Tiny Pearls
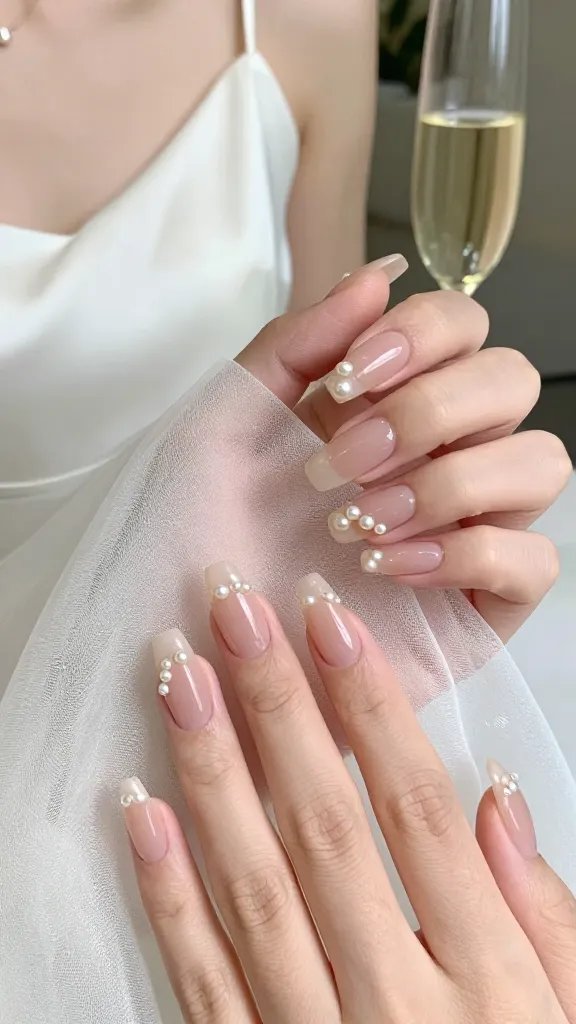
Start with the no-brainer: a sheer nude base and a delicate pearl or two near the cuticle. It’s minimalist and elegant, like your favorite silk slip dress in nail form.
Tips
- Pick a neutral that matches your undertone—cool pink or warm beige.
- Use teeny pearls (1–2 mm) for a refined look.
- Anchor pearls with a dot of builder gel so they last.
Perfect for brides who want something whisper-soft that still winks in photos.
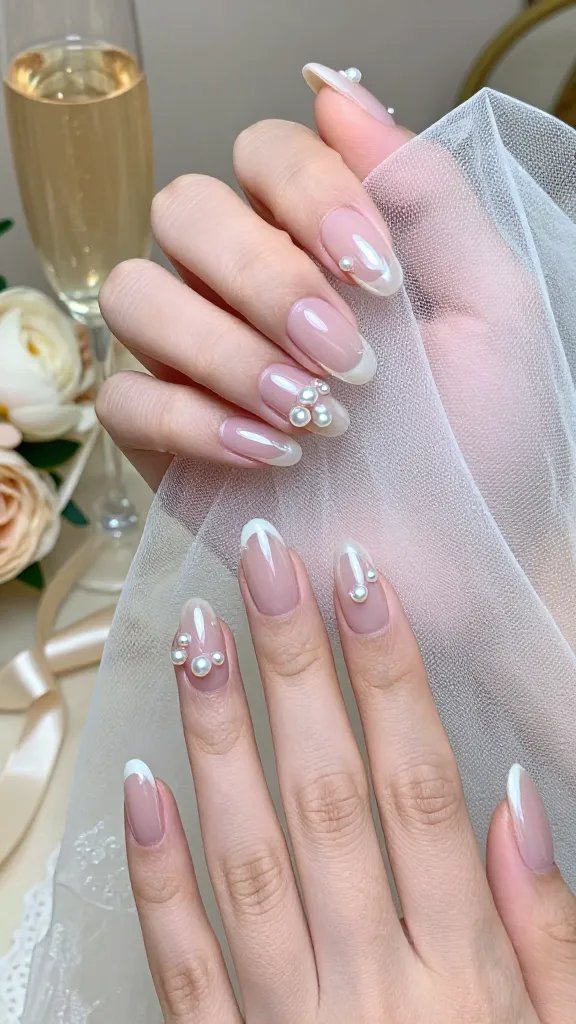
2. Pearly French Tips (But Softer)
Swap stark white tips for a pearlescent, milky fade. You get the elegance of a French manicure without the harsh line.
Key Points
- Use a pearly white chrome rubbed over the tip.
- Blend with a milky builder for a soft ombré.
- Top with a glossy top coat for that glassy finish.
Great for brides who want French, but make it couture.
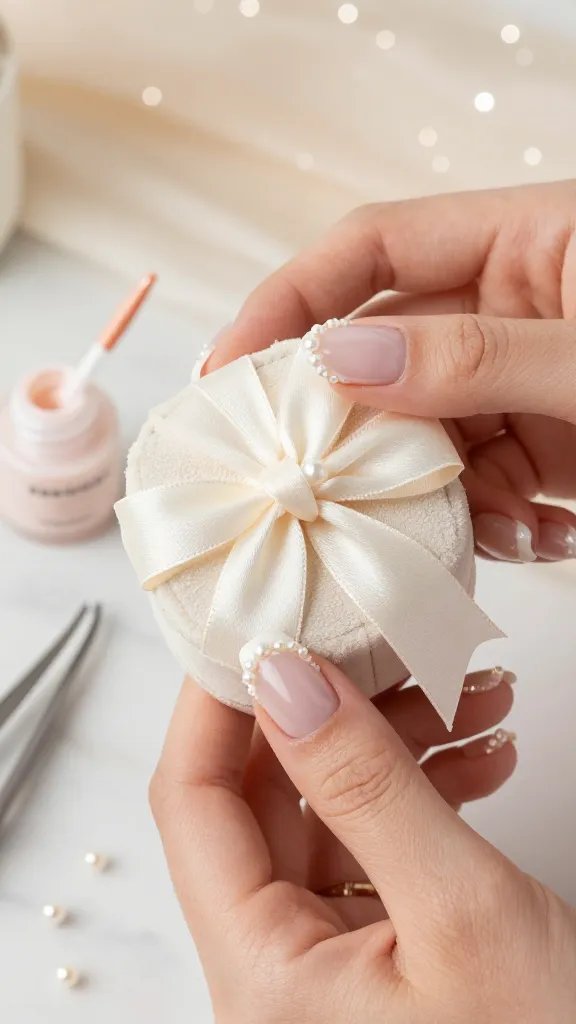
3. Micro Pearl Cuticle Halo
Ring each cuticle with tiny pearls for a delicate tiara effect on every nail. It looks intricate but feels airy.
Materials
- Micro pearls (1 mm)
- Thin liner brush
- Thick top coat or builder gel
Wear it when your bouquet is extra lush and you want nails that can hold their own.
4. Milky Jelly With Single Center Pearl

Milky jelly nails scream fresh, clean, and modern. Add one centered pearl per nail and you get “bridal cool girl” in two steps.
Tips
- Use a semi-transparent white or soft pink jelly.
- Place pearls dead center for symmetry.
- Seal edges with a non-wipe top coat.
For brides who love simplicity with a focal point, this is it.
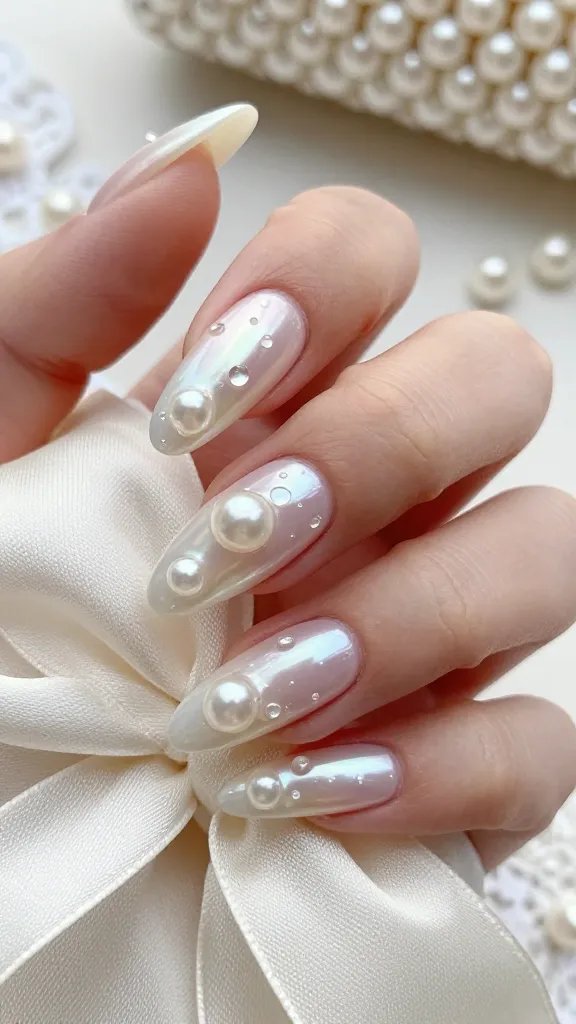
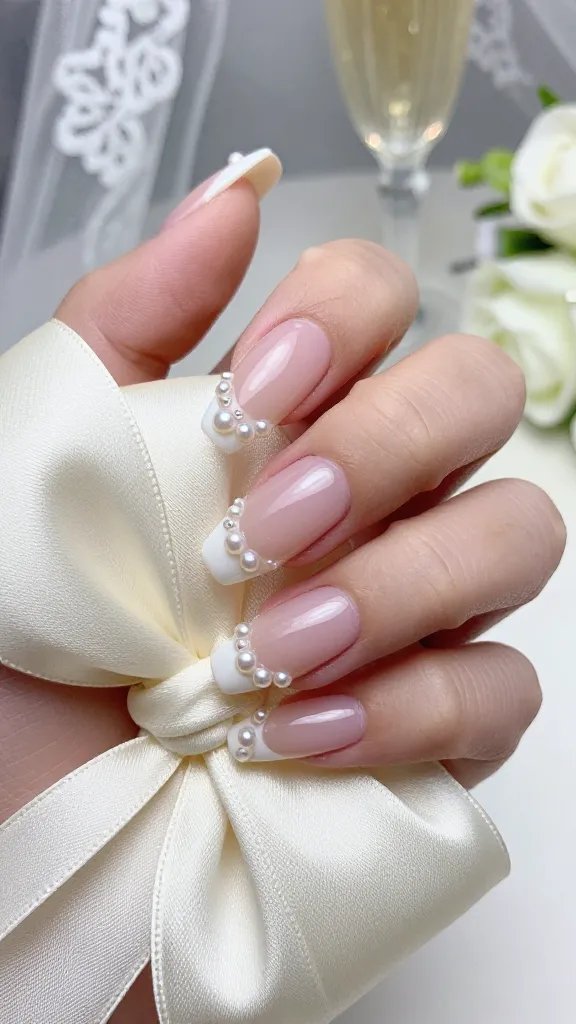
5. Pearl-Encrusted Accent Nail
Choose one nail per hand and go all out with pearls and crystals. Keep the others soft and simple so the accent sings.
Key Elements
- Mix pearl sizes for dimension.
- Cluster near the cuticle and taper toward the tip.
- Add a couple of clear crystals to catch light.
Ideal for that one close-up of your rings, FYI.
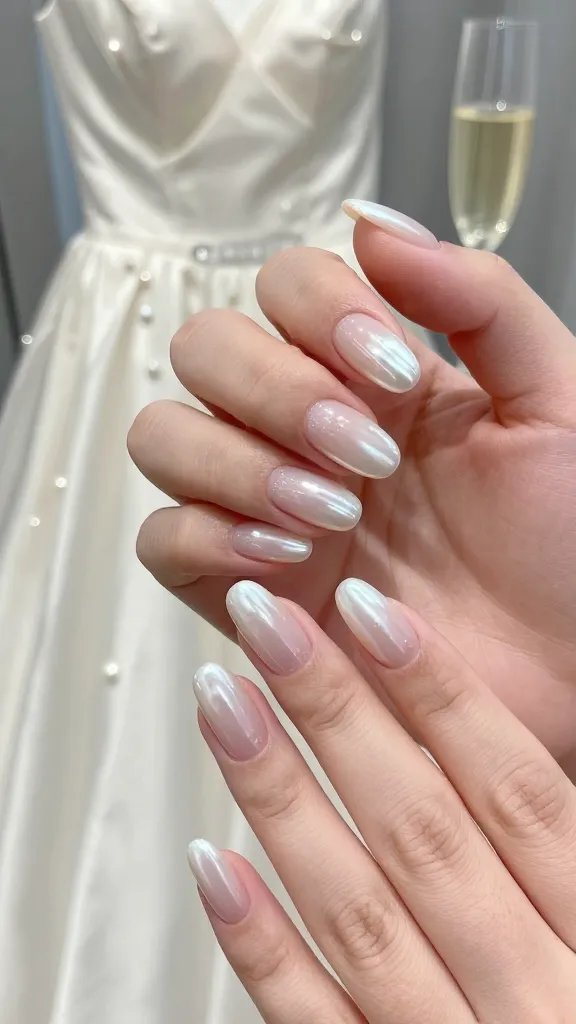
6. Iridescent Pearl Chrome All Over
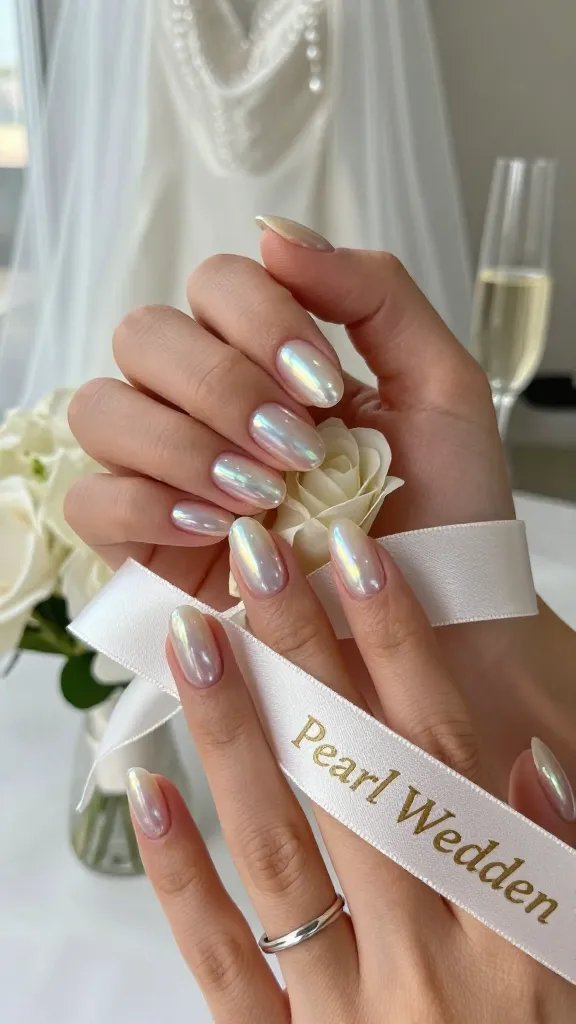
Chrome powder in a pearly finish gives instant glow. It reads luxe without any embellishments.
Tips
- Use a milky base, then rub in pearl chrome.
- Don’t over-buff—gentle is best.
- Top with a rubber top coat for durability.
Perfect when you want shine that looks effortless and expensive, IMO.
7. Lace + Pearl Combo

Paint a delicate lace pattern and dot tiny pearls where the “stitches” meet. It’s romantic and textural without bulk.
Materials
- White stamping plate or freehand gel paint
- Micro pearls
- Ultra-thin liner brush
Use this if your dress has lace and you want a subtle matchy moment.
8. Negative Space Pearl Arches
Create curved arches with pearls along the nail edge, leaving the center clean. It sculpts the nail and looks incredibly modern.
Key Points
- Stick to the sidewalls to elongate fingers.
- Use a nude base and glossy top.
- Keep pearls small for a sleek silhouette.
Polished, architectural, and very editorial—yes please.
9. Soft Ombré With Scattered Pearls
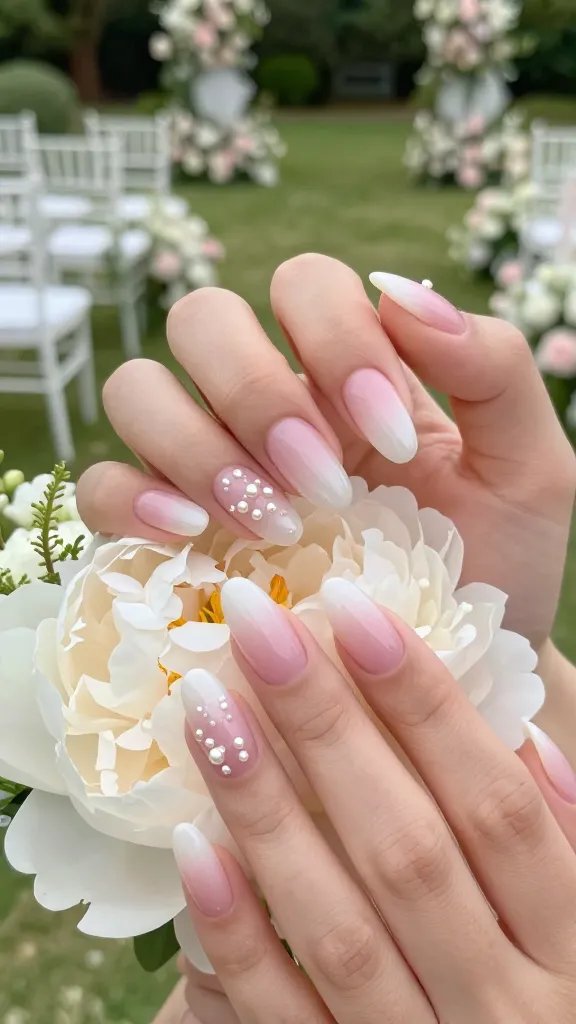
Blend soft pink into white, then scatter pearls like stardust. It’s gentle, dreamy, and undeniably bridal.
Tips
- Apply pearls sparsely—leave some nails bare.
- Use two ombré layers for depth.
- Finish with a gel top to lock everything in.
Great for romantic ceremonies and garden venues.
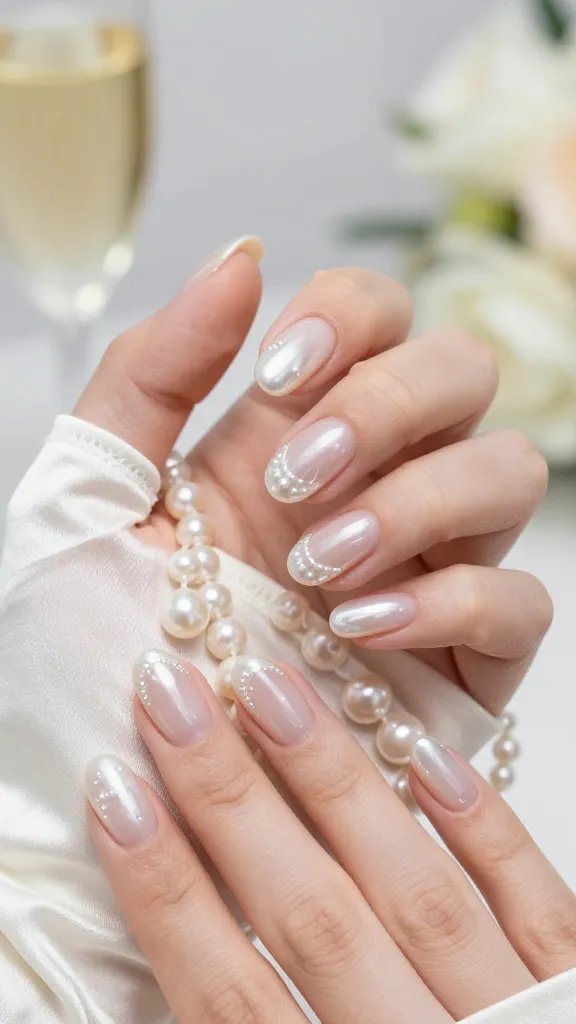
10. Pearl French With Micro Silver Line

Take a pearly French tip and add a razor-thin silver line under it. The contrast looks sleek and intentional.
Materials
- Pearl chrome or pearly white gel
- Silver striping gel
- Liner brush
Perfect if your jewelry skews silver or platinum.
11. Mother-Of-Pearl Mosaic
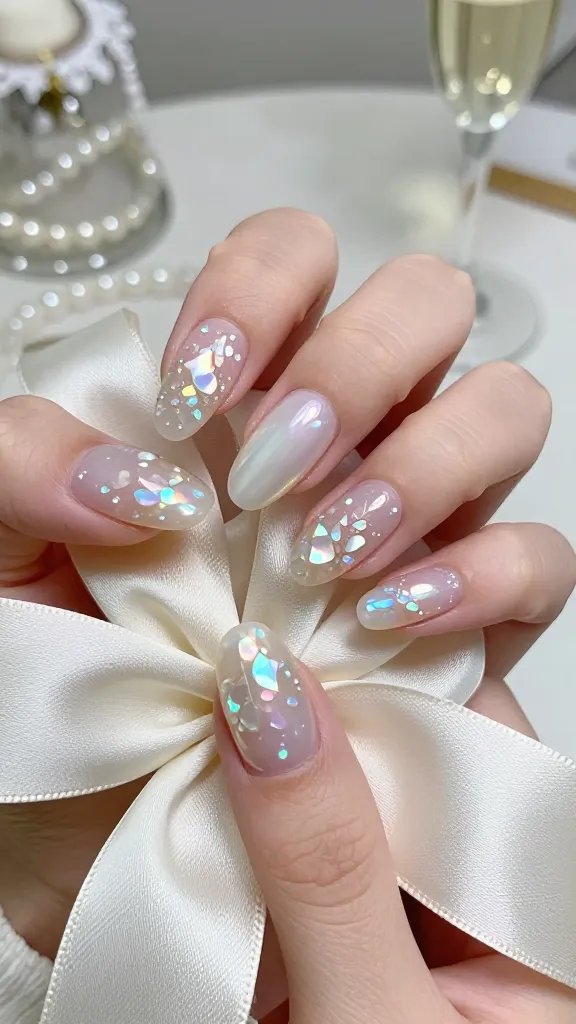
Tiny iridescent flakes mimic real mother-of-pearl. Seal them under a milky layer and you get that shell-like depth.
Key Points
- Use shattered cellophane or opal flakes.
- Apply in irregular shapes.
- Top with a soft-focus matte or glossy top.
For ocean vibes without literal seashells—classy and unique.
12. Pearls On A Glazed Donut Base
Glazed donut nails, but bridal. Add subtle pearls at the corners for a tiny sprinkle of glam.
Tips
- Use a sheer pink base with chrome highlight.
- Place pearls near sidewalls on a few nails only.
- Keep pearl count minimal—less is more here.
When you want Hailey Bieber energy with a veil.
13. Mini Pearl French (Micro Tips)
Create ultra-thin French tips using micro pearls along the edge. It’s delicate and wildly photogenic.
Materials
- 1–1.5 mm pearls
- Builder gel for adhesion
- Curved tweezer
Choose this if you love classic French but want unexpected texture.
14. Pearly Petals On Sheer Pink

Paint tiny flower petals and cap each bloom with a micro pearl center. It’s playful but still wedding-appropriate.
Key Points
- Use a dotting tool for petals.
- Keep flowers near tips or corners.
- Limit to two nails per hand to avoid overload.
Perfect for spring weddings and garden parties.
15. Sculpted 3D Pearlescent Drops
Use clear builder gel to sculpt droplet shapes and add pearly topcoat. The texture looks like dewy pearls melting down the nail.
Tips
- Work in thin layers to avoid bulk.
- Flash cure each droplet to lock placement.
- Finish with a soft pearl sheen.
Modern art but make it bridal—seriously stunning in macro shots.
16. Pearl And Crystal Crescent Moon

Curve pearls and a couple crystals at the cuticle to form a crescent. It frames the nail and adds light-catching drama.
Materials
- Mixed-size pearls
- Clear rhinestones
- Strong gel adhesive
Match with celestial earrings or a starry hairpin for the full vibe.
17. Soft Matte Oyster With Glossy Pearls

Go matte with an oyster-gray base, then dot glossy pearls on top. The texture contrast is chef’s kiss.
Key Points
- Choose a warm gray to avoid looking flat.
- Matte top coat first, pearls last.
- Add a tiny gloss line near the pearls for highlight.
Elegant, editorial, and great for modern minimalist gowns.
18. Pearly Half-Moons
Paint a sheer pearly half-moon at the base and leave the rest nude. It’s vintage-inspired but feels fresh.
Tips
- Use curved guides for a clean line.
- Choose a cool pearl tone for a crisp look.
- Keep nails short or medium for balance.
Works beautifully with retro waves and satin gloves.
19. Chrome Pearl Swirls

Draw abstract swirls with a liner brush and dust with pearl chrome. The lines catch the light without extra bulk.
Materials
- White gel paint
- Pearl chrome powder
- Detail brush
Perfect for brides who want movement and a little artsy flair.
20. Pearly Tuxedo Buttons
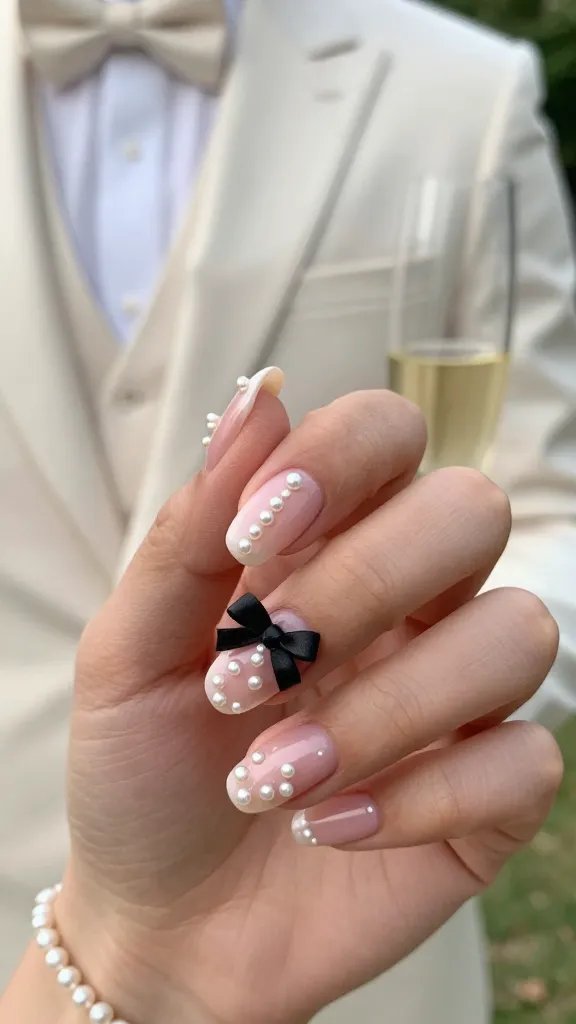
Dot tiny pearls down the center of one nail like a tux shirt. Cute nod to your partner’s look without being corny.
Tips
- Use a nude or sheer pink base.
- Align dots perfectly—use a guide if needed.
- Add a tiny bow at the cuticle if you’re feeling cheeky.
Playful detail that pops in close-ups but stays subtle IRL.
21. Pearl-Studded Side French
Flip the French to one side and line the edge with pearls. It’s asymmetric and slimming for the nail.
Key Points
- Choose a thin side stripe.
- Use smaller pearls near the tip to taper.
- Keep the opposite side clean.
Great for almond and stiletto shapes that love a side silhouette.
22. Mermaid Tail Scales With Pearl Accents
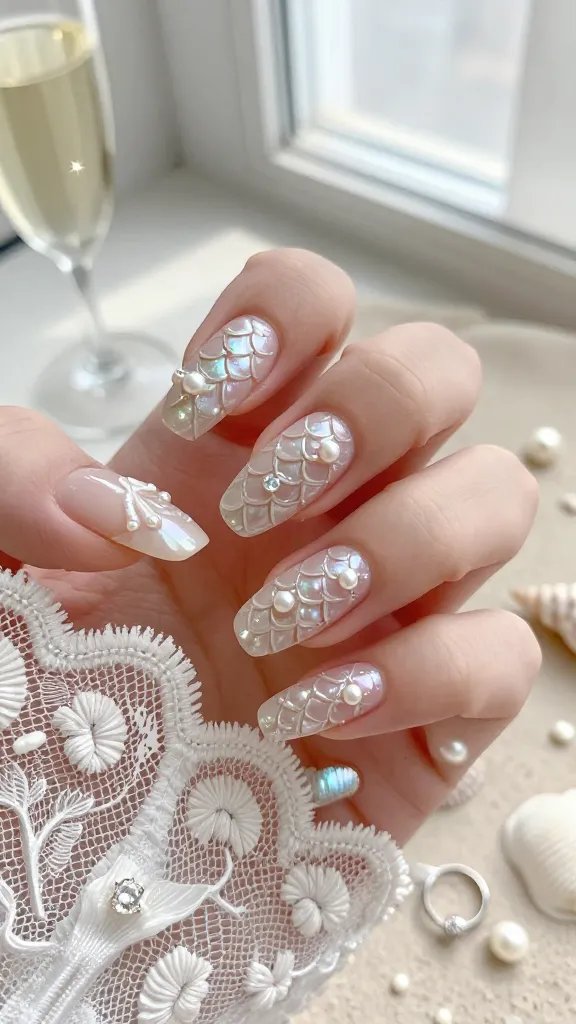
Stamp or hand-paint tiny scale patterns, then dot pearls where scales meet. It’s whimsical but still chic when kept neutral.
Materials
- Scale stamping plate or fine brush
- Pearlized gel polish
- Micro pearls
For beach weddings and brides who collect pretty shells, obviously.
23. Barely-There Pearl Sheen On Natural Nails

Don’t want embellishments? Go natural with a clear base and a whisper of pearl shimmer. Clean, glossy, unfussy.
Tips
- Buff lightly for a smooth canvas.
- Apply one ultra-sheer pearly coat.
- Seal with a high-shine top.
Best for low-maintenance brides and intimate city hall vibes.
24. Champagne Pearl Gradient
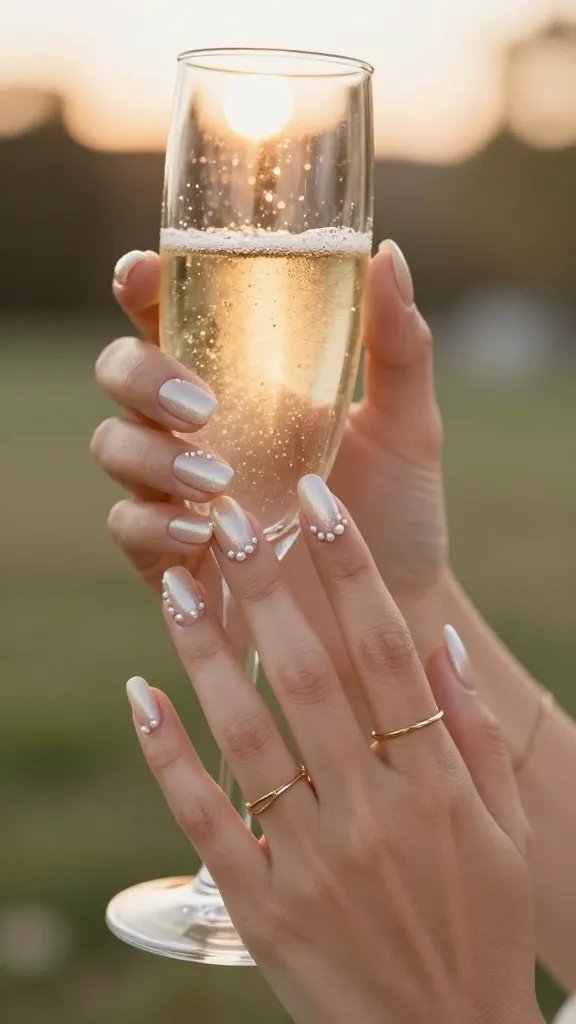
Blend a soft champagne tone from cuticle to tip and add a few pearls near the base. Think “lit-from-within” glow.
Key Points
- Use warm shimmer for depth.
- Keep pearls clustered at the cuticle.
- Neutral enough to match gold jewelry.
Pairs perfectly with champagne flutes and sunset receptions.
25. Baroque Pearl Clusters
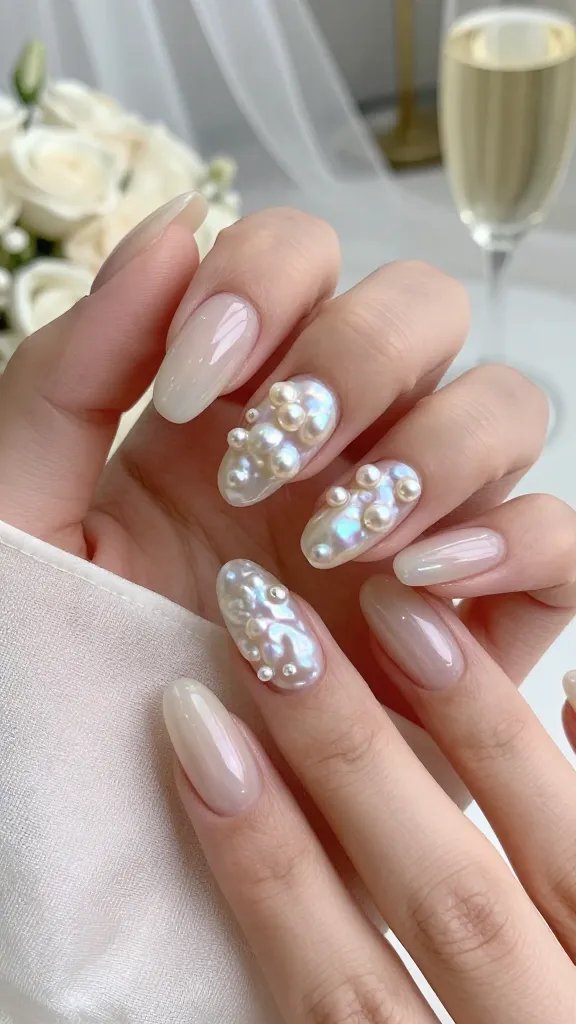
Embrace irregular, baroque-style pearls for organic texture. Cluster them on one or two nails for drama.
Tips
- Balance bigger pearls with tiny micro ones.
- Keep surrounding nails super simple.
- Secure with sculpting gel for staying power.
Statement nails that scream editorial bride and look epic in detail shots.
26. Pearl-Dipped Tips
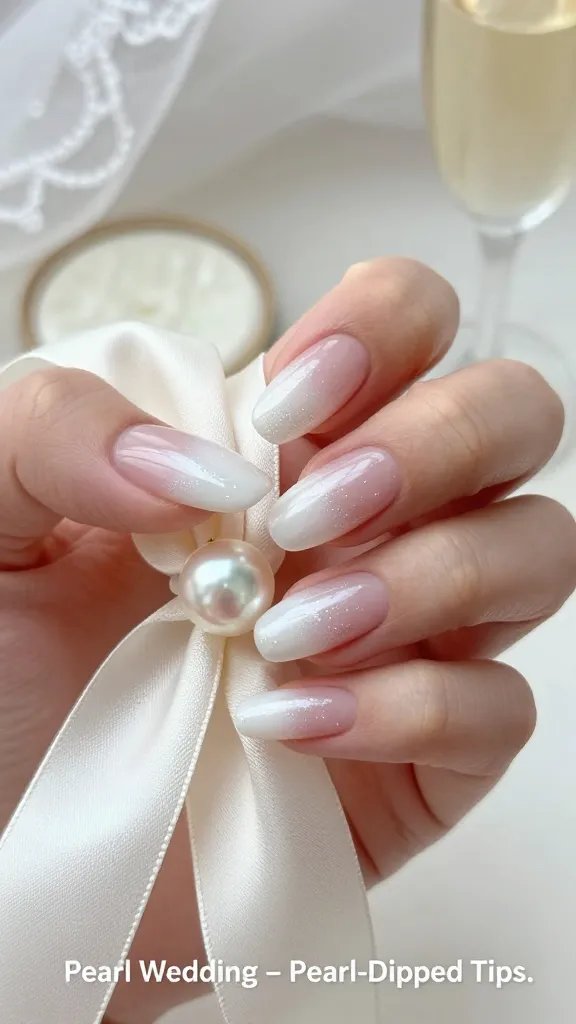
Paint tips with pearly polish, then fade into a sheer base like they were dipped in light. It’s delicate and flattering.
Materials
- Pearl white gel
- Sponge for gradient
- Glossy top coat
Perfect if you want glow at the tips without a hard line.
27. Subtle Pearl Stripe Down The Center

Run a fine, pearlescent stripe down the middle of each nail. It elongates and adds quiet glam.
Tips
- Use striping tape for precision.
- Layer two coats for visibility.
- Optional: add a single micro pearl at the cuticle.
Minimalist and modern, especially on squoval and almond shapes.
28. Pearls On Velvet Matte Nude
Matte nude with glossy pearls equals texture heaven. The pearls look extra luminous against the soft backdrop.
Key Points
- Choose a velvet-matte top coat.
- Apply pearls last with glossy gel dots as anchors.
- Keep spacing consistent for symmetry.
Great for brides who love contrast but want to keep the palette neutral.
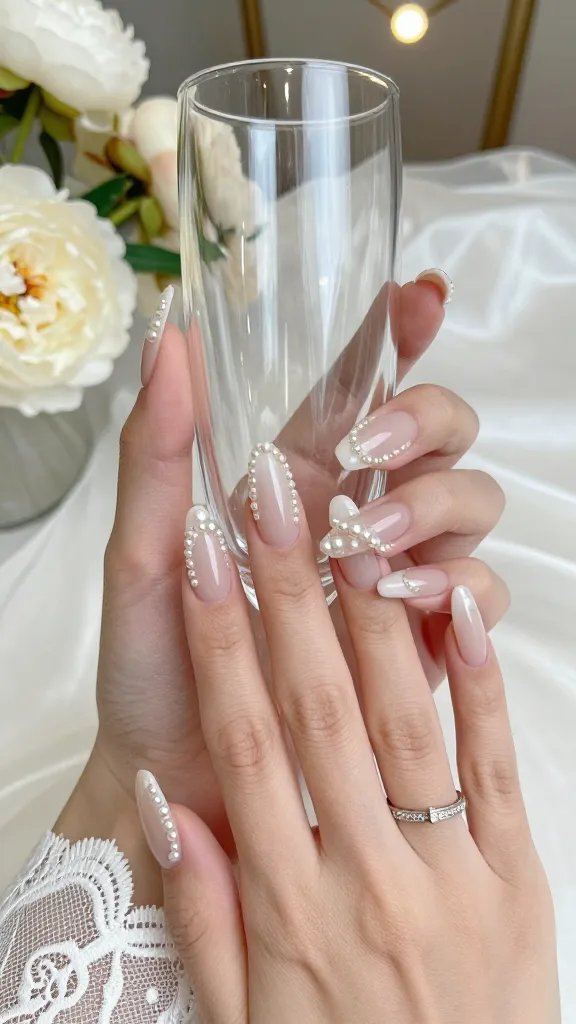
29. Full Pearl Frame

Outline the entire nail with a ring of pearls. It’s bold, regal, and surprisingly wearable if you keep sizes tiny.
Tips
- Use 1 mm pearls for a delicate border.
- Start at the cuticle and work around for even spacing.
- Seal edges with a thick, flexible top coat.
Choose this when your mantra is “go big, get married, go home.” It frames your ring like a spotlight.
There you go—29 pearl wedding nail ideas that range from whisper-soft to full-on goddess. Pick one that matches your dress, your vibe, and your dance-floor stamina. Your nails deserve their own close-up, and these designs will absolutely deliver. Now go book that nail appointment and enjoy every sparkly second.