These 10 Dreamy Engagement Nail Arts Are What Pinterest Goals Are Made Of
You’ve seen the ring. You’ve practiced the pose. But have you nailed the nails? These dreamy engagement nail looks are taking over your feed for a reason—and yes, #7 is as extra as it is stunning.
Engagement Nail Art Ideas
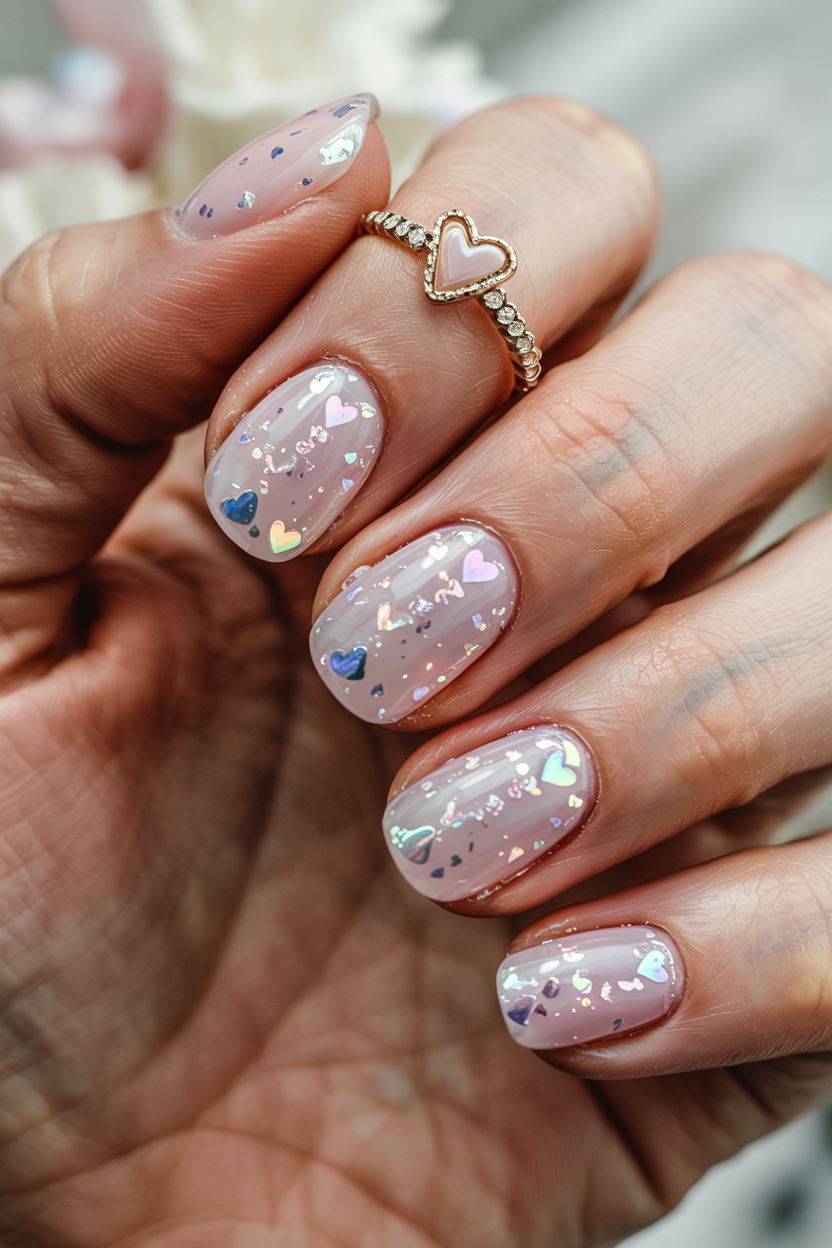
1. Milky Pink Base with Floating Glitter Hearts
This design feels soft and romantic, like your nails are blushing along with you. The tiny glitter hearts seem to float in the polish, giving a dreamy, fairytale vibe.
What makes this design unique?
Instead of bold nail art, it uses sheer layers and suspended glitter to create depth. It catches light and movement in a subtle way, perfect for a ring close-up.
How to do it?
- Start with a milky pink jelly base.
- Apply a second layer and place small holographic or rose gold heart glitters while still wet.
- Use a dotting tool or toothpick to position them gently.
- Add a third layer of jelly polish to “trap” the hearts inside.
- Finish with a glossy top coat to smooth everything over.
2. Opal-Inspired Shimmer Nails
These nails look like you’re wearing crushed moonlight. Iridescent and glowing, they shift with every angle, just like the emotions tied to a proposal.
What makes this design unique?
It mimics the look of natural opal with flashes of pastel pink, lavender, and blue. The shimmer is layered and glassy, giving a soft prismatic effect.
How to do it?
- Apply a sheer pink base coat.
- Use fine iridescent flakes or opalescent pigment powder.
- Press the flakes onto a slightly sticky layer of gel polish.
- Add another coat of sheer polish to blend them in.
- Finish with a clear, high-shine top coat.
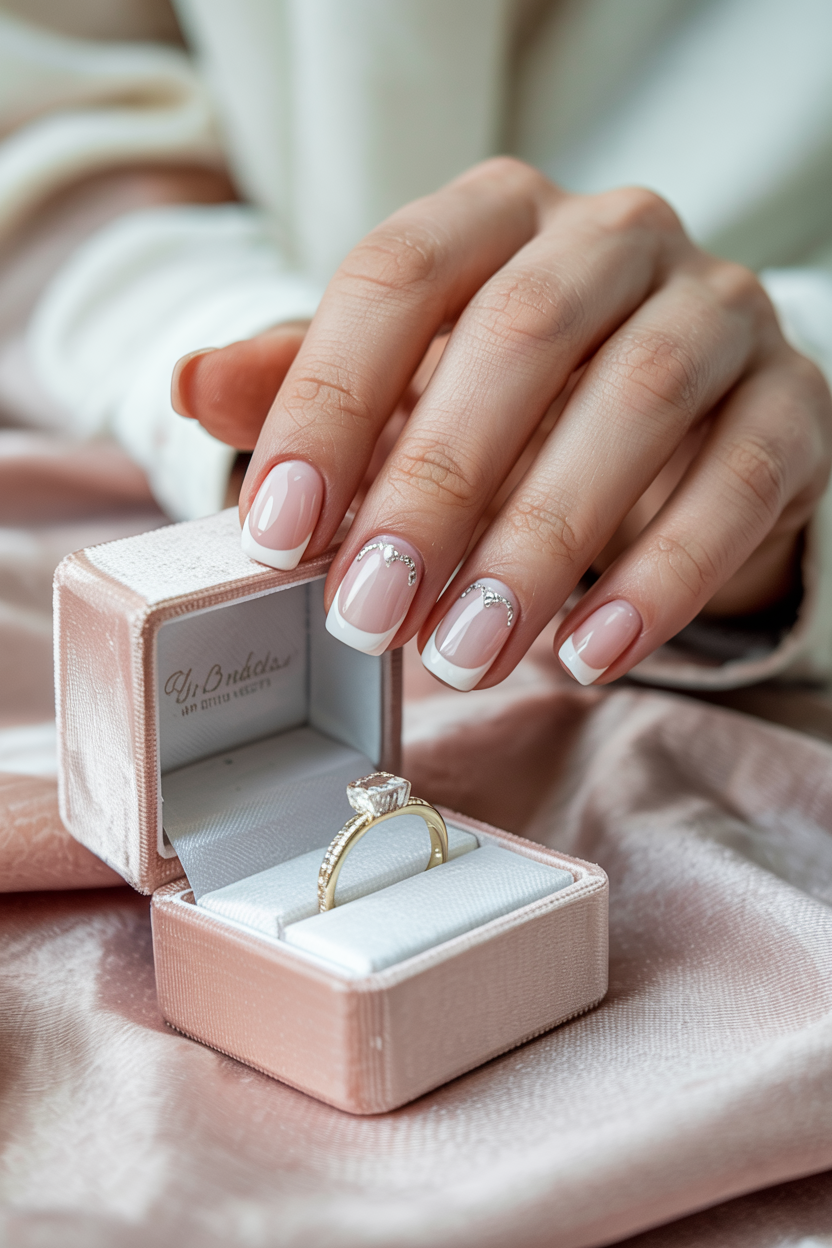
3. Minimalist French with Silver Half-Moons
Clean, simple, and timeless. This design elevates the classic French tip with a modern metallic twist at the cuticle.
What makes this design unique?
The silver half-moons add a unique symmetry to the nail, making both the tip and base visually interesting without crowding the design. It pairs beautifully with white gold or platinum rings.
How to do it?
- Start with a sheer nude or pale pink base.
- Paint clean white French tips using a thin brush or guide stickers.
- Use silver metallic polish or foil to paint a small half-moon at the base of each nail.
- Apply a glossy top coat to lock it all in.
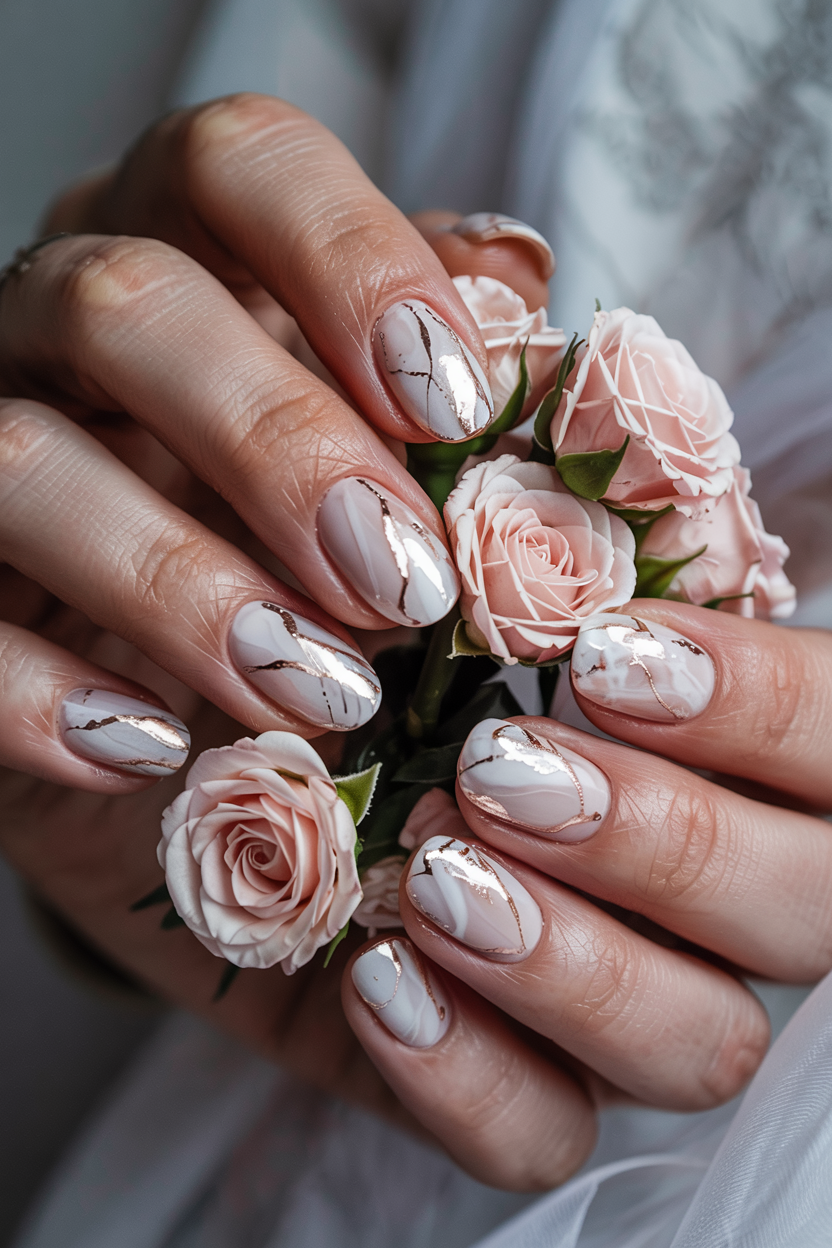
4. Soft Marble Nails with Rose Gold Veins
Like swirls of silk or cloudy skies, this design uses soft marble effects to create movement and elegance, topped with rose gold lines that shimmer in the light.
What makes this design unique?
The rose gold veins break up the softness of the marble, adding contrast and shine. It feels polished and romantic without being loud.
How to do it?
- Start with a soft gray or nude base.
- Using a fine brush, drag a little white and blush polish in random curves across the nail to create marble.
- While still slightly tacky, add ultra-thin lines of rose gold using foil or polish.
- Blend slightly for a natural look.
- Apply a glossy top coat.
5. Clear Tips with Glitter Fade and Tiny Gems
These nails give off a magical sparkle, like fairy dust fading into crystal-clear tips. They’re dreamy, minimal, and very Pinterest-worthy.
What makes this design unique?
It uses negative space and placement of glitter, making the nails look light and luminous. The clear tips give a fresh, modern feel, while tiny gems add bridal elegance.
How to do it?
- Use a sheer nude or pink base, leaving the tips mostly bare.
- Apply fine silver or champagne glitter at the base and drag upward for a fade effect.
- Add a few tiny gems along the cuticle line or randomly among the glitter.
- Finish with a thick gel top coat to smooth out the surface.

6. Blush Chrome Nails with Micro Crystals
This design has a smooth, mirrored blush finish with tiny crystals placed like dewdrops. It’s shiny, soft, and super photogenic for ring selfies.
What makes this design unique?
Instead of chunky gems or loud rhinestones, this uses very small crystals placed delicately. The chrome base reflects light beautifully, making the whole nail shimmer like rose quartz.
How to do it?
- Paint your nails with a blush pink gel polish and cure.
- Rub in a blush chrome powder using a sponge applicator.
- Seal with a no-wipe top coat.
- Apply tiny crystals at the cuticle line or in a diagonal arc using nail glue or gel.
- Flash cure and finish with top coat around the stones (not over them).

7. Sheer Nude Base with Gold Leaf Accents
Light, sheer polish paired with scattered gold leaf gives a subtle glow. It’s like having little pieces of sunlight caught on your nails.
What makes this design unique?
It’s refined and artistic, letting the nail’s natural tone show through while adding flashes of texture. It complements gold rings or warm-toned skin beautifully.
How to do it?
- Apply a sheer nude or beige base coat.
- While the second coat is tacky, gently place small flakes of gold foil onto the nails.
- Use tweezers to arrange the foil—don’t overdo it.
- Press flat, then add a thick gel top coat to seal everything in.
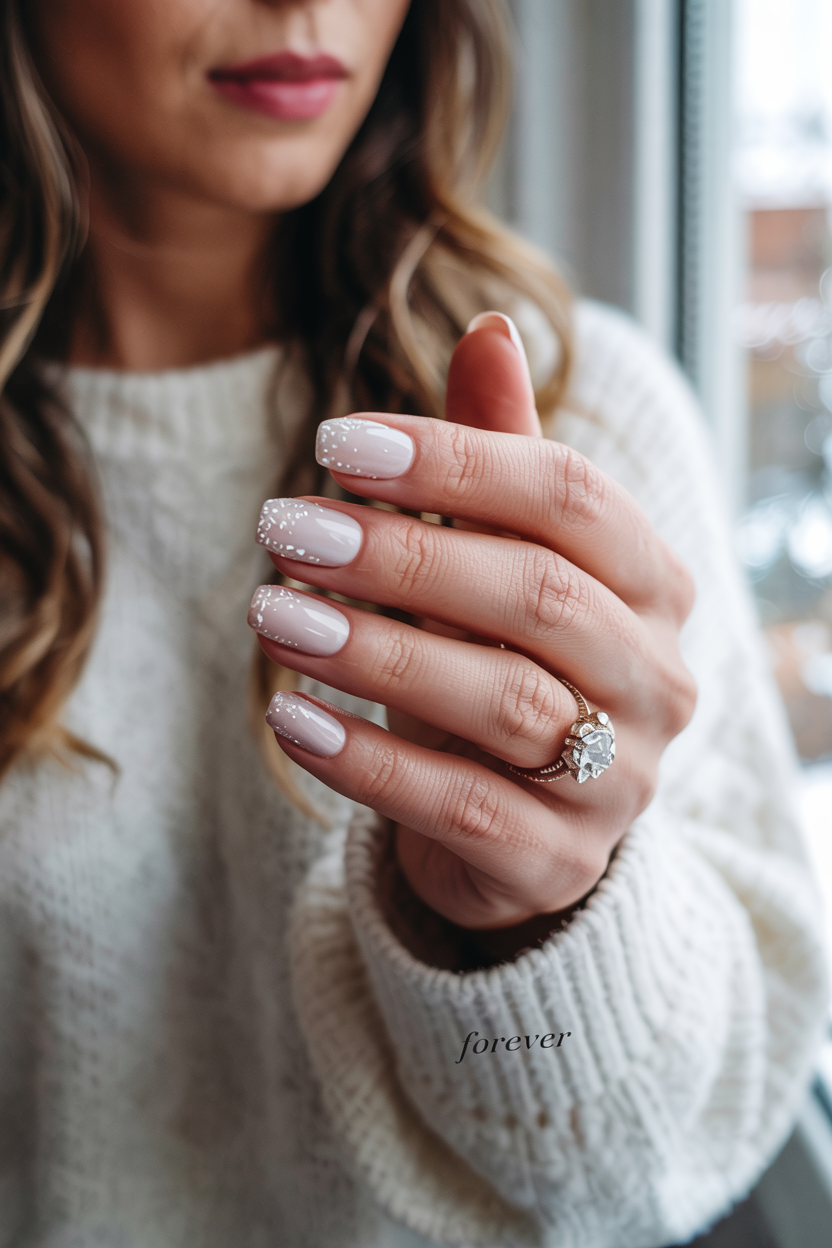
8. Icy White Nails with Sugar Glitter Tips
Think snow-kissed French tips, soft white fade topped with sugar-fine glitter. It’s delicate and wintery, perfect for cold-weather proposals.
What makes this design unique?
It adds subtle sparkle without overwhelming the nail. The sugar glitter feels like frosted glass, which is romantic and crisp.
How to do it?
- Apply a sheer white or milky base coat.
- Dab white polish at the tips and blend it downward for a soft gradient.
- Press superfine white or iridescent glitter into the tip while it’s tacky.
- Lightly pat to secure, then apply a top coat to smooth it out.
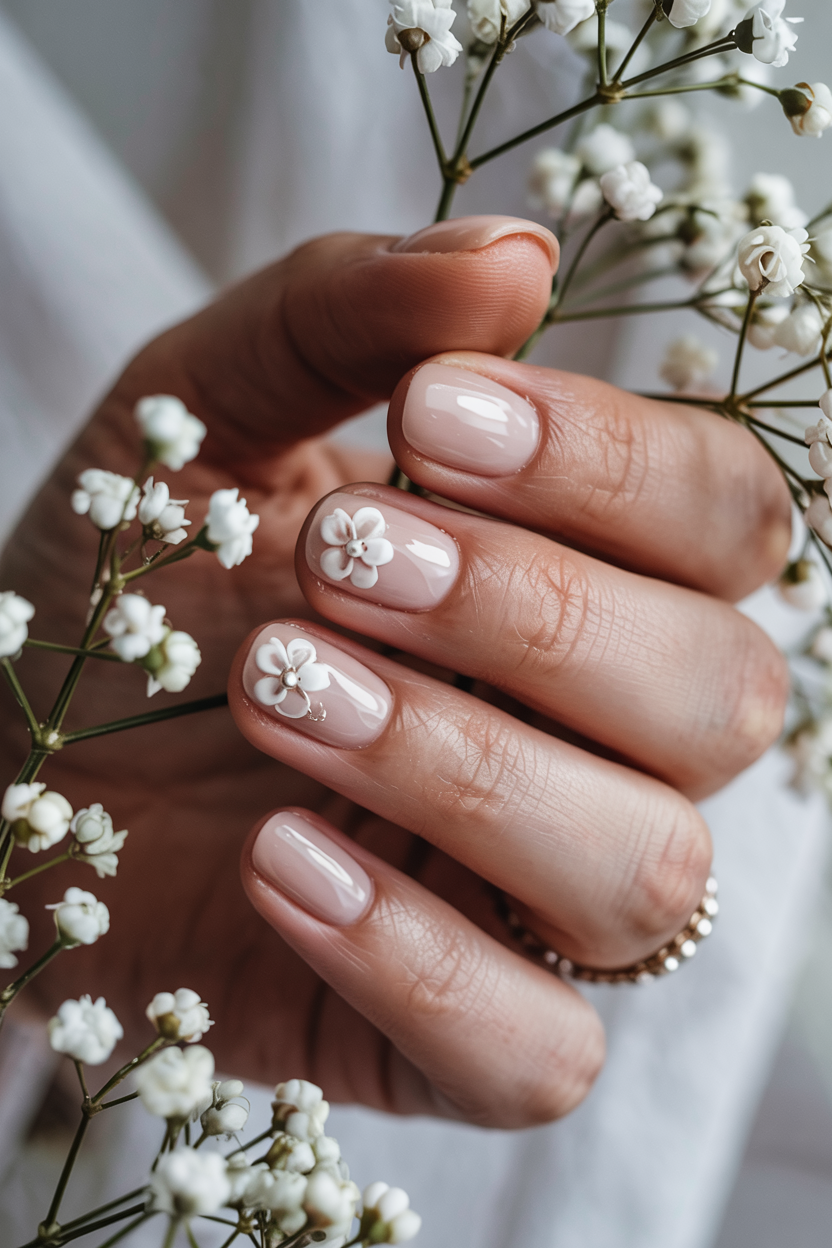
9. Nude Nails with Tiny White Flowers and Baby Pearls
This one’s floral and feminine, using miniature white blossoms and pearls arranged like a pressed bouquet.
What makes this design unique?
It’s soft but detailed, using nail art decals or hand-painted flowers with pearl centers to build a design that’s both bridal and dainty.
How to do it?
- Paint your nails with a neutral nude polish.
- Use white gel paint or nail stickers to create tiny flowers (or use pre-made flower decals).
- Add a baby pearl to the center of each flower with nail glue.
- Keep it simple, just 1–2 flowers per nail.
- Finish with a clear gel top coat to smooth it all over.
10. Clear Jelly Nails with Embedded Star Confetti
If you love a whimsical look, this one brings it, like tiny star confetti embedded in a jelly base makes the nails feel playful and dreamlike.
What makes this design unique?
It’s a mix of fun and romantic, with soft pink jelly polish and floating stars that catch the light. Great for a surprise proposal or a fun-loving bride.
How to do it?
- Start with a clear or light pink jelly base coat.
- Add a second layer and place star-shaped confetti before it dries or cures.
- Use tweezers or a silicone tool to place them neatly.
- Apply one or two more layers of jelly polish to seal in the confetti.
- Finish with a thick top coat for a glassy finish.