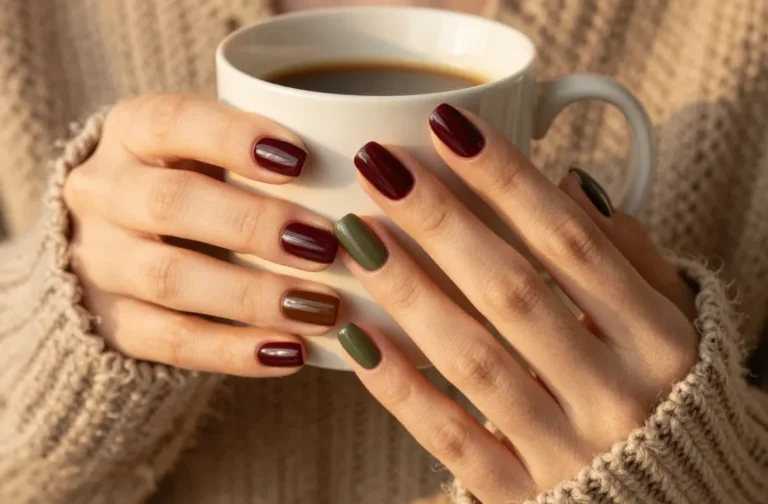
These 10 Bridal Nail Art Ideas Are Going Viral for All the Right Reasons
You know that moment when you’re deep in a bridal Pinterest rabbit hole at 2 a.m., and suddenly – bam! You stumbled on the perfect nail inspo?
That’s exactly what these 10 bridal nail designs are. Elegant, trendy, and just the right amount of “OMG, where did you get those done?” These are the viral-worthy looks every bride needs on her radar.
Popular Bridal Nail Art
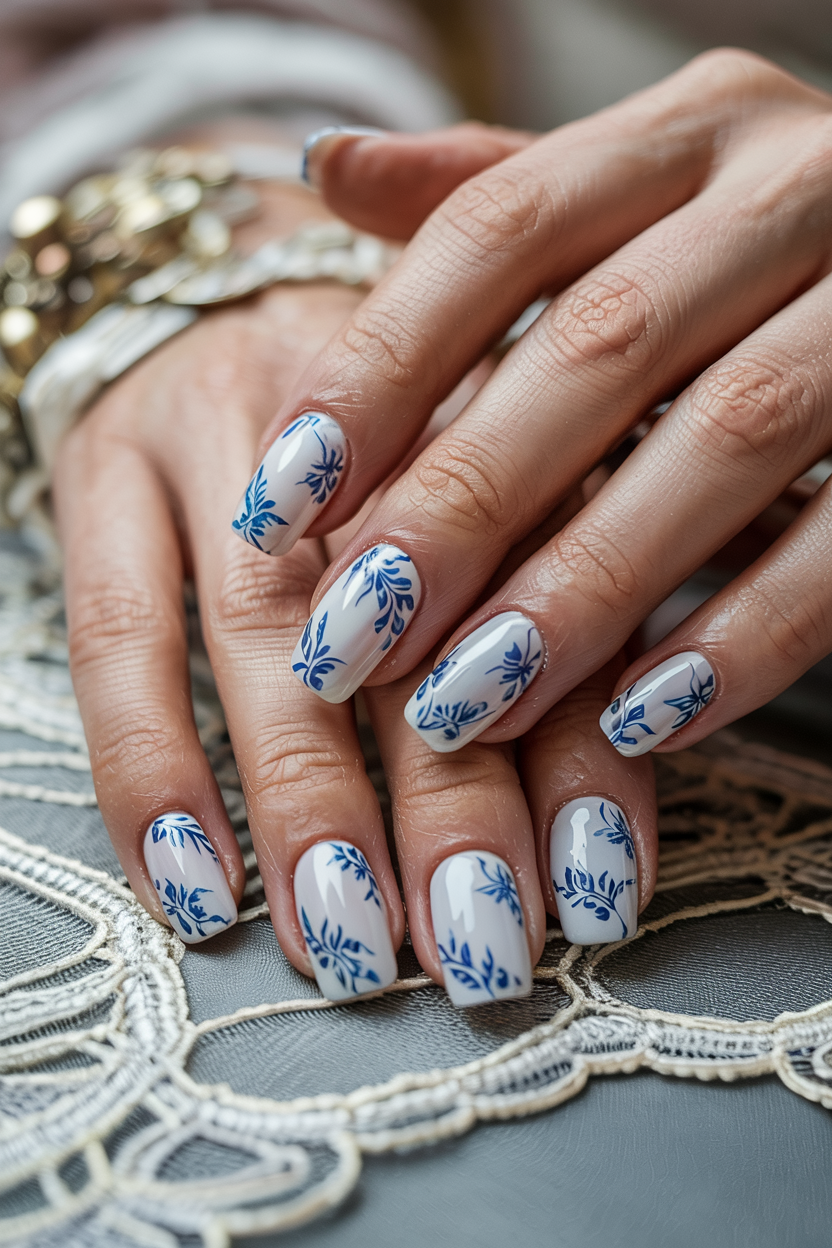
1. Porcelain-Inspired Blue Floral Nails
This nail design looks like it came straight off a vintage china set. The delicate blue-on-white floral art adds a soft, romantic touch that’s perfect for brides who want something graceful yet unexpected.
What makes this design unique?
It channels the charm of antique porcelain teacups with hand-painted blue florals on a milky white base. It’s not your average wedding nude or French tip—it adds just enough personality while staying elegant.
How to do it?
- Apply a soft white or ivory base coat (not pure white, think off-white).
- Use a fine nail art brush or stamping kit to draw delicate blue floral patterns (like tiny vines, roses, or cherry blossoms).
- Choose a matte or glossy finish depending on your preference—matte gives it a true porcelain effect.
- Seal with a top coat.
- Optional: Add one or two rhinestones at the base for a little sparkle.
2. Rose Quartz Glow Nails
This look mimics the natural beauty of rose quartz stones—translucent, pink, and glowing from within. It’s soft, feminine, and subtle, but still stands out with its ethereal vibe.
What makes this design unique?
It uses sheer layers and wispy white veining to recreate the look of rose quartz crystals. It’s like gemstone nails, but refined for a bridal setting.
How to do it?
- Start with a sheer pink jelly base coat.
- Use a thin brush to draw faint white lines in random, natural curves—this mimics the quartz veining.
- Blend the lines slightly using a tiny sponge or brush dipped in clear polish.
- Layer another coat of jelly pink to create depth.
- Repeat steps 2–4 for a dimensional effect.
- Finish with a shiny top coat.
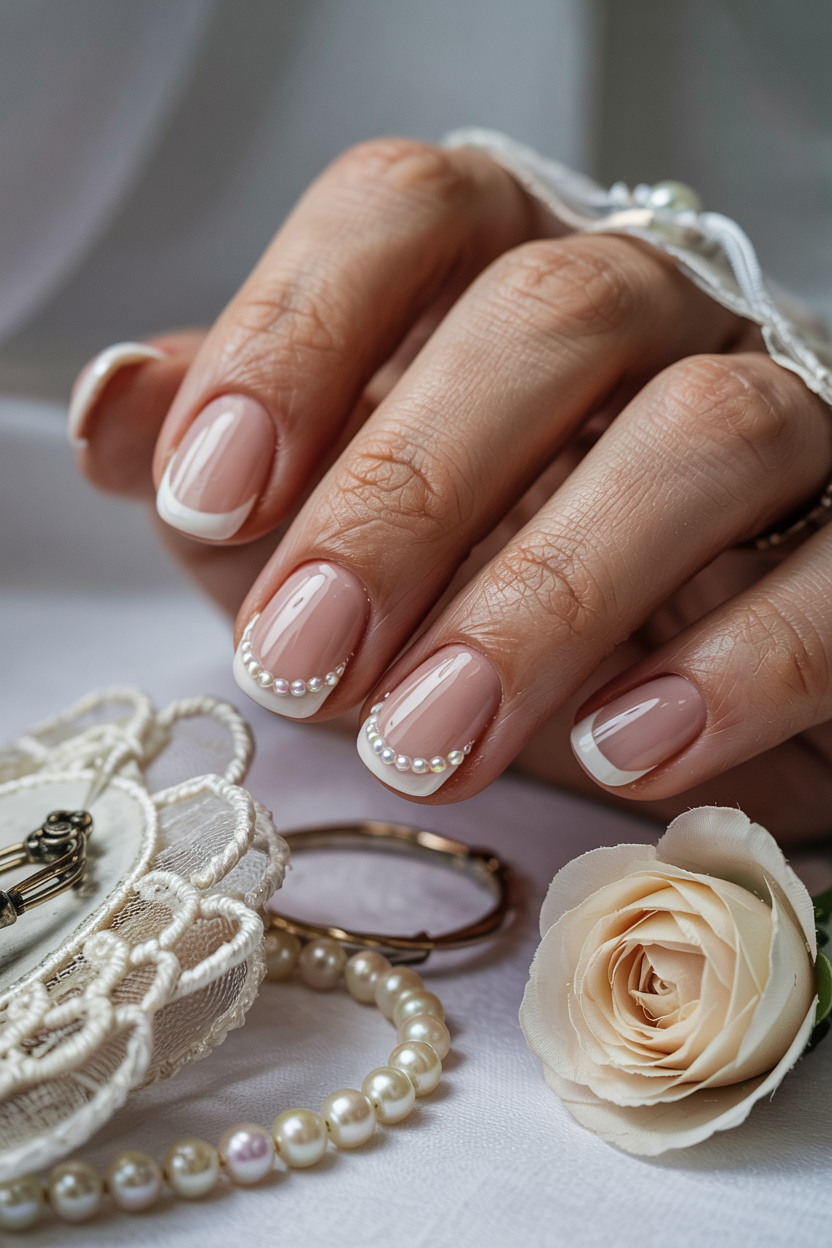
3. French Tip with Micro Pearls
Think of a classic French tip and then imagine it with a string of tiny pearls. This design gives the bride that clean, polished look with a little extra.
What makes this design unique?
It keeps things minimalist but adds a tactile element with micro pearls tracing the smile line. It’s both modern and timeless.
How to do it?
- Apply a nude or light pink base.
- Paint your French tips using a soft white polish.
- Using a toothpick or dotting tool, apply a line of tiny flatback pearls right under the French tip.
- Use nail glue for each pearl to keep them secure.
- Apply a thick layer of gel top coat to seal everything in place.
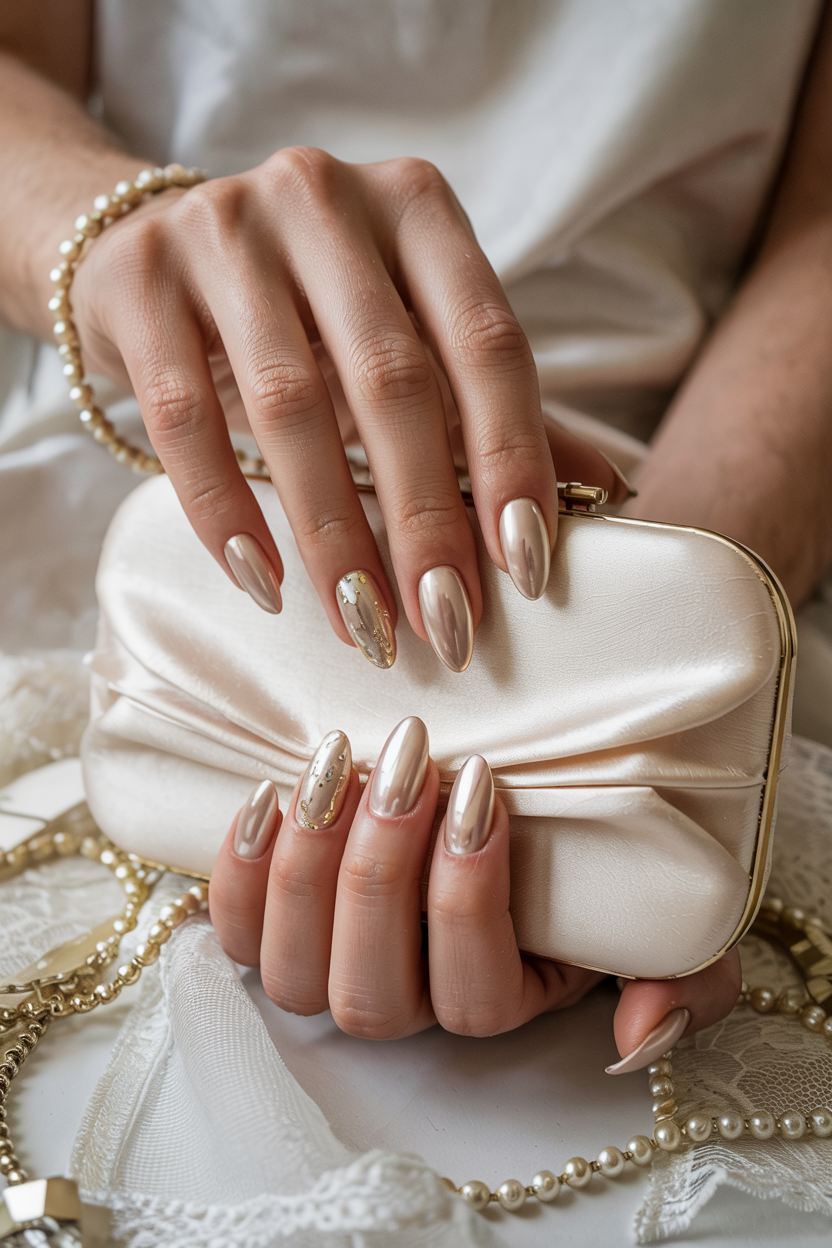
4. Champagne Chrome with Gold Foil
This look gives off quiet luxury, champagne chrome nails that shine with a warm undertone, topped with scattered gold foil for just a touch of glam.
What makes this design unique?
It stays away from loud glitter or heavy sparkle. Instead, it uses light-reflecting chrome with fine gold foil placed asymmetrically, giving it a modern bridal feel.
How to do it?
- Apply a nude base coat.
- Use a champagne-colored chrome powder (warm-toned, not silver) over cured gel nails.
- Press tiny pieces of gold foil on random parts of each nail.
- Press lightly so it stays flat.
- Seal with a thick top coat to avoid texture.
Red Bridal Nail Art
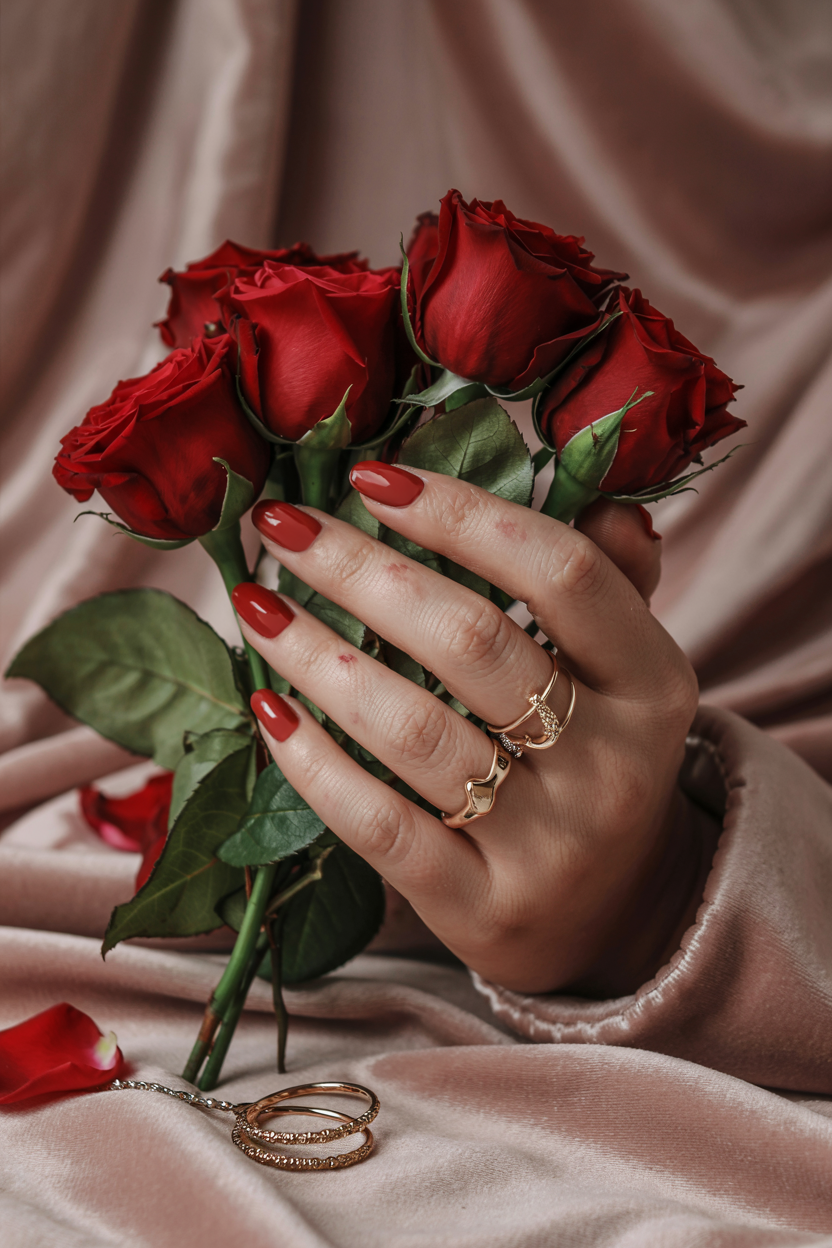
1. Scarlet Velvet Nails with Gold Cuticle Cuffs
Deep red velvet nails make a bold statement, but adding a clean gold accent at the cuticle keeps it wedding-appropriate. The mix of matte and metallic feels high-end without being flashy.
What makes this design unique?
It plays with textures like matte velvet red on the nail body, paired with a glossy metallic cuff. It’s dramatic without being overdone, and perfect for brides wearing gold jewelry or red in their dress.
How to do it?
- Paint your nails with a rich scarlet red polish.
- Apply a matte top coat and let it dry fully.
- Using gold nail foil or metallic gold polish and a liner brush, draw a slim half-moon at the base of the nail.
- You can also use gold nail stickers or decals for cleaner curves.
- Seal only the gold part with a gloss top coat to keep the velvet effect untouched.
2. Crimson Marble Nails with Clear Tips
It combines the richness of red marble with the elegance of negative space. It’s bold on top, sheer at the tip, creating a design that’s both creative and sophisticated.
What makes this design unique?
The clear tip gives it a floating effect, while the red marble swirls add depth. It’s not your average full-coverage nail—it’s light, structured, and looks like wearable art.
How to do it?
- Apply a sheer nude base or leave the tips bare using French nail guides.
- Use a crimson red and a tiny bit of white polish to create marble swirls on the top half of the nail.
- Blend the colors using a fine nail art brush or small sponge.
- Keep the bottom tip clean and transparent.
- Finish with a high-shine top coat.
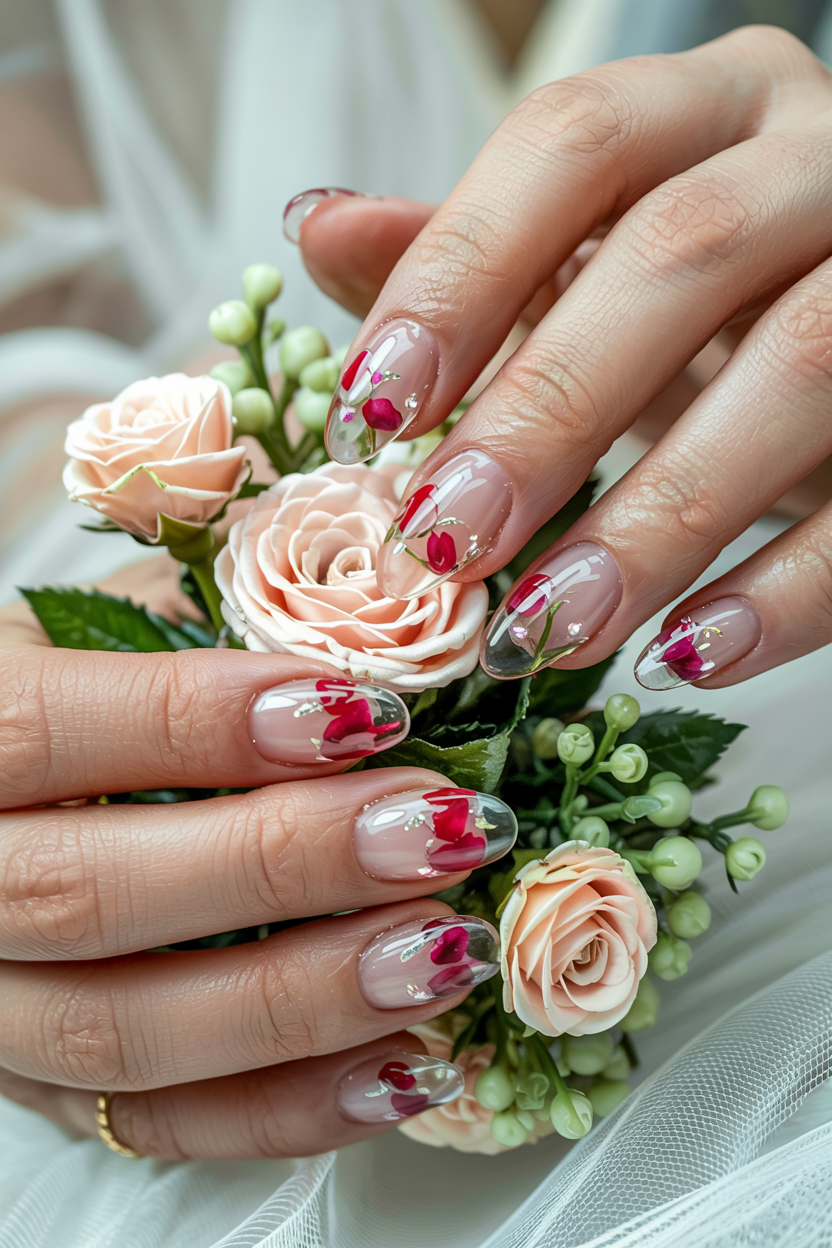
3. Red Roses Encapsulated in Gel
This one’s for the floral-loving bride. Mini red rose petals sealed inside clear gel nails make it feel like you’re wearing a romantic keepsake on your hands.
What makes this design unique?
Instead of painting roses, this look uses tiny real or dried rose petals sealed inside transparent gel. It’s soft, natural, and gives off a 3D effect without going over the top.
How to do it?
- Use clear gel or builder gel to sculpt the nail or over a transparent tip.
- Before curing, place tiny red rose petals or dried pressed roses onto the surface.
- Seal them in with more layers of clear gel to encapsulate the petals.
- File and shape the nails after curing.
- Apply a final clear top coat for shine.
Bridal 3D Nail Art
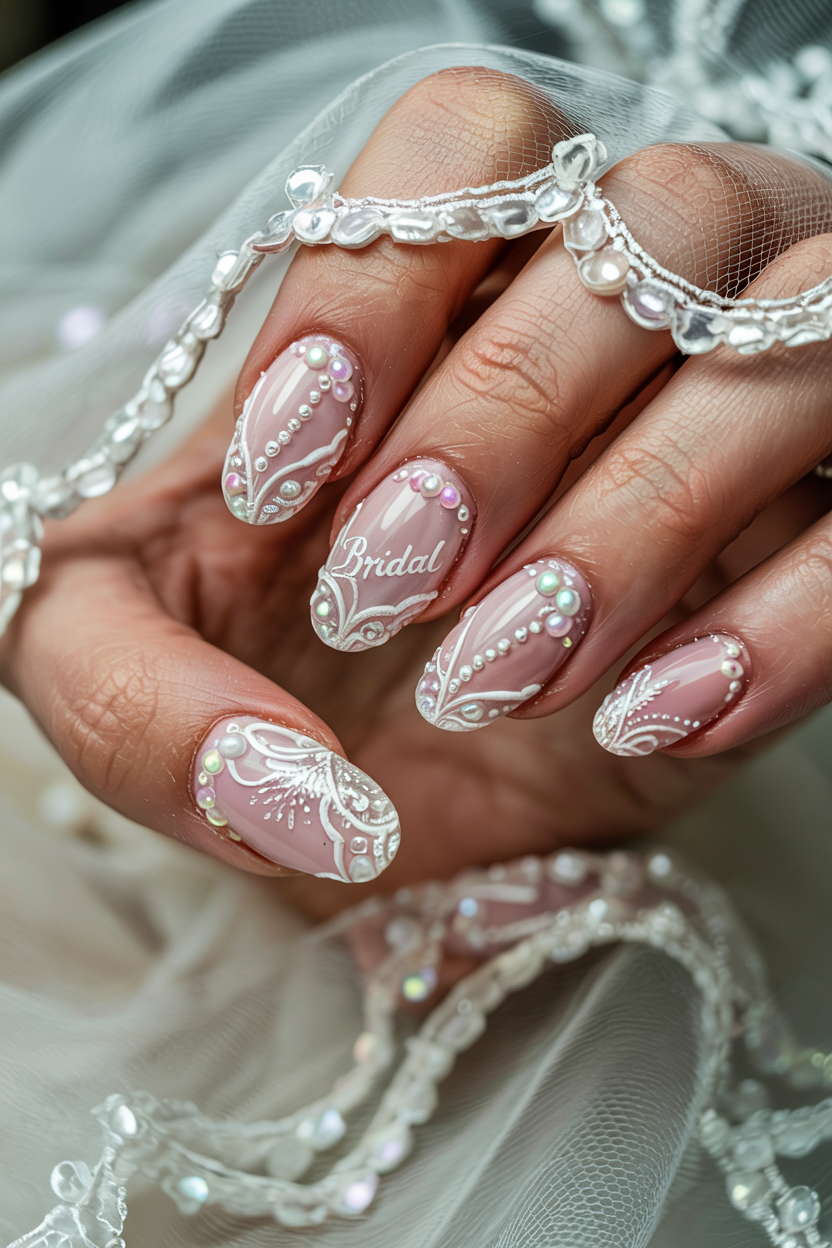
1. 3D Lace Appliqué with Pearls
This nail design takes cues from embroidered bridal lace. The raised white lace patterns paired with tiny pearl accents make the nails look like they belong on a couture gown.
What makes this design unique?
It uses textured 3D gel to mimic lace embroidery, not just flat art. The detailing stands slightly above the nail surface, creating a tactile effect. The micro pearls add just enough bridal sparkle.
How to do it?
- Start with a sheer pink or milky white base coat.
- Use 3D gel or builder gel and a fine brush to draw lace patterns—like flowers, swirls, or netting.
- Cure each section after drawing to hold the shape.
- Apply tiny pearls at the center of flowers or along the edges using nail glue.
- Finish with a high-shine or matte top coat—your choice depending on the texture you want to highlight.
2. Sculpted Floral Tips with Clear Base
This style keeps the base clean and see-through while letting the 3D florals take center stage. It’s romantic without covering the entire nail, giving a light and fresh bridal look.
What makes this design unique?
The flowers are sculpted using gel or acrylic and sit near the tip, so the nails look airy and delicate, like pressed flowers frozen in time, but with texture.
How to do it?
- Start with a clear or nude sheer base.
- Sculpt small roses or blossoms near the tips using acrylic or 3D builder gel.
- Add details like tiny white beads, pearls, or iridescent flakes between the petals.
- Cure fully and finish with a glossy top coat to lock everything in.
- Keep the design minimal—1 or 2 floral accents per hand is enough.
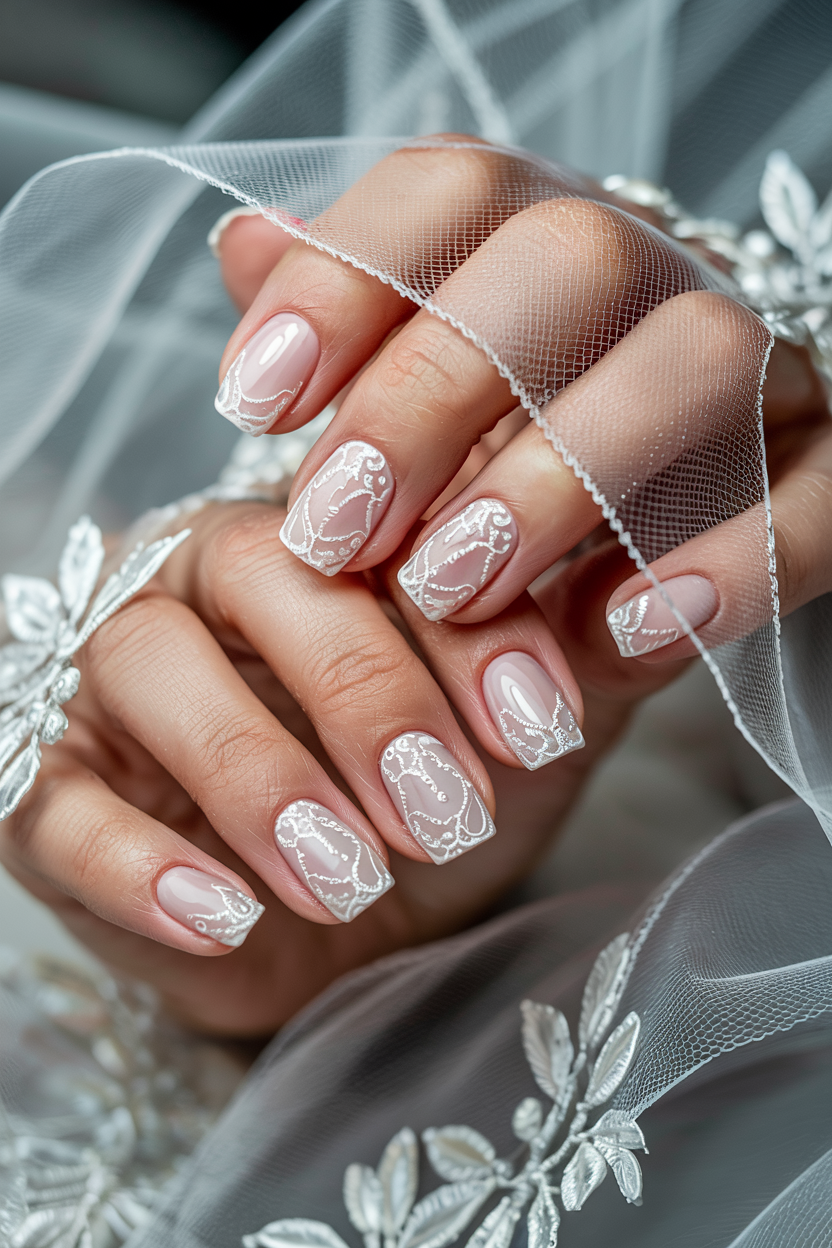
3. Sheer Lace Overlay Nails
This idea mimics the delicate lace on a bridal gown. It’s soft, sheer, and incredibly romantic. Almost like wearing a veil on your fingertips.
What makes this design unique?
The lace patterns are semi-transparent and vary across each nail, creating a hand-drawn look. When paired with a sheer base, the effect is light and airy.
How to do it?
- Start with a sheer milky or blush-toned polish.
- Use stamping plates or a fine liner brush to create lace patterns—think floral, swirl, or netting designs.
- Use white gel polish for the lace so it stands out softly against the sheer base.
- Add a matte top coat for a fabric-like texture, or go glossy for a more polished look.
- Accent one or two nails with a rhinestone or foil if you want more dimension.